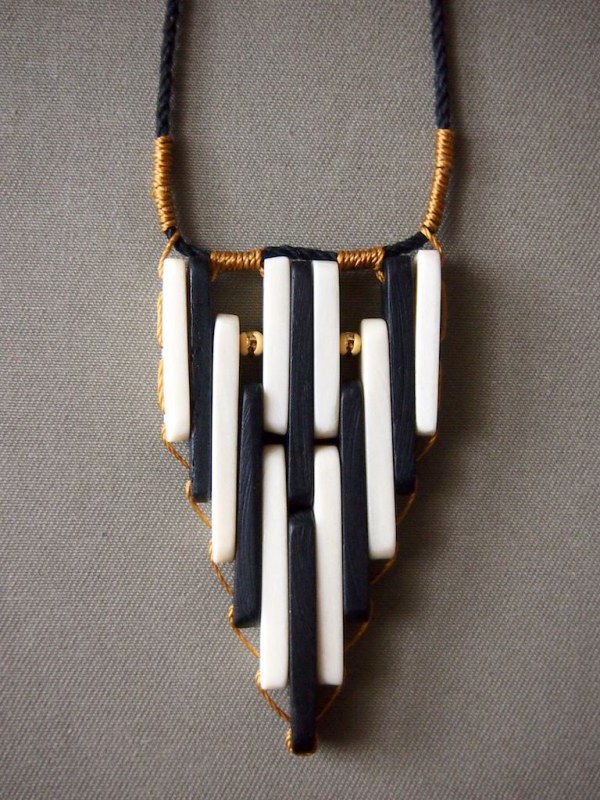
empire necklace
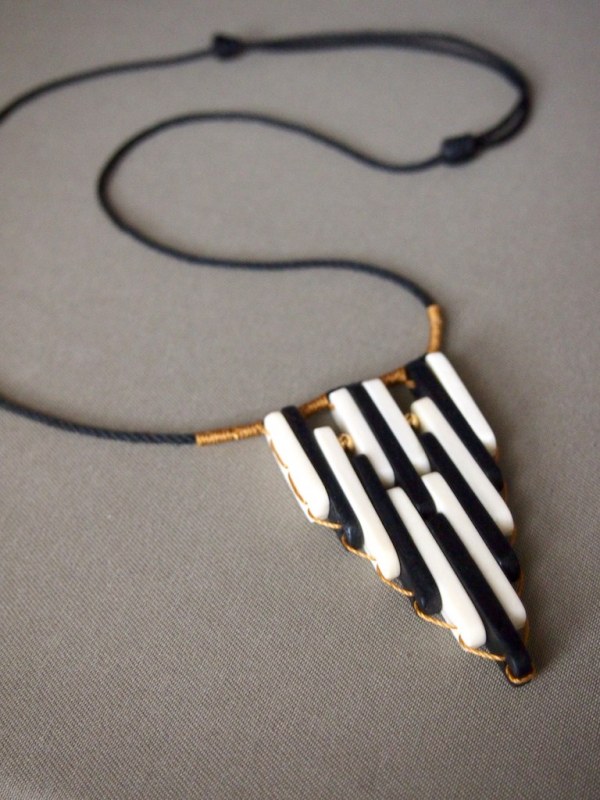
part art deco, part native american. this diy giftable is short on time and long on style.
native american spacer beads are are typically used to keep multiple strands of horn beads straight. they are almost never seen touching each other, and are usually not the focal point in a collar of bib. they're relatively inexpensive -ditto for the hardware store twine- but the final piece has the weight and feel of fancy pants jewelry.
materials:

- 4 3 hole bone spacers in white
- 4 4 hole bone spacers in white
- 6 4 hole bone spacers in black
- 2 3.2mm gold beads
- sharp scissors, 2 big eye needles, super glue
- 64" superlon bead cord
- 46" black twisted cotton cable cord (this came from a hardware store, but you can find simliar here
- 1.5" piece of masking tape (not shown)
- a small pair of jewelry pliers come in handy, but aren't critical.
tips:

- it helps if the needle is longer than the width of the pendant. it's not a dire situation if it's shorter, just takes a bit of extra care.
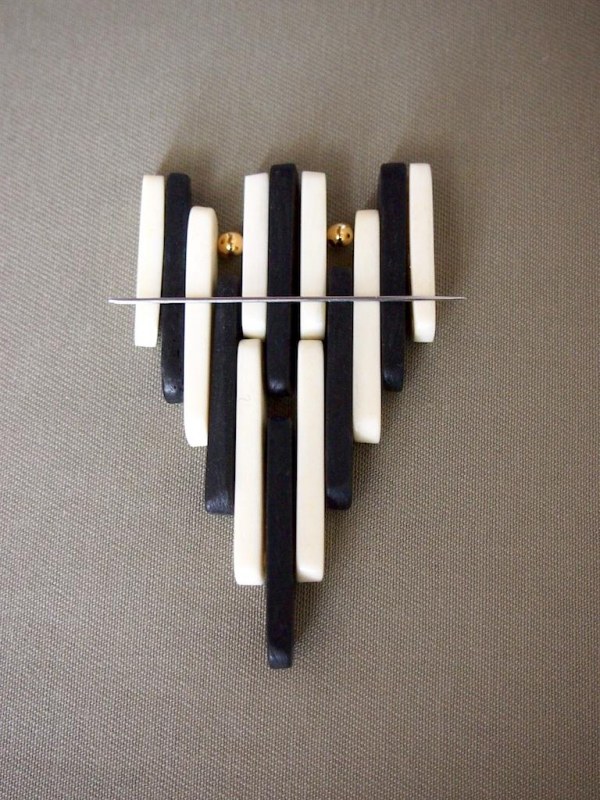
- when making your own pattern out of the spacers, set them up and take a photo to reference while stringing them together.
- the spacers are all a little different in hole placement and thickness, so it's a good idea to do a trial run. it may take some adjustments to get them to line up perfectly.
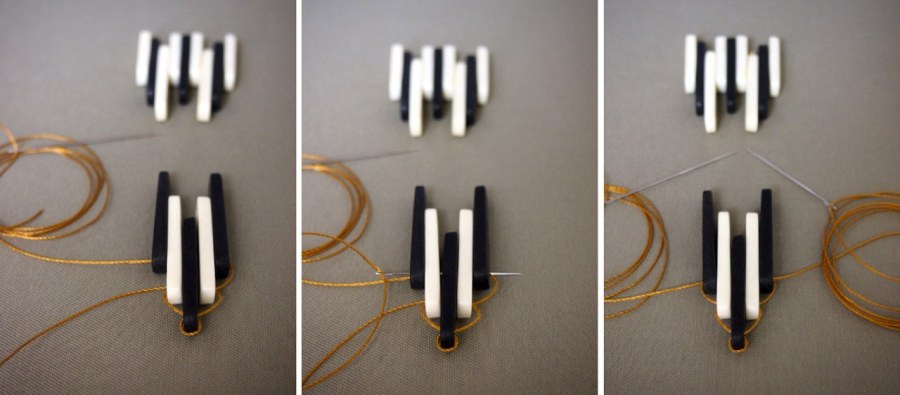
stringing the pendant:
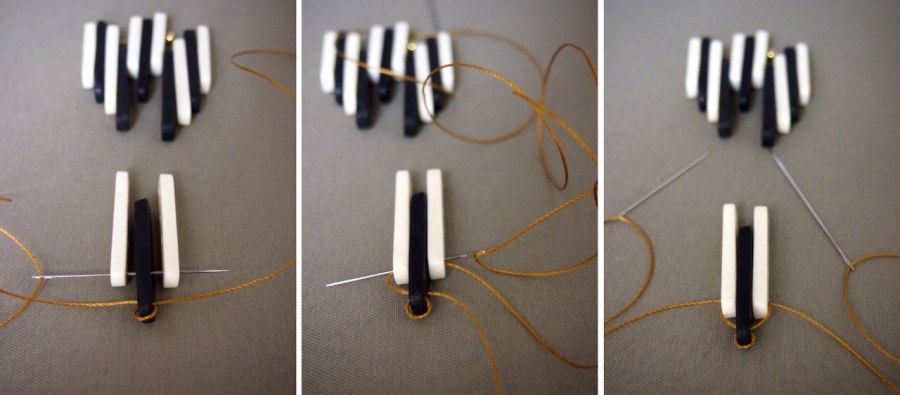
- thread one needle on each end of the bead cord. starting with the lowest hole, string the bead through one needle.
- take the other end of the cord, and go through the same hole, in the opposite direction.
- pull each side tightly, creating a loop around the bottom edge of the bead. this point doesn't have to be centered on the cord- one side should be a bit longer than the other.
- slide down the next 2 spacers, lining up their lowest holes with the second hole of the center bead.
- string all three beads on one end of the cord, then string them on the other end of the cord in the opposite direction.
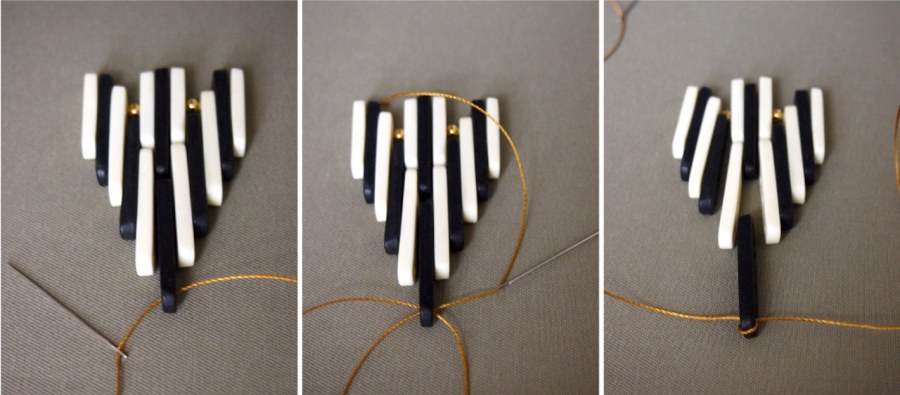
- pull each side to tighten. continue this technique of lining up the holes and stringing the spacers on each side of the cord in opposite directions:
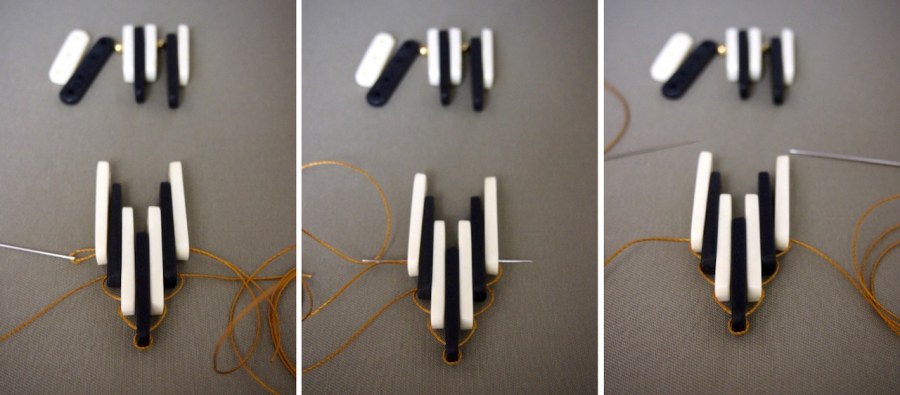
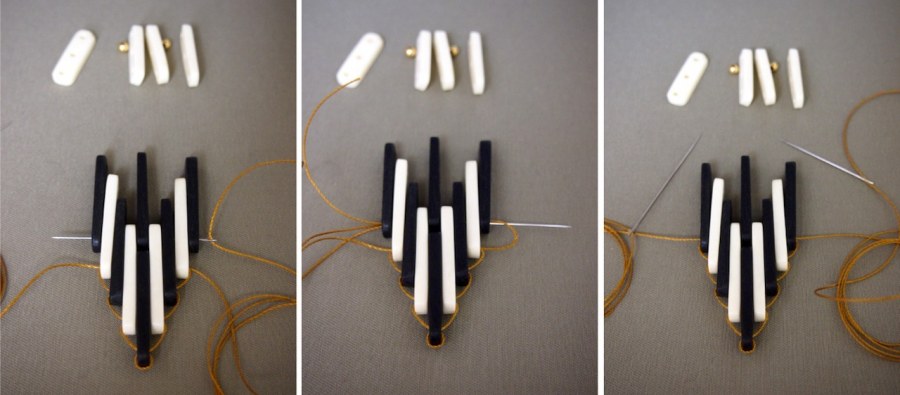
- when the needle is shorter than the width of the pendant, thread the outer beads and pull it away from the pendant. thread the middle section, then through the outer beads on the other side.
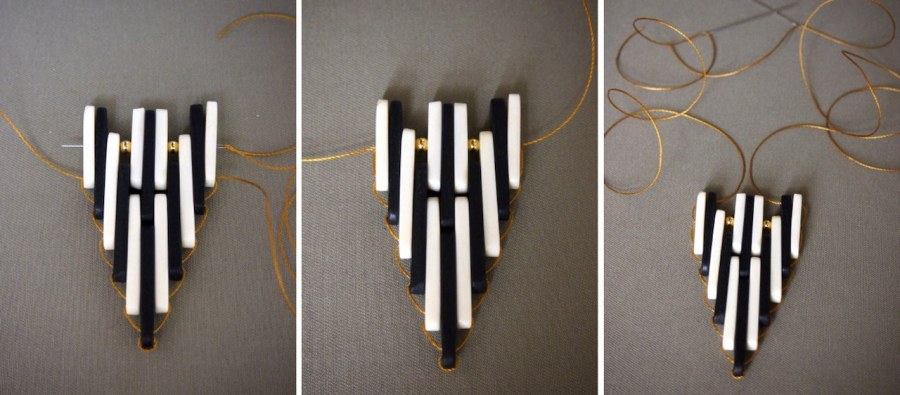
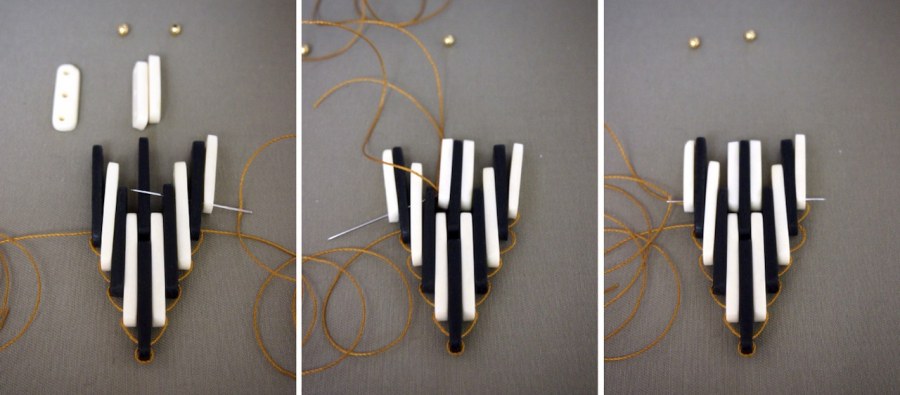
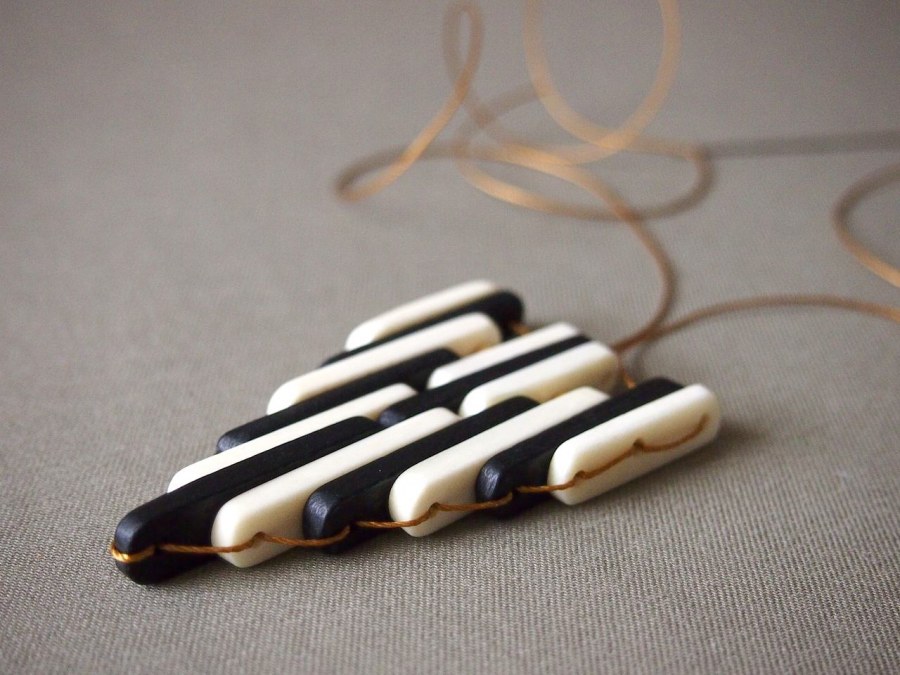
- the final beads to thread are the gold balls. once they're in place, bring each side of the cord through the top two holes on the outer spacers. and the pendant is done! the sides should look something like this:
attaching to the necklace:
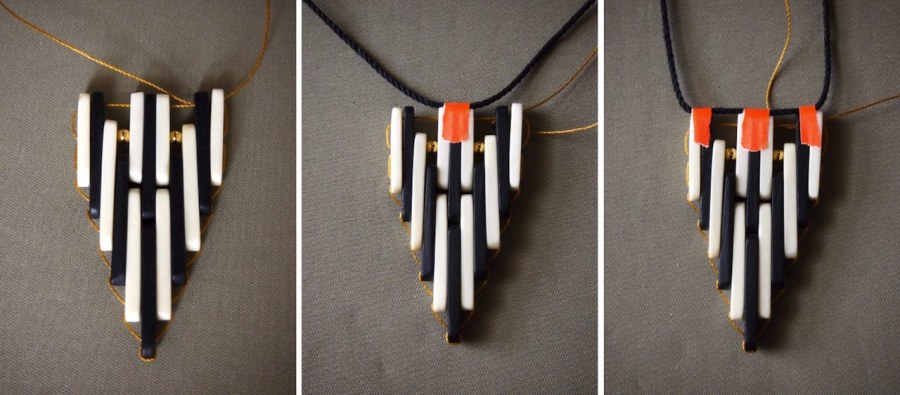
- using the shorter end of the bead cord, string the top hole of all the spacers.
- find the center of the cotton cord and line it up with the center of the pendant. secure it to the pendant with a thin piece of tape.
- tape the cord to the top of the outer spacers in the pendant as well.
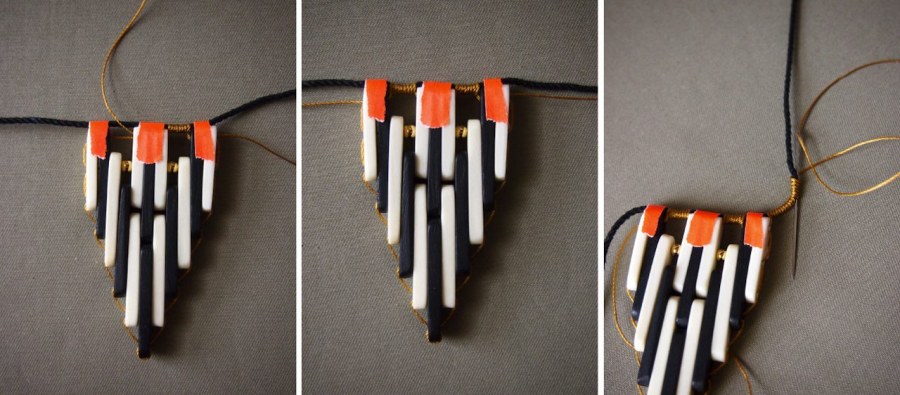
- take the longer end of the bead cord, and wrap it around the necklace cord and other side of the bead cord. wrap towards the center of the pendant, and string through the middle spacer's top hole.
- continue to wrap the necklace cord and other side of the bead cord until reaching the outer spacers. at that point, thread both spacers onto the cord.
- at this point, the center gaps are wrapped, and each end of the cord is coming from the top hole on both sides. wrap the bead cord around the necklace cord, to whatever length is desired. tuck the end of the bead cord inside the wrapping (this is where the pliers might come in handy). trim off the tail. repeat on the other side. remove the tape and viola:
sliding knot closure:
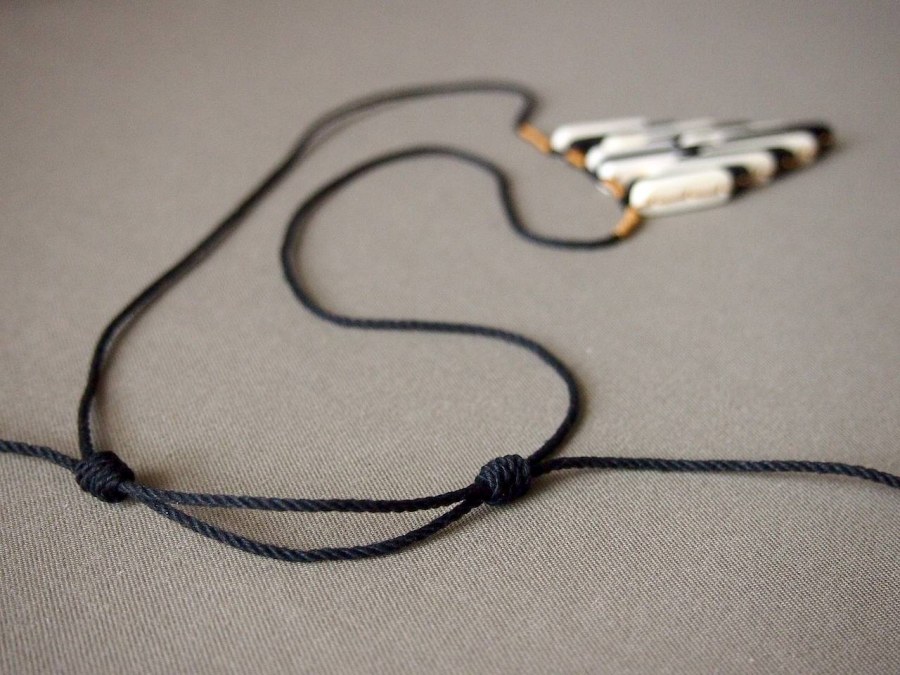
any kind of closure can be attached if a specific length is desired. super adjustability was important for me, so i opted to use sliding knots. they worked well with this cord, and the instructions at daily bead buzz are really straight forward. i recommend using a touch of super glue on the tails before trimming them- but be extra careful to keep the glue away from the cord going through the spiral or it will ruin the adjustability.
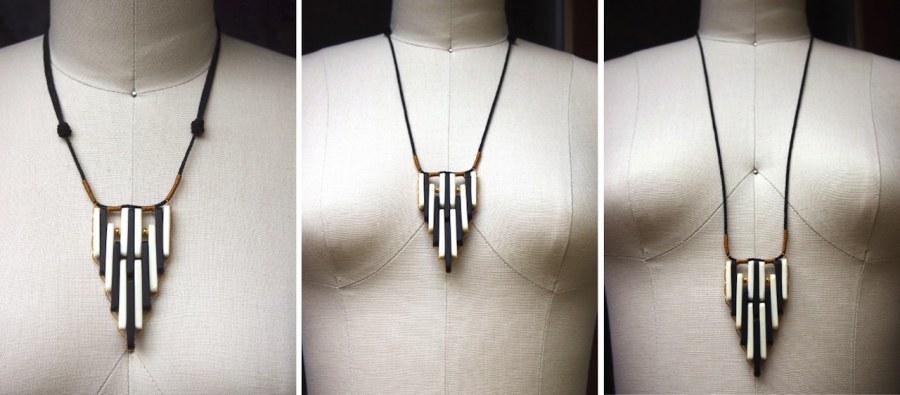
square knots are another option for an adjustable clasp, if you don't want the slip knots visible on the front when the necklace is worn short. in total, i spent an afternoon putting this together- and that includes taking all the photos. it's definitely a one day project (but no one has to know that).
