fishtail bracelets
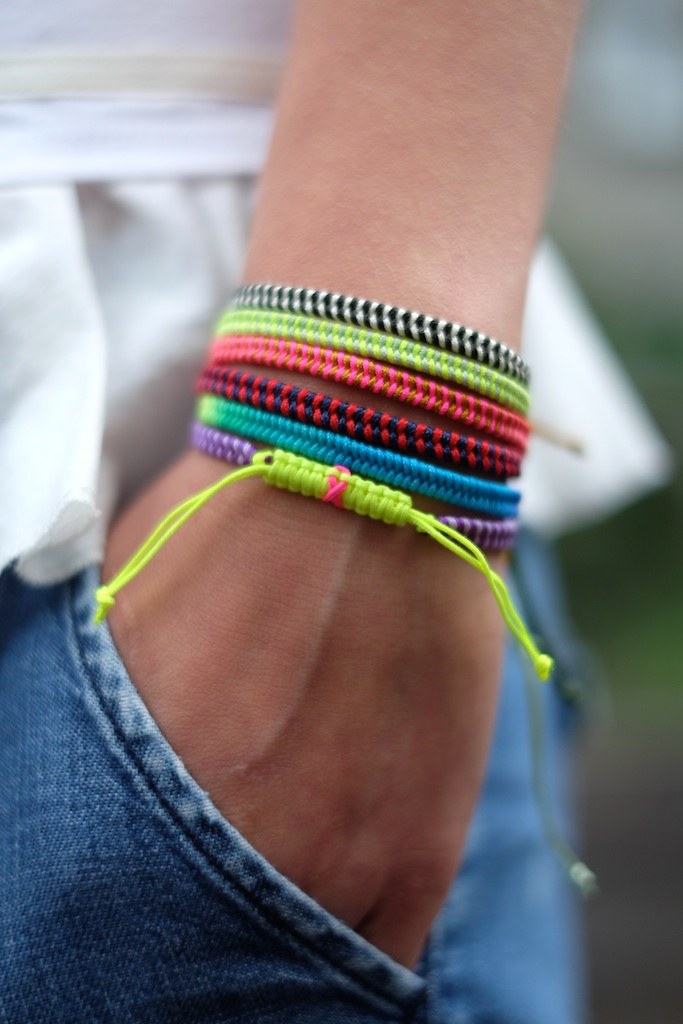
our family has been raising money to help my sister while she's kicking cancer, so i've made about 250 bracelets for the cause. we've been selling them at fundraising events, and a batch just got taken to tokyo. they're not complicated to make, but they did take some practice and after many trails and errors, the following is what worked best for me. each one took roughly an hour from beginning to end.
materials:
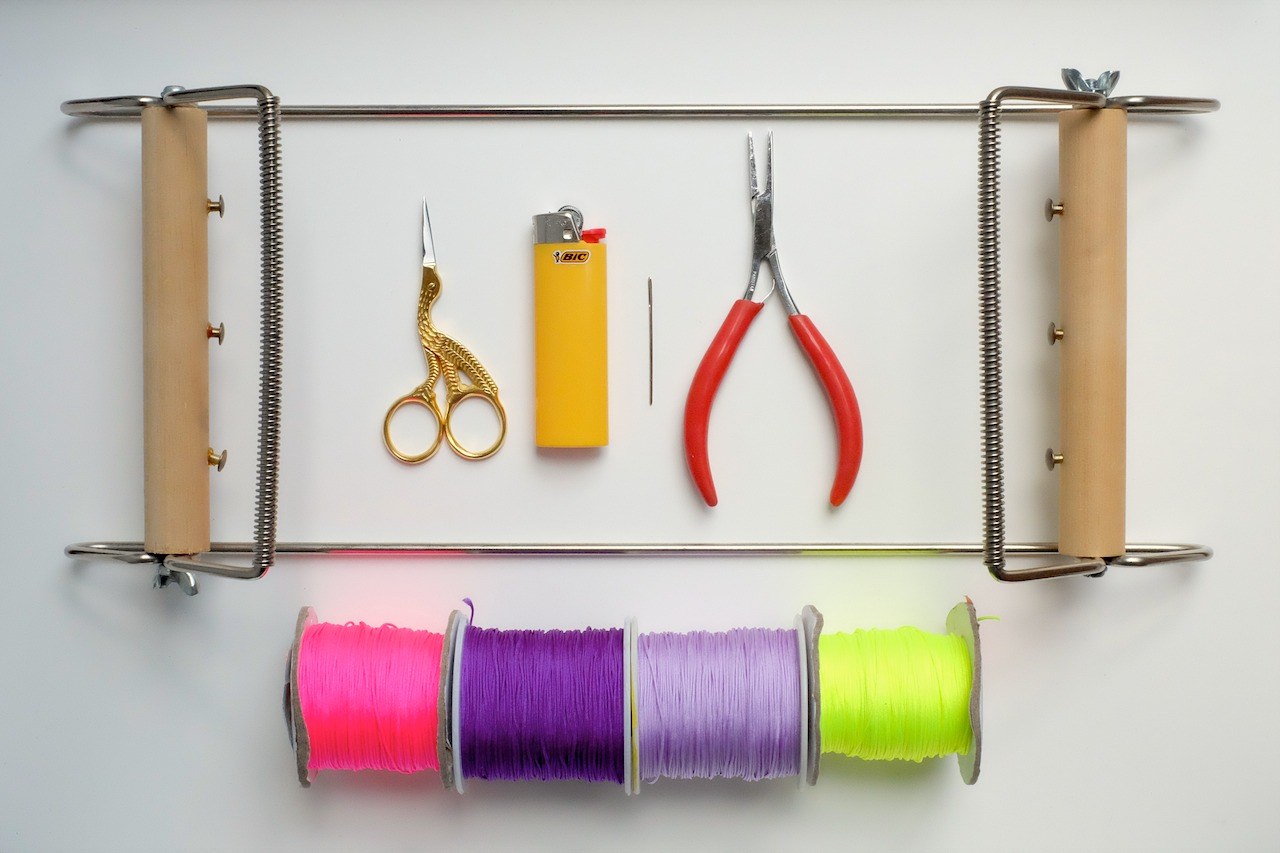
- bead loom
- small scissors
- lighter
- big eyed needle (to fit cord. the duller, the better)
- pliers
- .8mm or 1mm cord, cut in the following lengths:
- main cord = 34"
- stripe cords = 30"
- back clasp knots = 19"
- ribbon (if using) = 5"
set up:
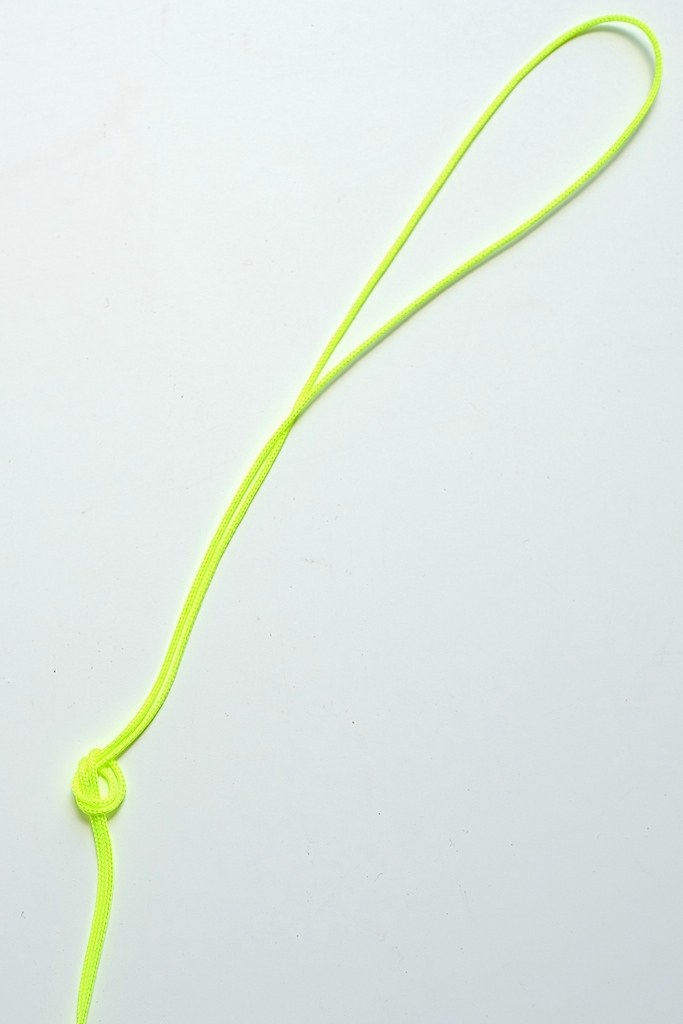
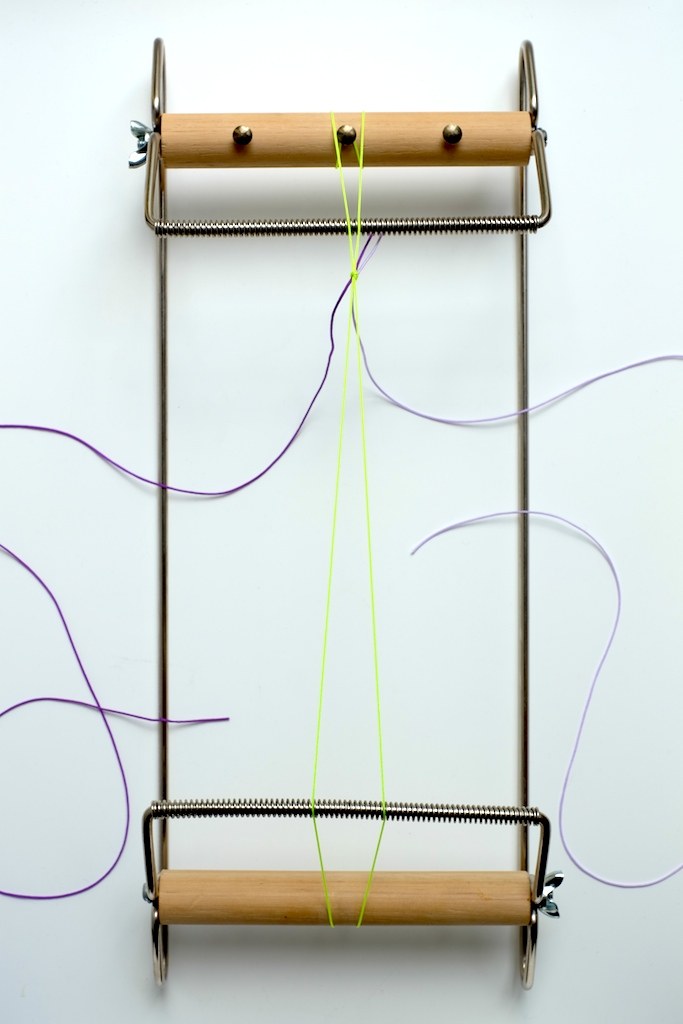
- fold the main cord in half and tie a loose overhand knot about 5" from the center of the loop.
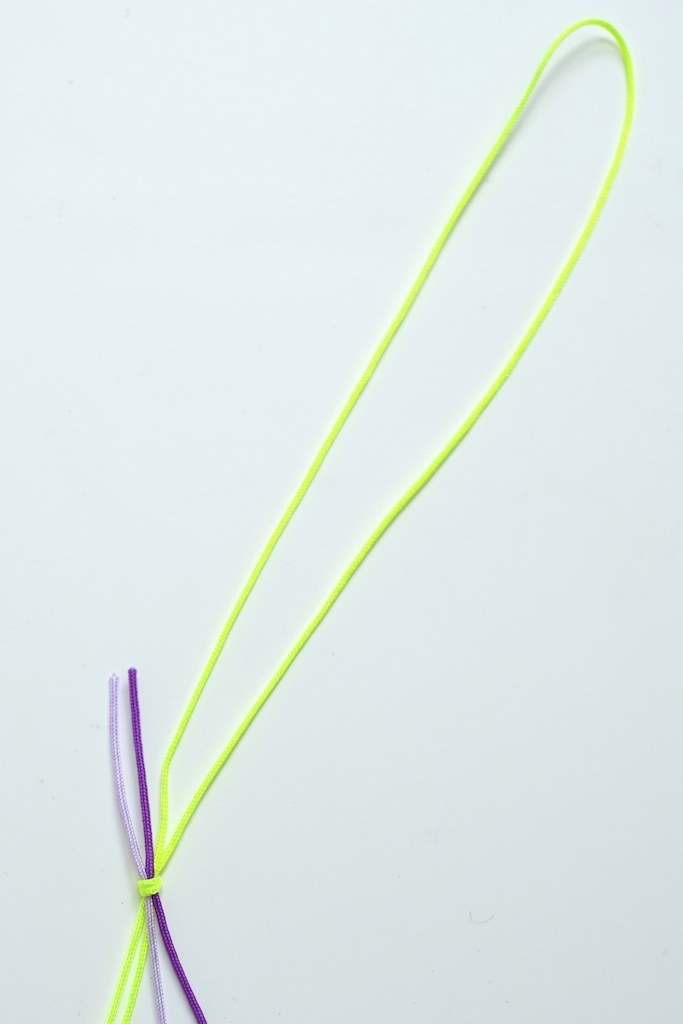
- tuck about 1" of the stripe cords into the overhand knot, and pull it tight to secure them. tie another overhand knot at the other side of the main cord, as close to the ends as possible.
- hook one end of the main cord onto a center post on the loom. set the cords up on the loom so that the stripe cords are under the main cords. loop the other end of the main cord on the center post of the opposite side of the loom- leave about an inch of space between the cords. tighten both rods to create as much tension as you can on the main cords.
braiding:
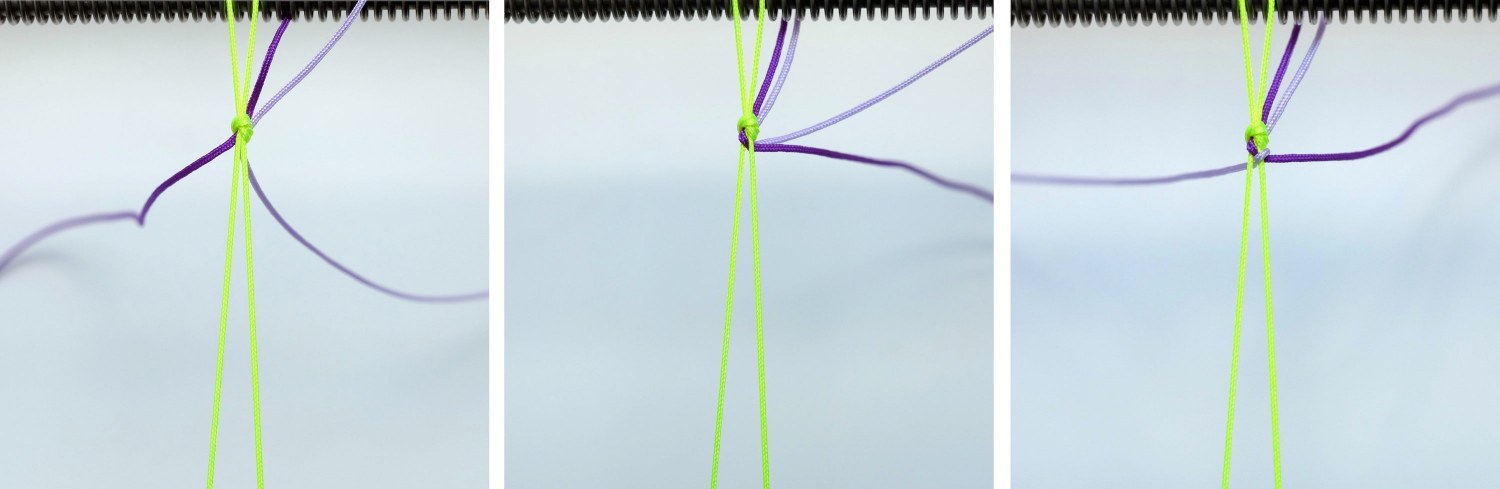
- place the stripe cords on each side of the main cords.
- starting on the left, weave the stripe cord over the lf. main cord and under the rt. main cord.
- take the higher stripe cord on the right, and weave it over the rt. main cord and under the lf. main cord.

- starting again on the left, weave the cord over the lf. main cord and under the rt. main cord.
- take the higher stripe cord on the right, and weave it over the rt. main cord and under the lf. main cord.
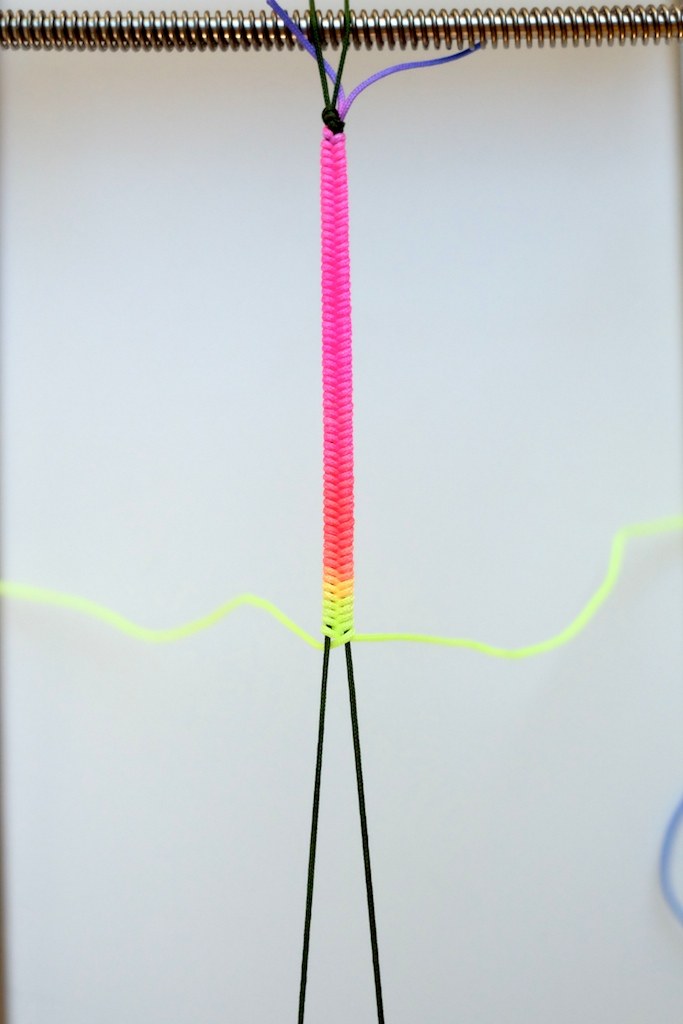
- repeat weaving the cords in this pattern. every so often, push them up towards the top knot to keep them tight. soon enough it will start to look like this:
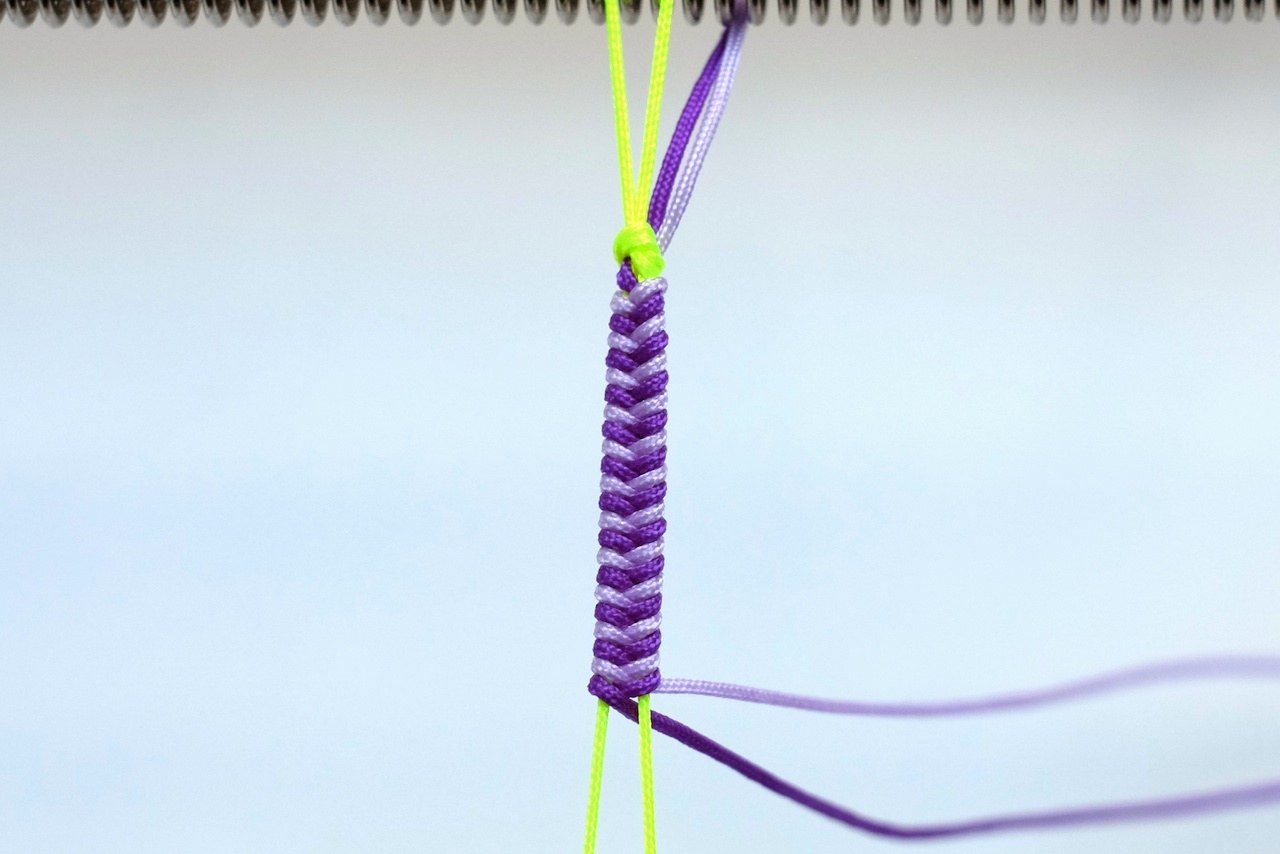
make the braid as long as you like. around 5" fits a broad range of people (remember that these have about an inch of closing knots on the back and are super adjustable, so no need to match the circumference of your wrist exactly).
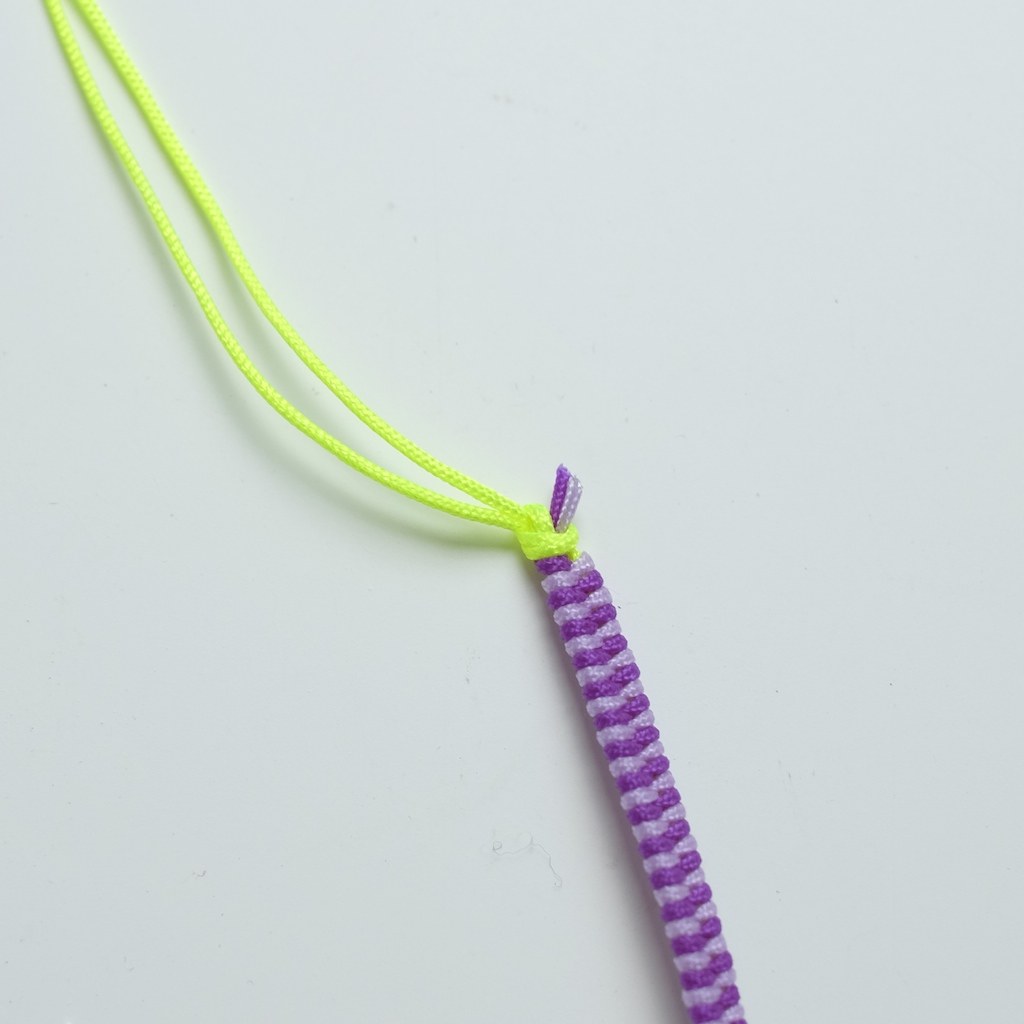

- when the braid is finished, carefully remove it from the loom, keeping all the ends tight. tie another overhand knot with the main cords to secure the ends of the stripe cords.
- trim the stripe cords to about 3mm from the knots.
- VERY carefully, melt the cords with a lighter (don't melt the main cords!).
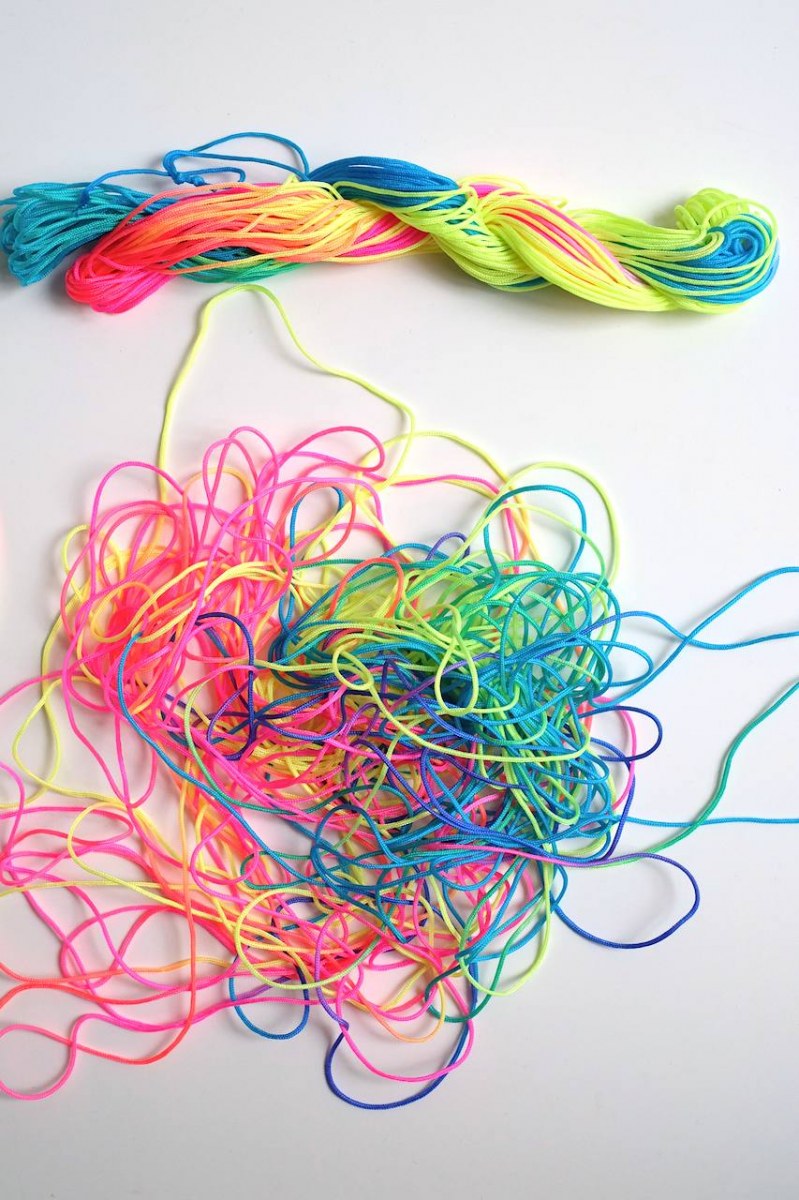
in addition to solid colors, nylon cord also comes in neon rainbow. depending on where you get it, the spacing of the colors varies greatly. to make a neon rainbow bracelet, cut two 30" strands of the cord, making sure that the colors line up on both pieces. braid it the same as the stripe. if the colors are matched on both sides, the transition between them will be pretty seamless.

back clasp knots:
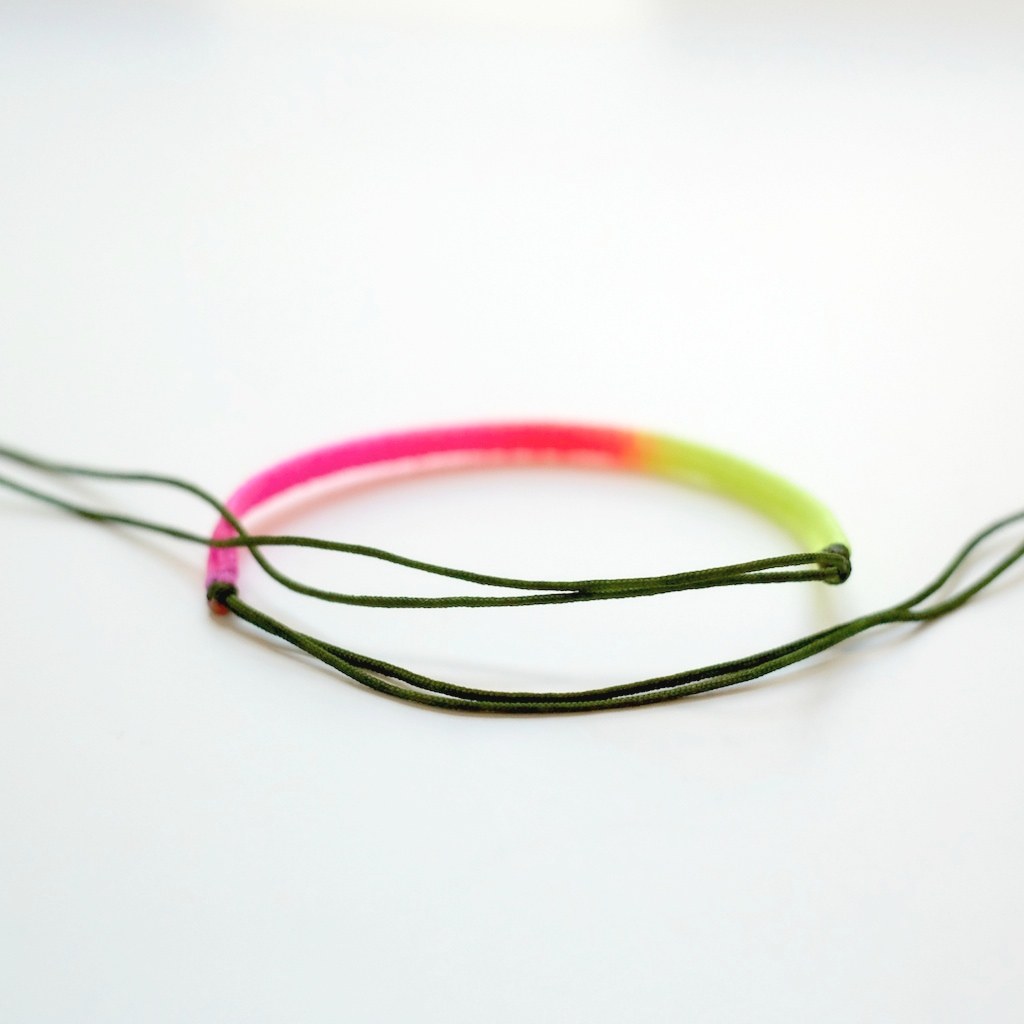
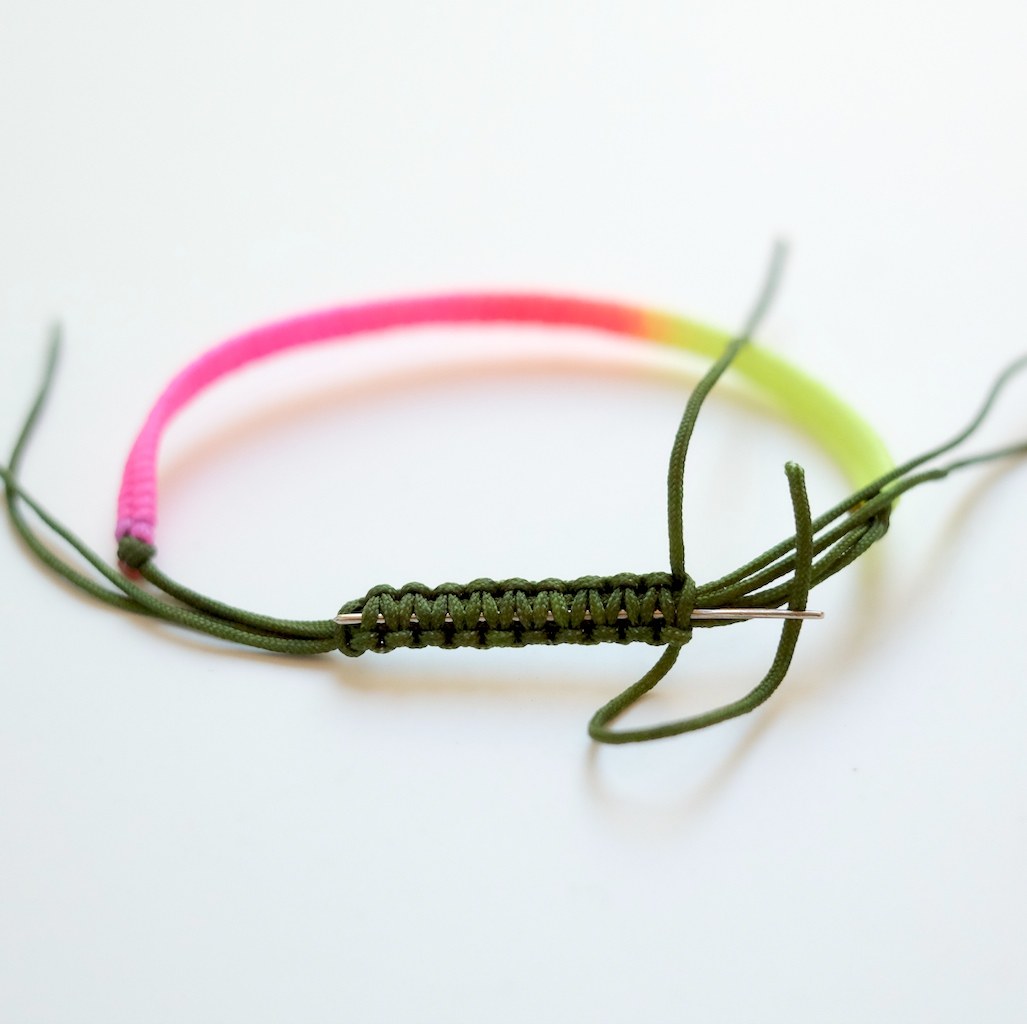
- trim the main cords on each side evenly. cross both sets of cords at the back of the bracelet.
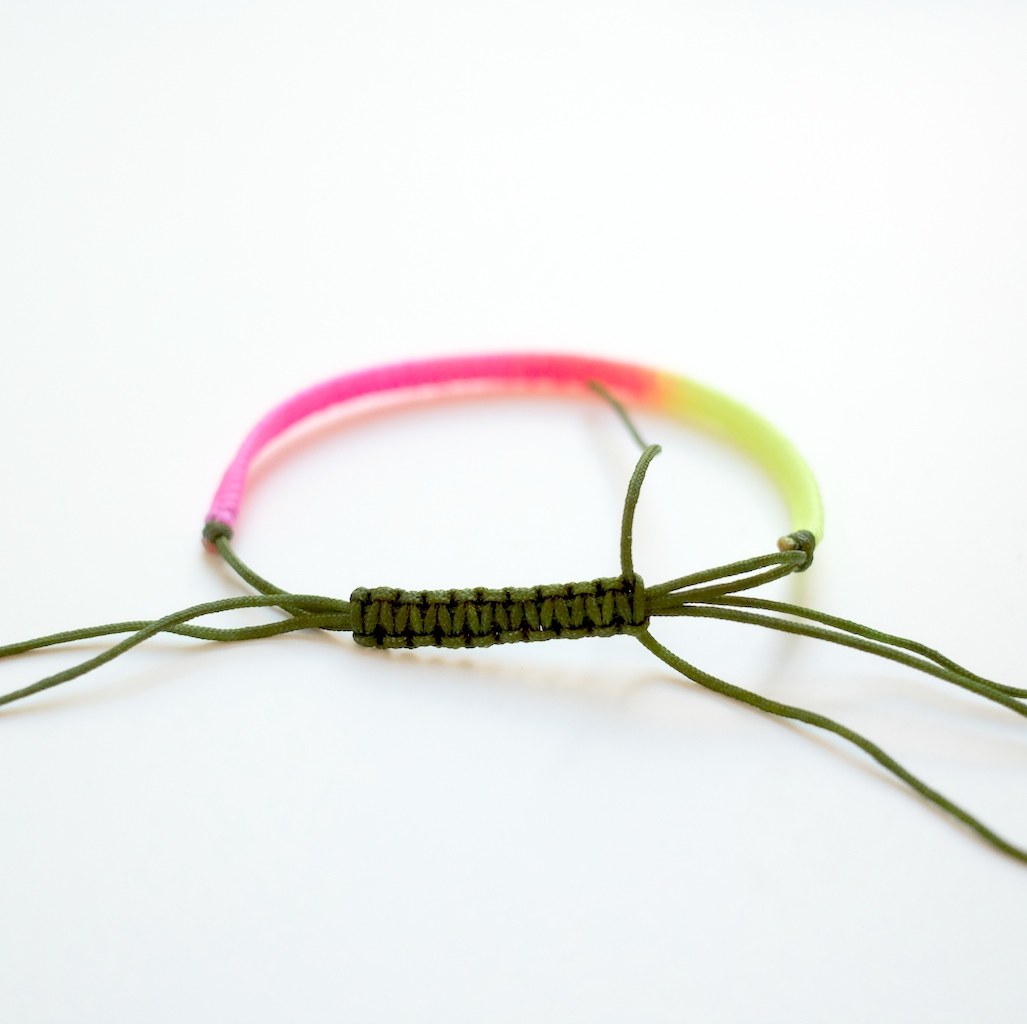
- using the 19" strand, tie 10 square knots, enclosing all four main cords. for instructions on how to tie a square knot, look here. try to keep the knots a tiny bit loose, if they're too tight it will make threading the ends back through difficult.
- using the needle, on the back side of the knots, weave each end through, being careful not to catch any of the sliding main cords. pull the tail through near the beginning of the knots. the pliers will come in handy for pulling the needle through, but make sure when you grip it, to do so at the tip only. gripping it at the top of the needle will crush the eye.
adding a ribbon:
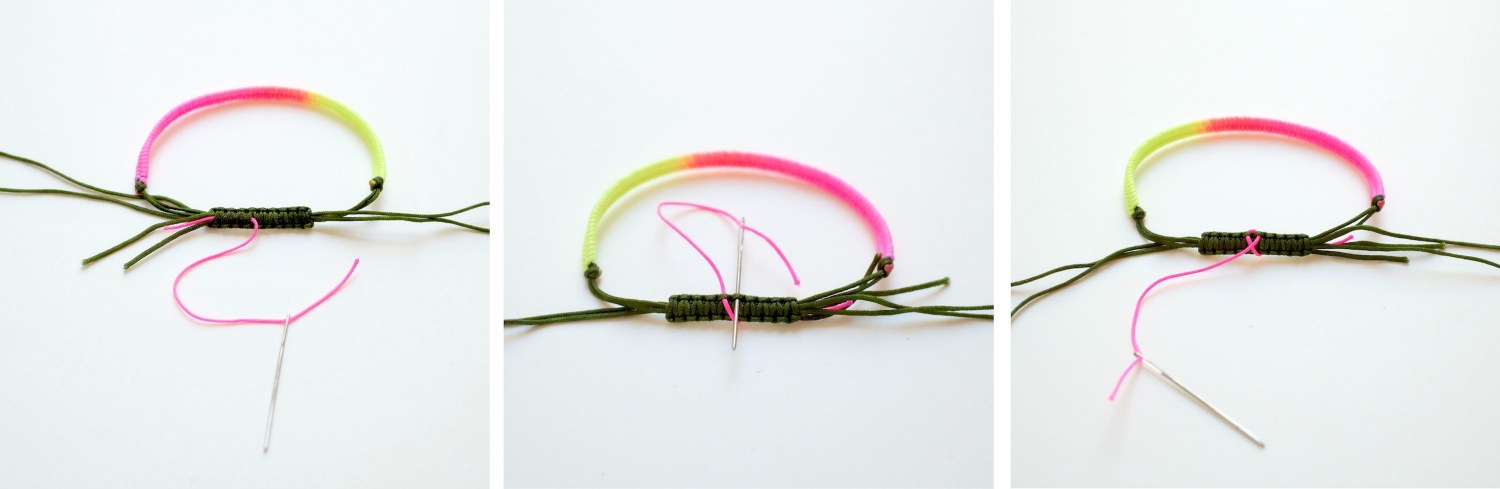
- thread the needle with the 5" cord. on the back side of the knots, insert the needle where the previous tails are coming out. go behind 4 knots, then bring the needle back out, and turn the knots to the front.
- bring the cord from the bottom edge of the knots, then up through the top of the 5th knot on the front. take it back down through the top of the 6th knot, and cross it over, bringing it back to the bottom edge. flip the knots over again.

- on the reverse side of the knots, insert the needle again, and bring it out near the end of the knots. pull on both sides of the main cords to make sure that none of them have gotten caught, and to tighten the knots. gently pull on all the tails to ensure that the cords are tight.
- trim all the tails to about 3mm.
- VERY carefully, use the lighter to melt the tails, securing them to the back knots. take your time, and really focus- if the main cords get melted, the bracelet will be ruined.
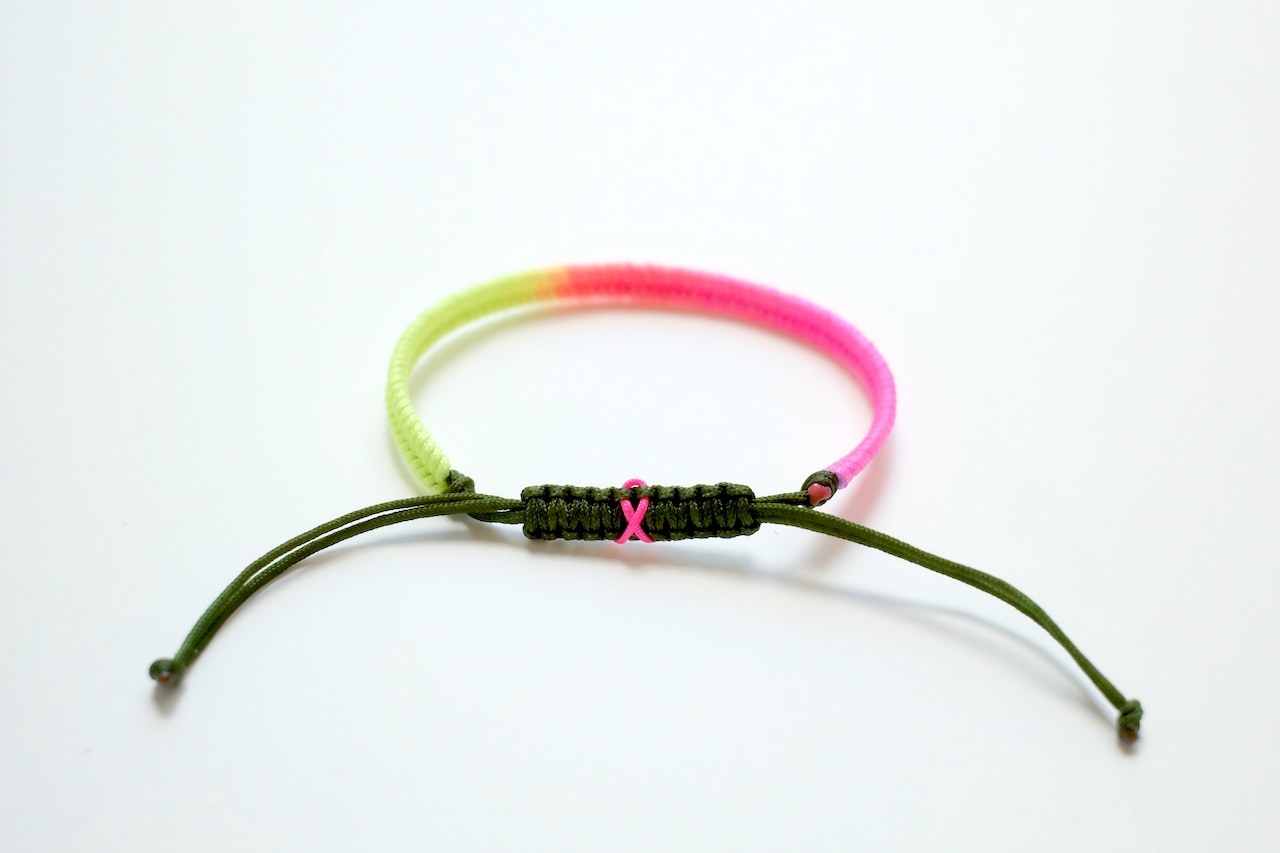
- tie the main cords together with an overhand knot on each side. trim the tails, and melt the ends to secure.
- the main cords can be trimmed to fit smaller wrists pretty easily- they only need to be as long enough to fit over your hand. open the bracelet up so that it comfortably fits over your hand, and tie the end knots on each side as close the closure as possible. trim the tails and melt to secure.
finito:
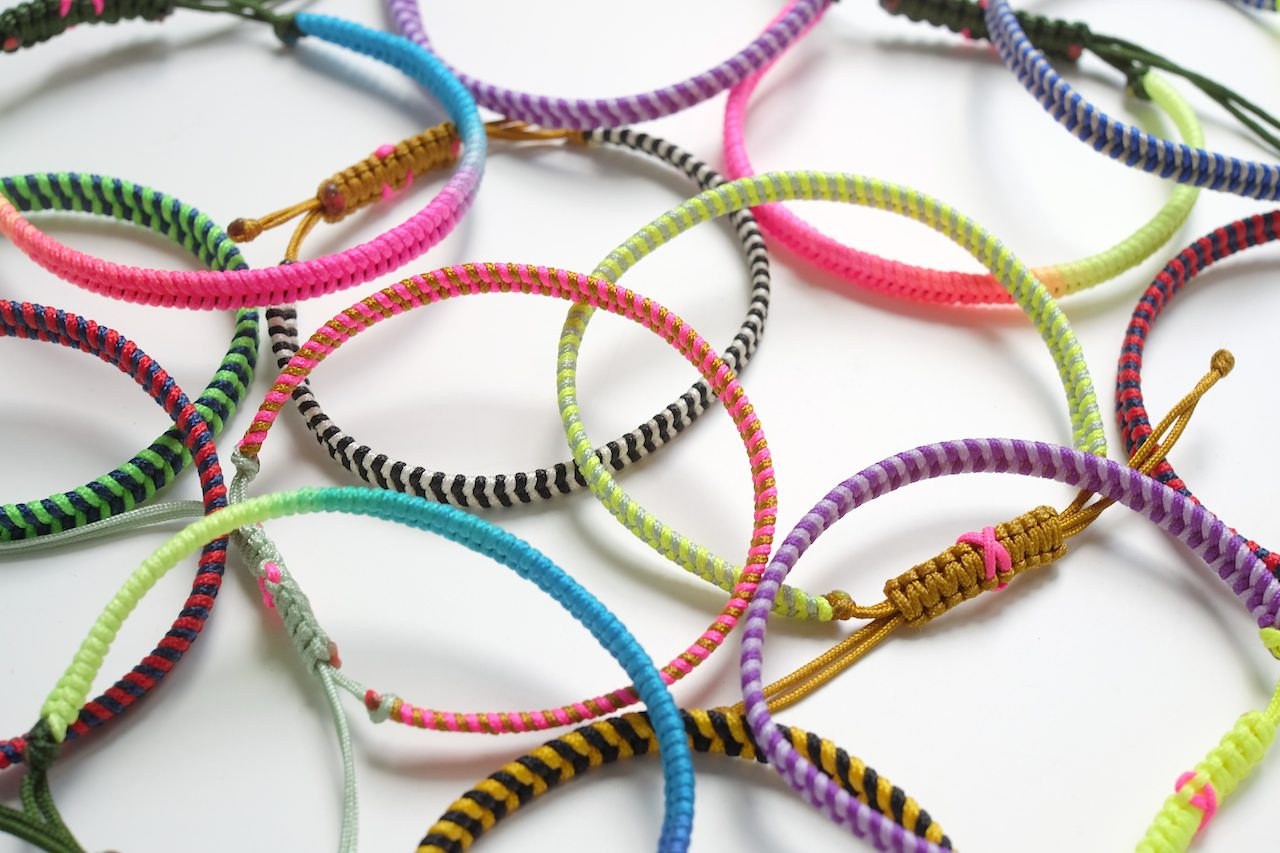
if you're looking for a way to make a little something extra at fundraising events, these are much more personal than rubber "live strong" bracelets. we're working on getting these up for sale online, but if you see any colors above that you'd like to purchase, shoot me an email and i'll try to make it happen.
