Macrame Pendent Necklace
December 28 2012, 11:00 pm
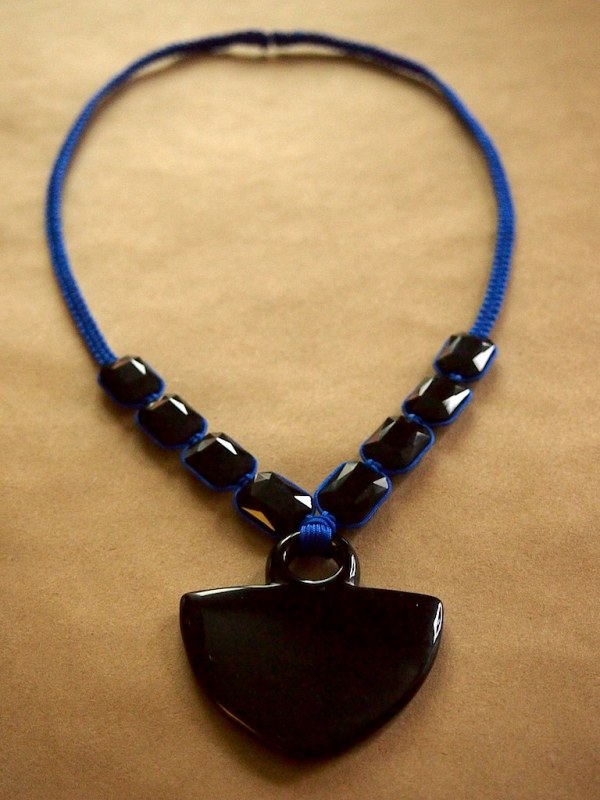
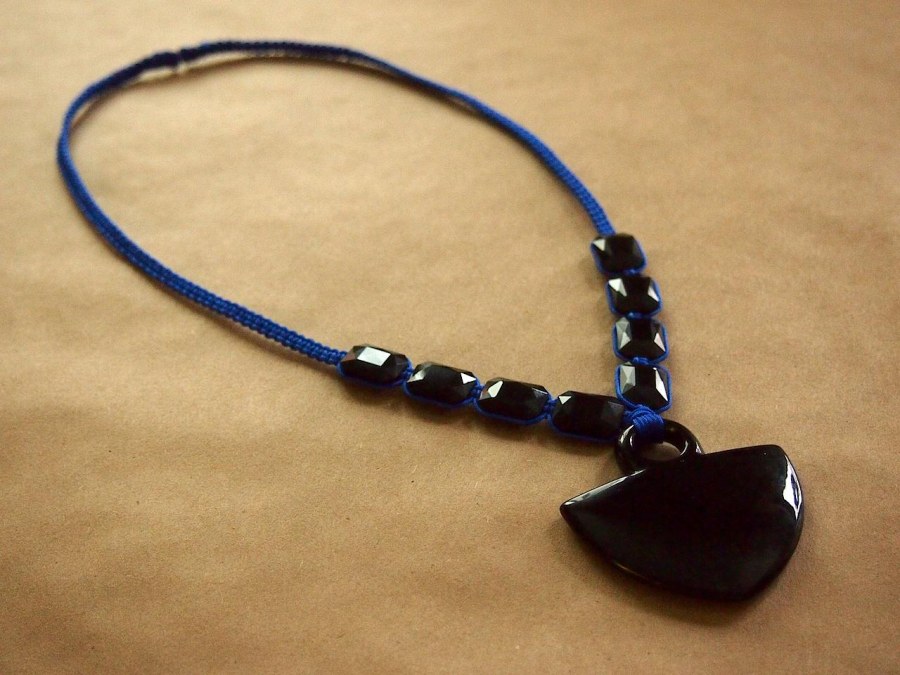
Macrame usually conjures images of scratchy hemp chokers and scary owls from the 70s. But it doesn't have to be that way. This necklace is a great starting point if you're interested in macrame- it's made using the square knot, which is one of the most basic knots to master. Add some classy beads to a smooth cord, and you've got yourself a fancy pants look.

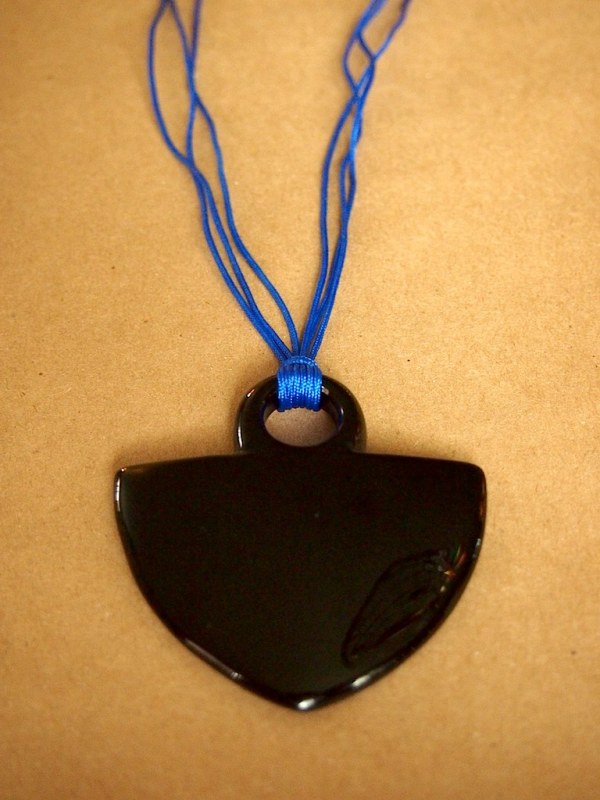
- Large pendant (this came from a bead store in manhattan, but there are some really nice ones here)
- German glass facetted beads
- 1 mm nylon cord
, cut into 3 lengths: the first about 12" longer than you want your necklace, the other 2 cords should be 3 times the length of the first cord.
- Lighter, Scissors, Masking Tape
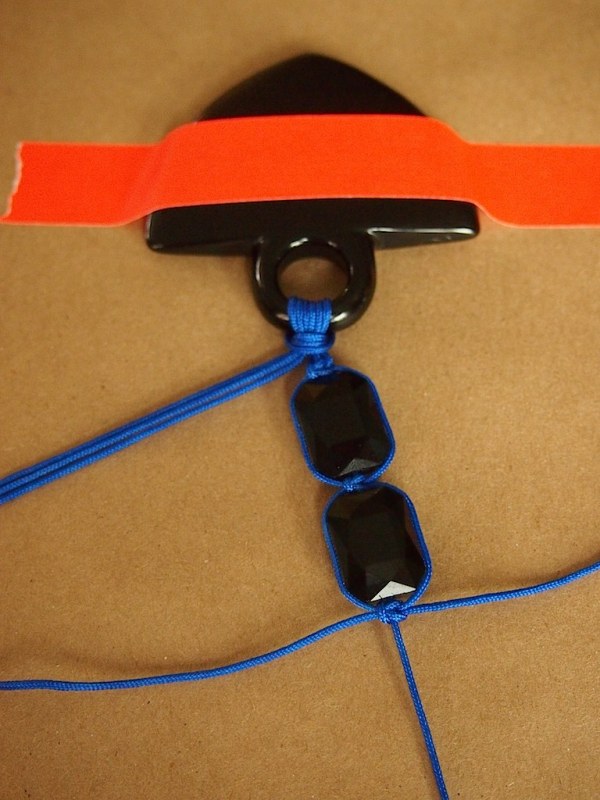
Attach the Pendant:
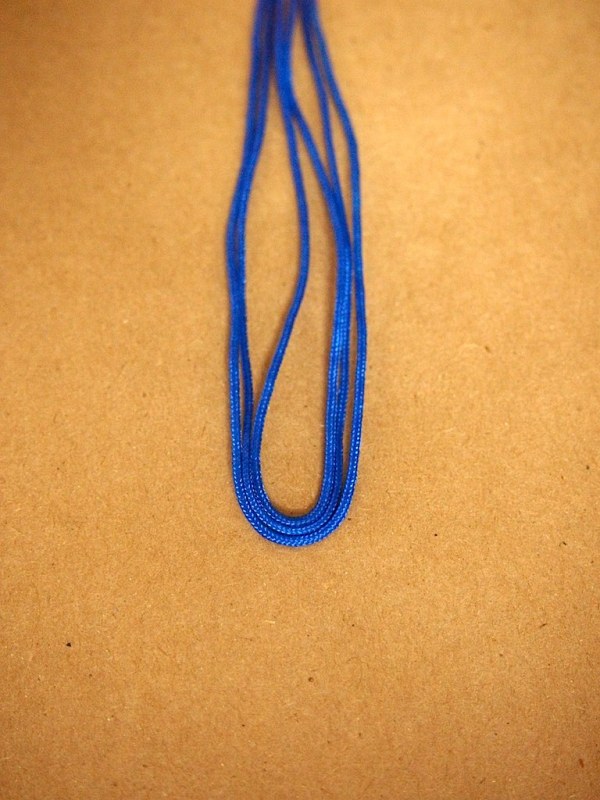
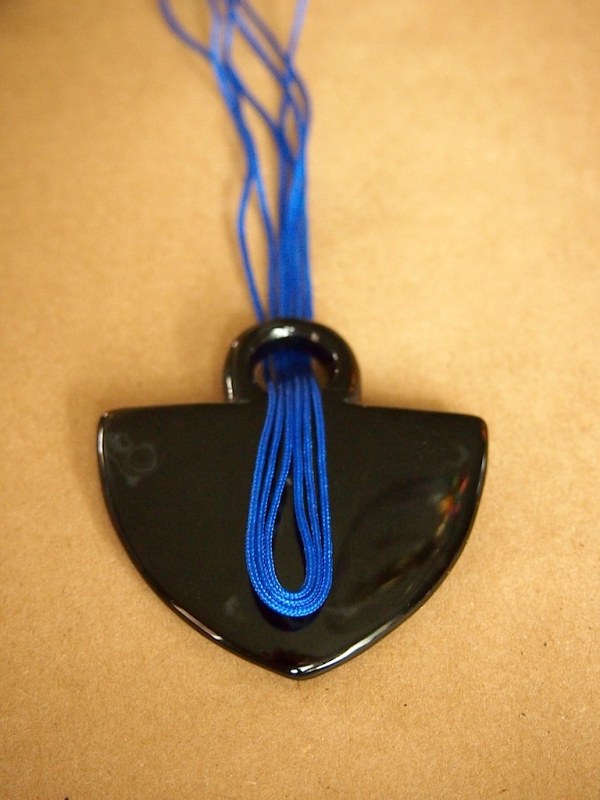
- Fold all 3 cords in half, lining up the middles of each. The shorter cord should be between the longer cords.
- Push that loop through the pendant, going from the front to the back.
- Fold the loop up, and pull all the cords through it.
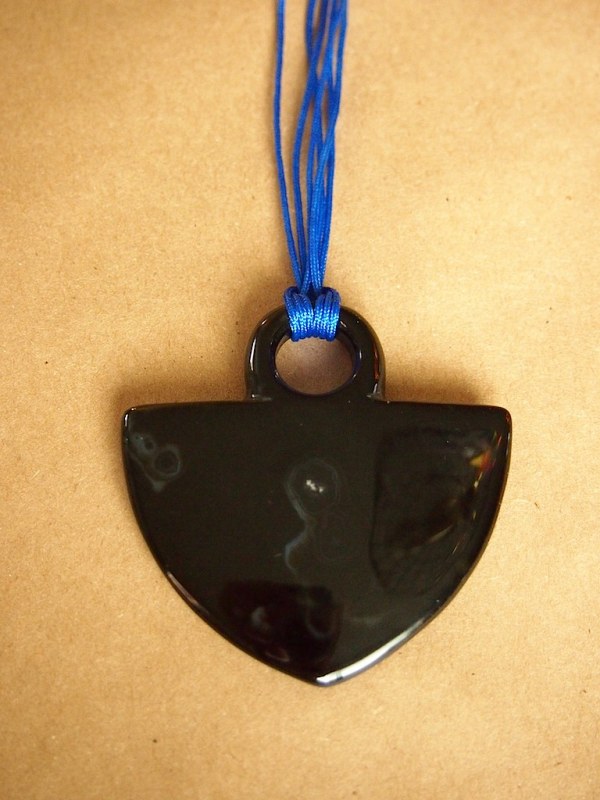
- Flip the pendant over, so the front side is facing up.
Add the Beads:
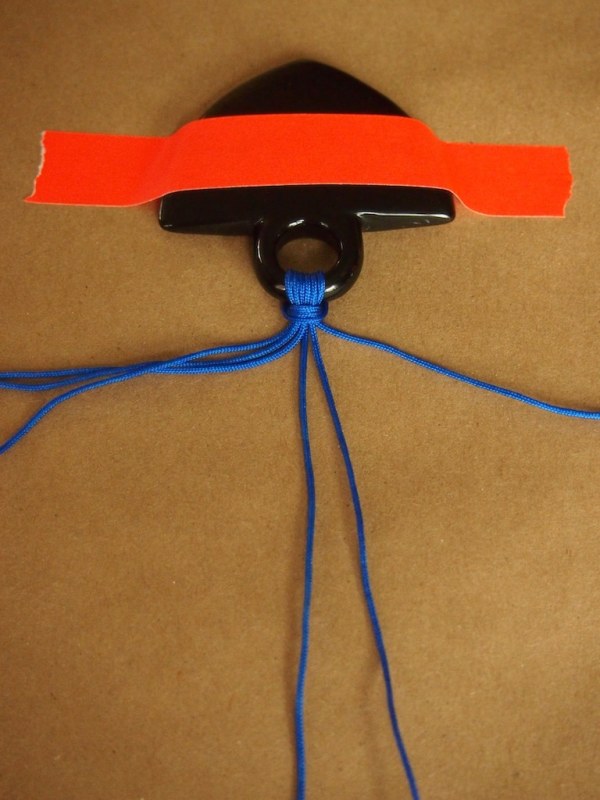

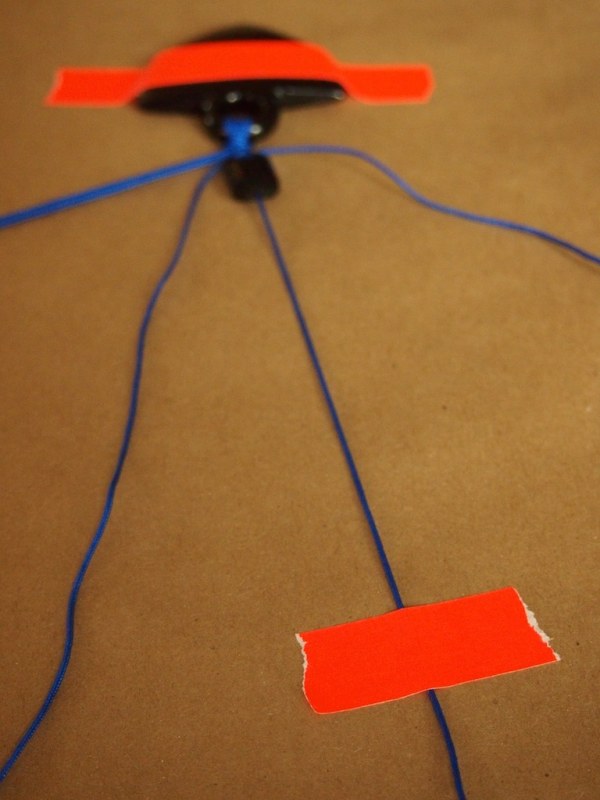

- With the cords facing you, tape the pendant to the work area. Separate the cords so that there are 3 on each side. Work on one side at a time.
- With the shorter cord in the middle, tie a square knot with the longer cords. (For a great visual of how to tie a square knot, click here)
- Slide a bead onto the middle cord, and tape it to the work table.
- Bring the outer cords around the edges of the bead and tie another square knot. It takes a little bit of adjusting to get those cords flush with the edge.
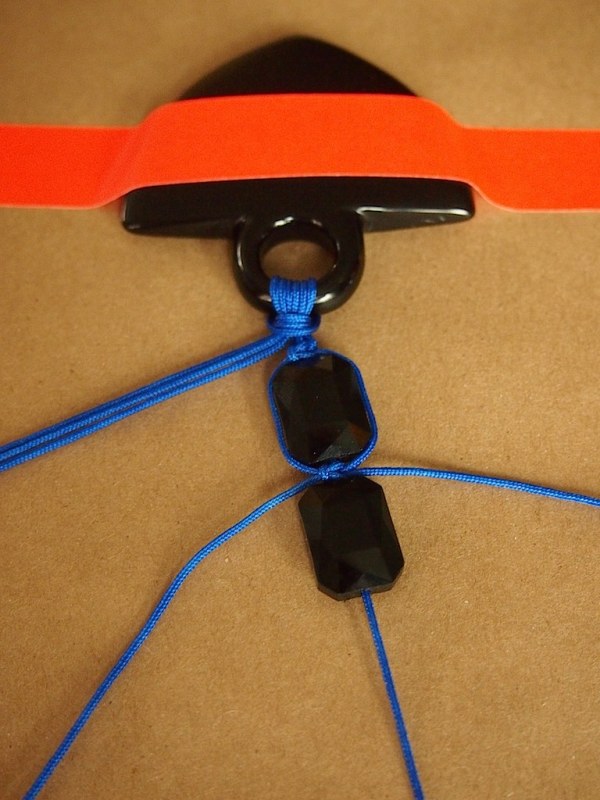
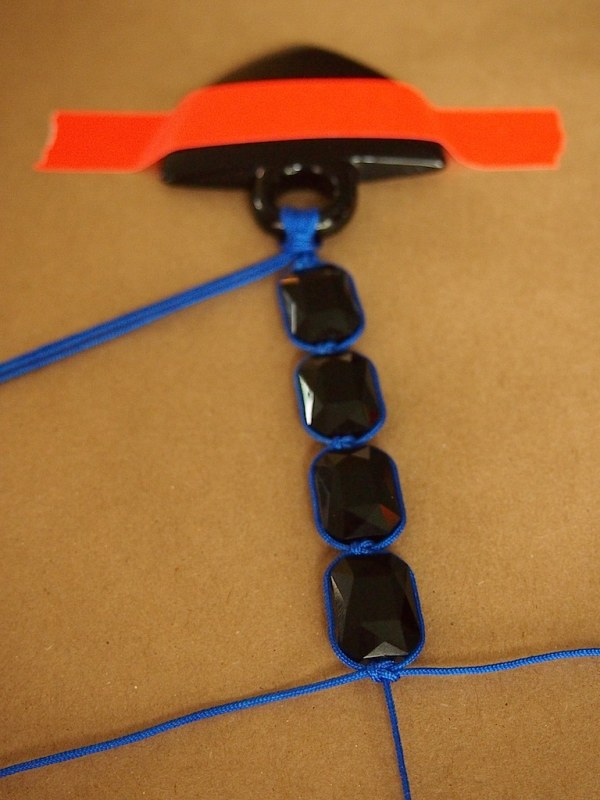
- Untape the center cord, and slide another bead on it.
- Again, bring the outer cords around the edges of the bead and tie a square knot.
- Repeat this process with beads and square knots. Add as many beads as you like.
- When all the beads have been, start tying square knots to make the necklace.
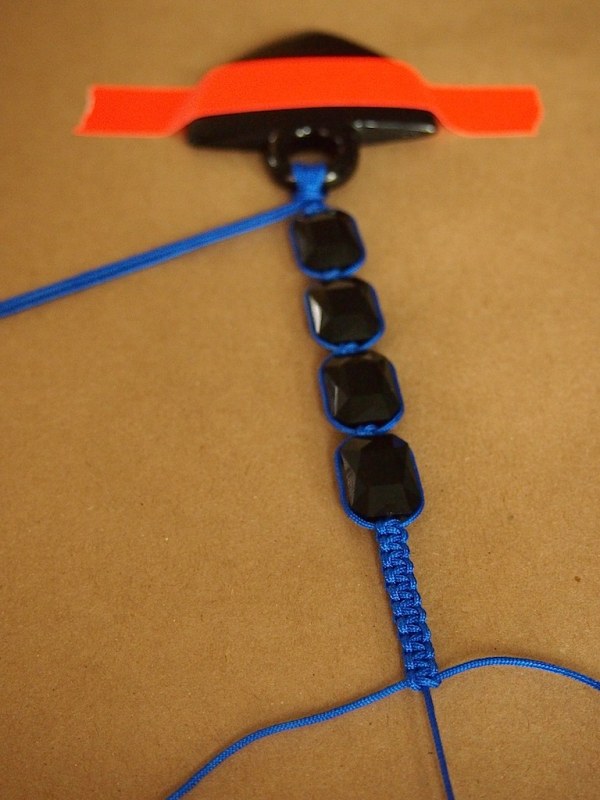
Macrame the Cords:
- Determine how long you want your necklace. It doesn't have a clasp, so be sure you make it long enough to slide over your head. Stop tying knots about 2" from the center back of the necklace.
- Repeat the same bead/knot procedure on the other side.
Finish the Back:


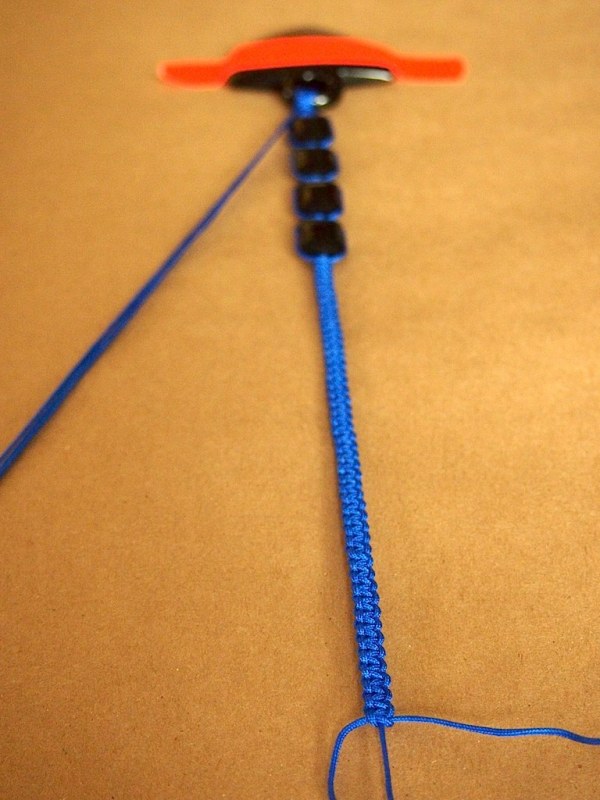
- Melt the tips of each center cord and (carefully!) press it to the other side just after the last knot. This should "glue" the strands together. Run the lighter gently along the middle of these cords, and press them together.

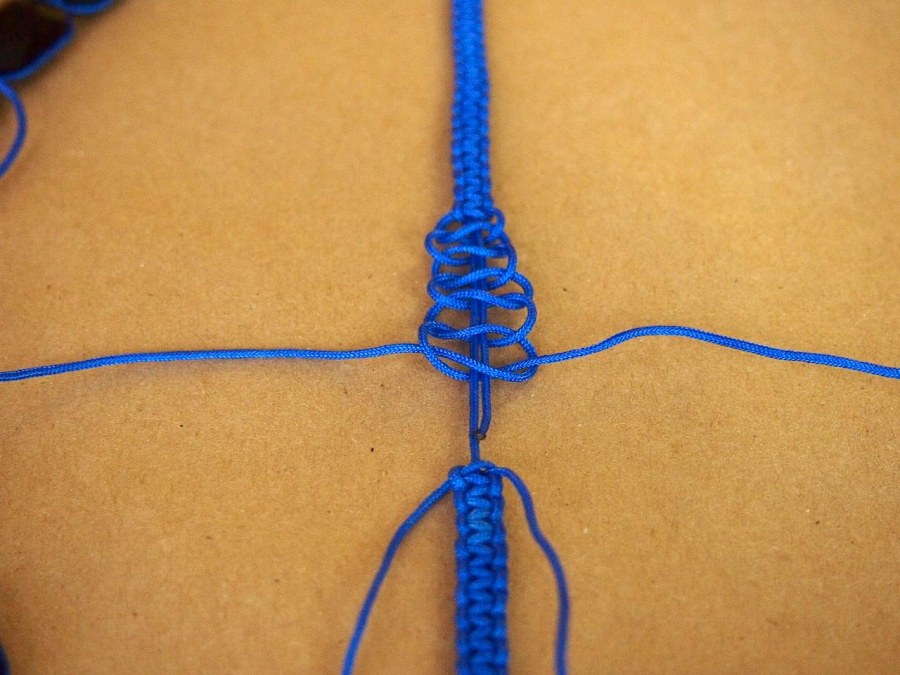
- Tape the necklace to the work table as shown in the photo. Starting at the top, continue to tie square knots over both center cords.
- Tie almost to the middle of this section, keeping the last 3 knots pretty loose.
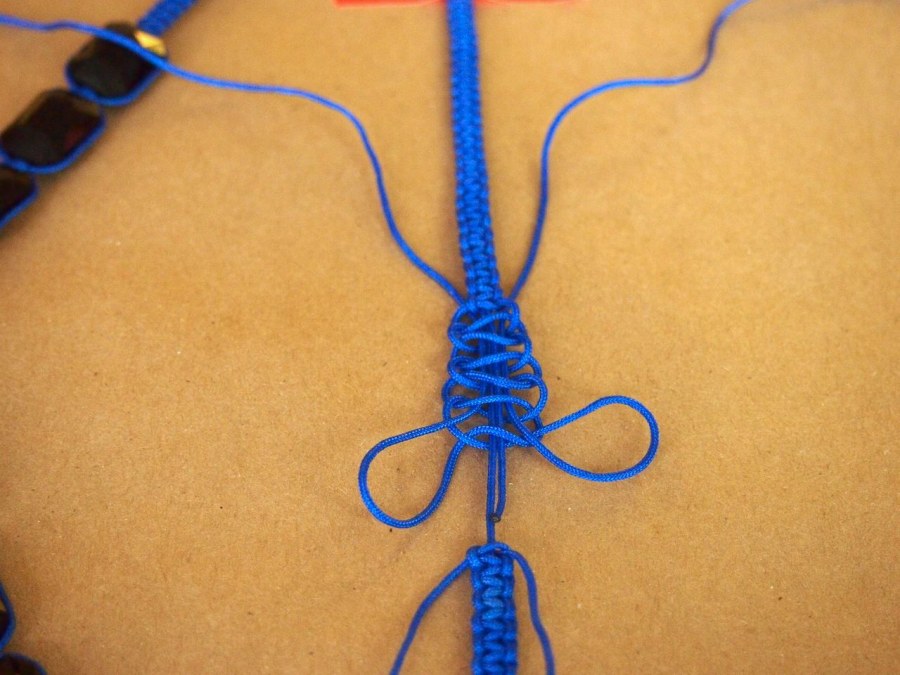
- Weave the outer strands back through the last 3 knots, laying them on either side of the middle strands.
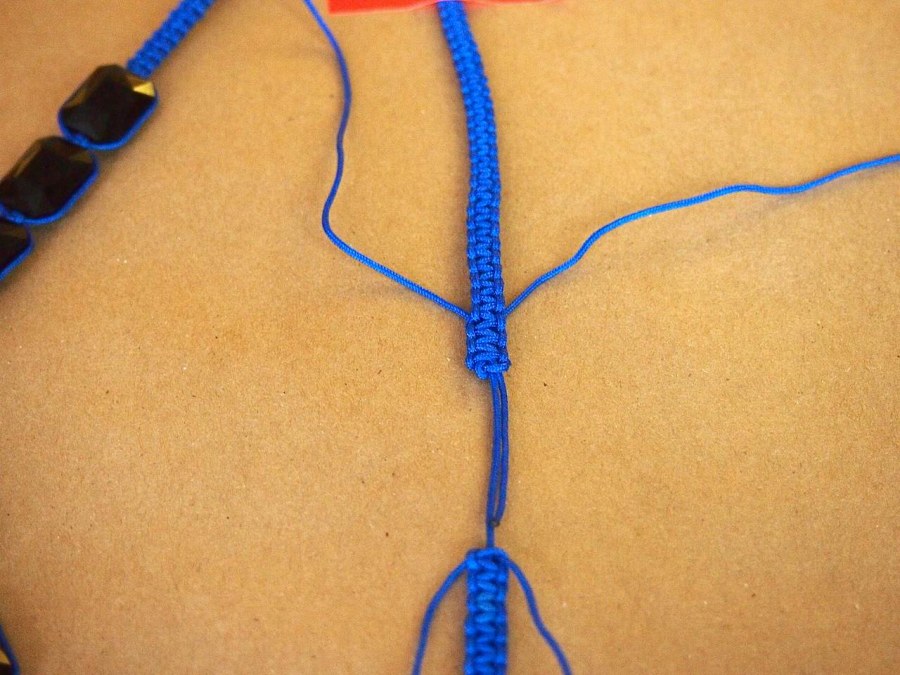
- Carefully, tighten each of the last 3 knots, starting with the ones closer to the previous knots. Trim off the excess tails
- Untape the necklace and turn in around so the opposite side is at the top. Repeat the same final knots, weaving in the outer strands and tying off the tails.
