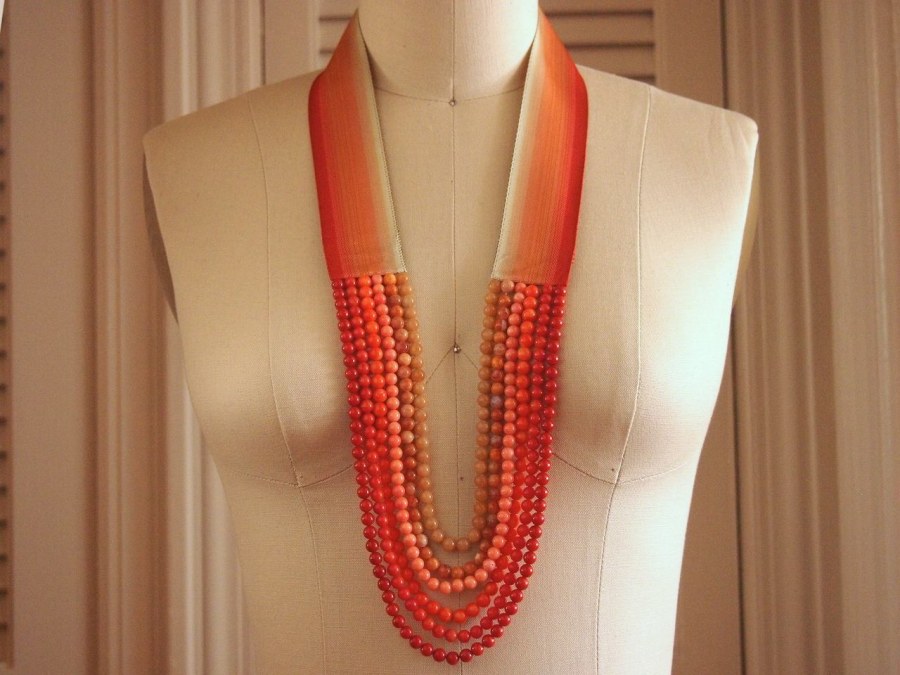
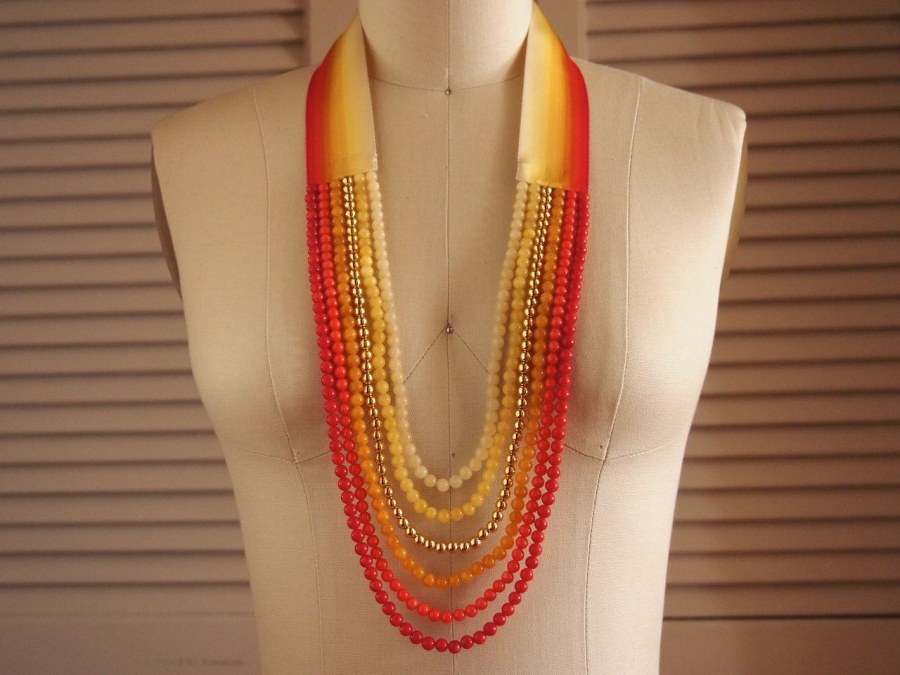
vintage ribbon, coral and jade speakeasy necklace
February 23 2012, 6:10 pm
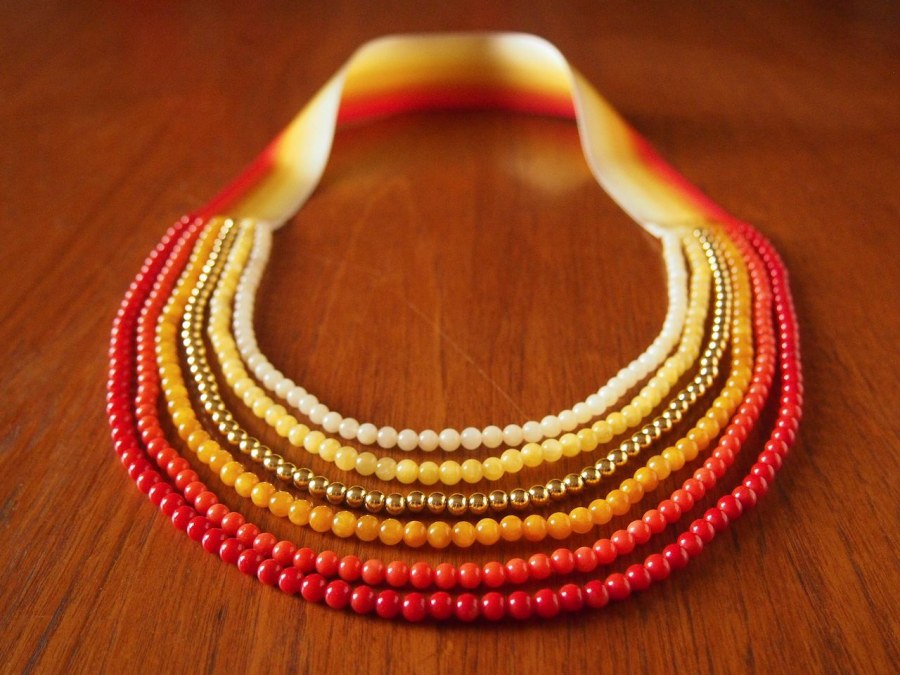
not only is this audibly loud when you move, it swings and shakes like a flapper at a speakeasy.
having already made 2 of these necklaces, i really have no need for another. i might be addicted to making them though. the hardest part is finding beads that match the colors in the ribbon perfectly. it makes a big difference in the final piece. the ribbon came from ebay, and the beads from various stores on 6th ave in manhattan. depending on the ribbon, the resulting piece is drastically different from the previous.

materials:
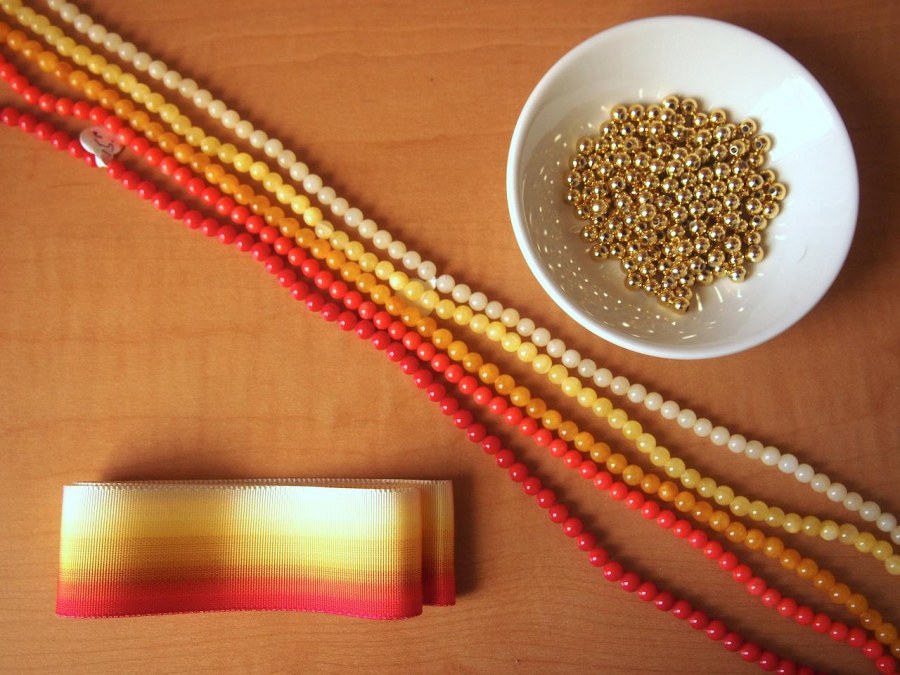
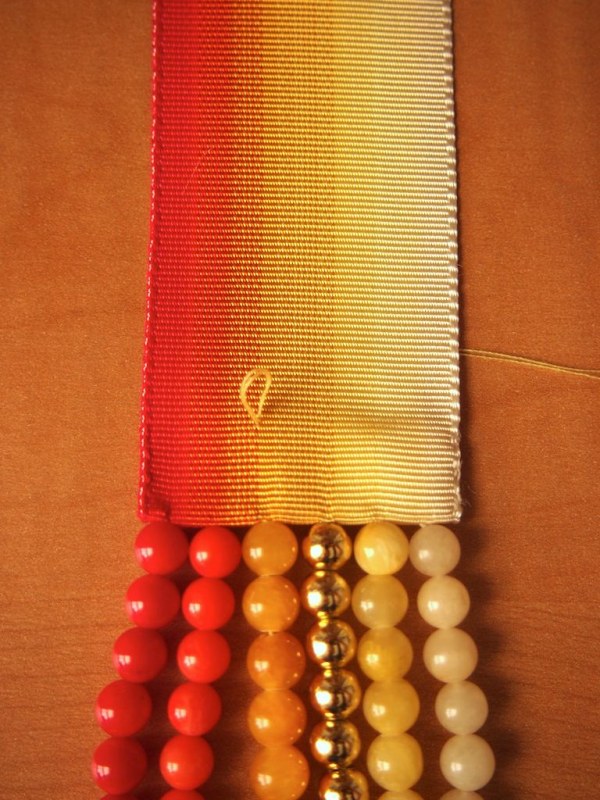
- 18" striped gros grain ribbon, 1 1/2" wide
- 5mm beads- the necklace pictured used the following:
- 20" red coral
- 19" orange coral
- 18" mustard jade
- 17" gold tone
- 16" lemon jade
- 15" white coral
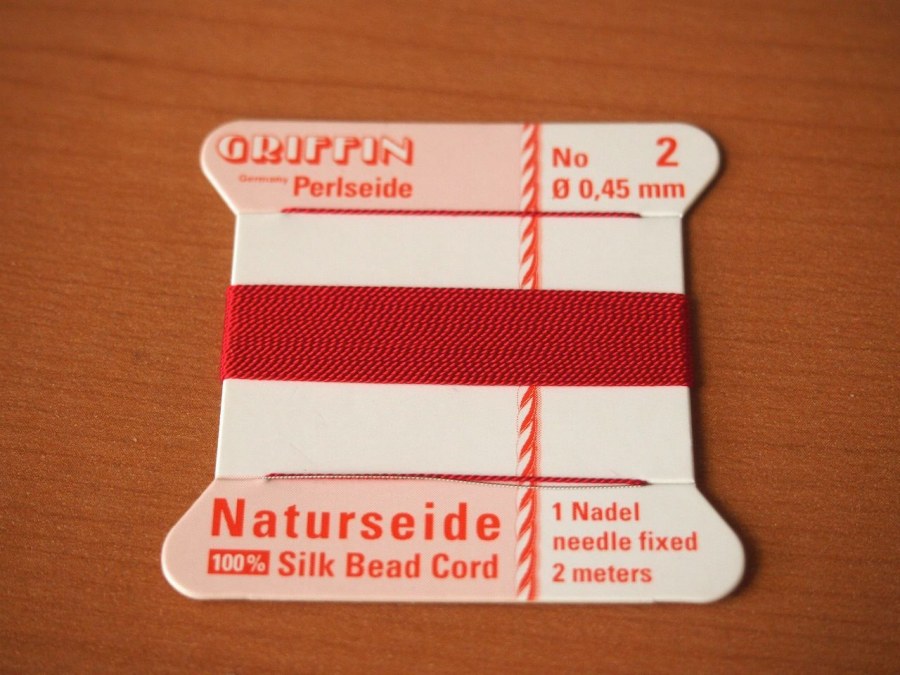
- #2 silk bead cord in red, orange, yellow, white
- macrame board
- Magna Tac
- fray check
set up ribbon:
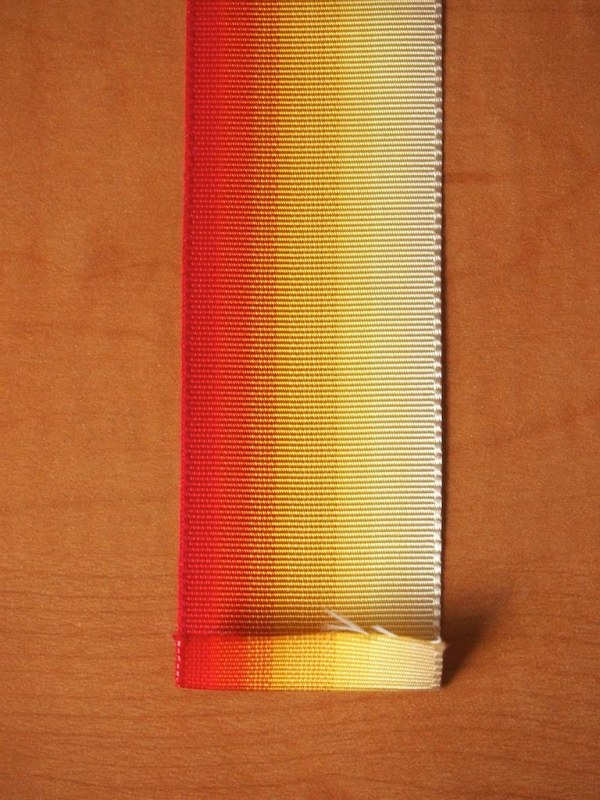
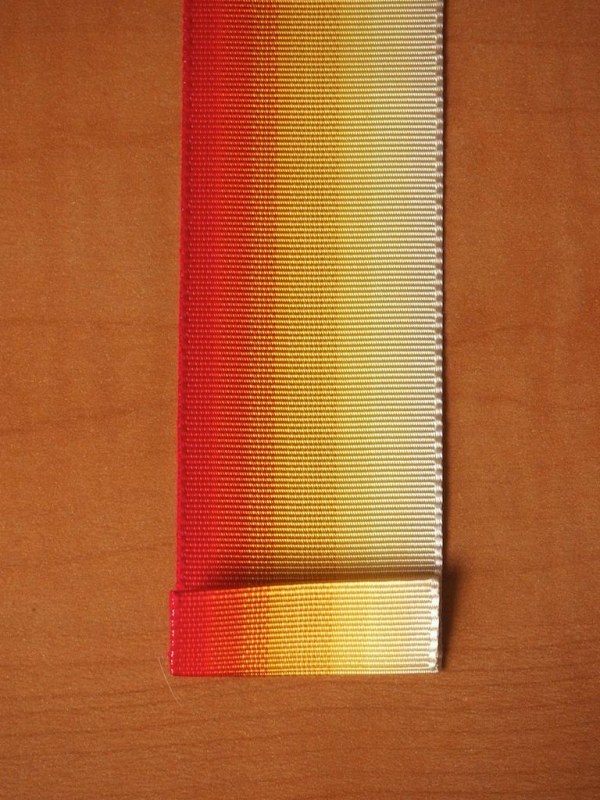
- fold 3/8" of ribbon up at both ends and press.
- fold ribbon over again and press.
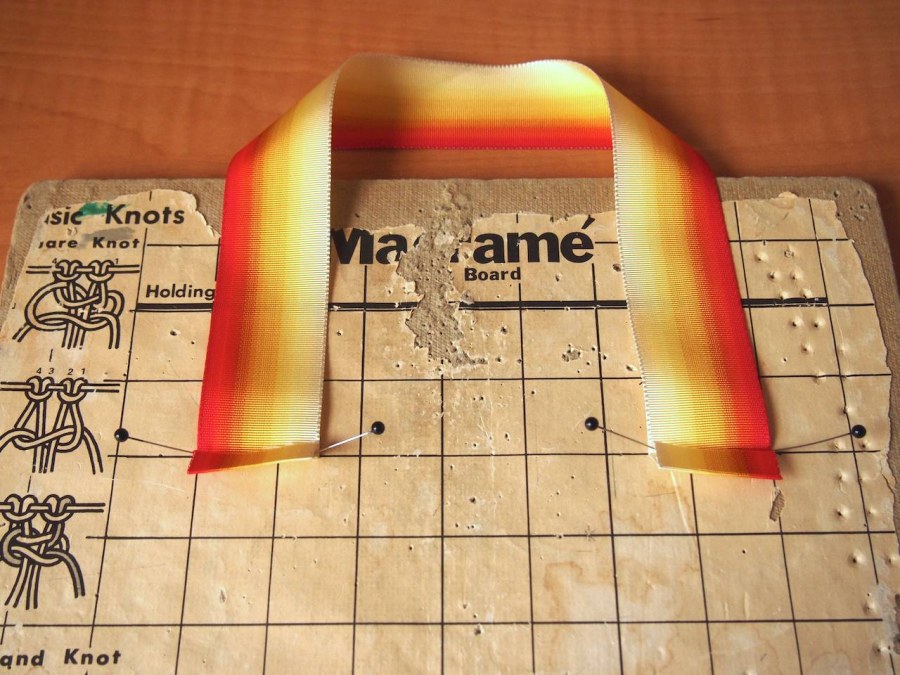
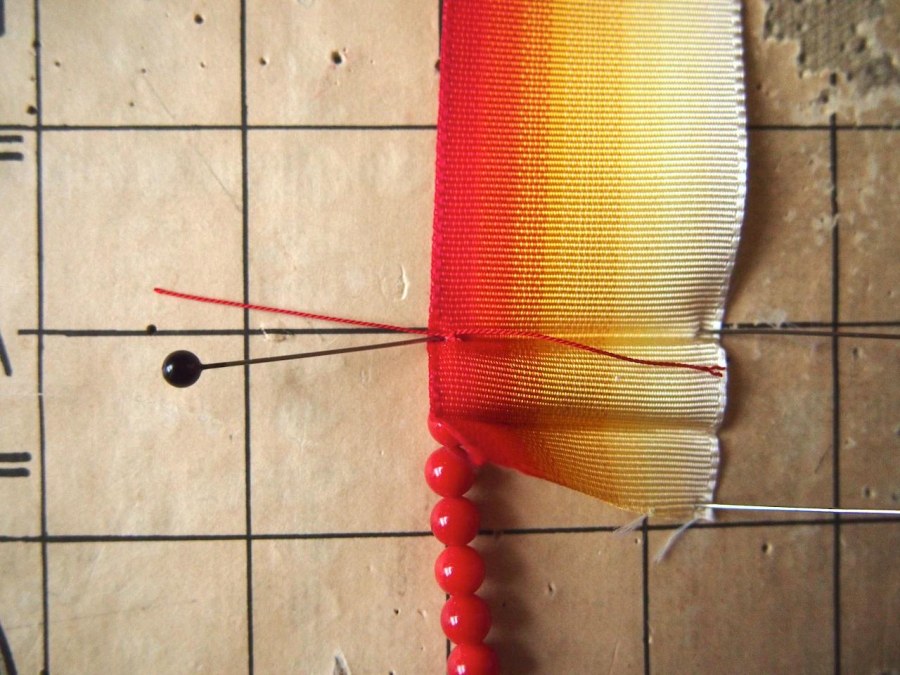
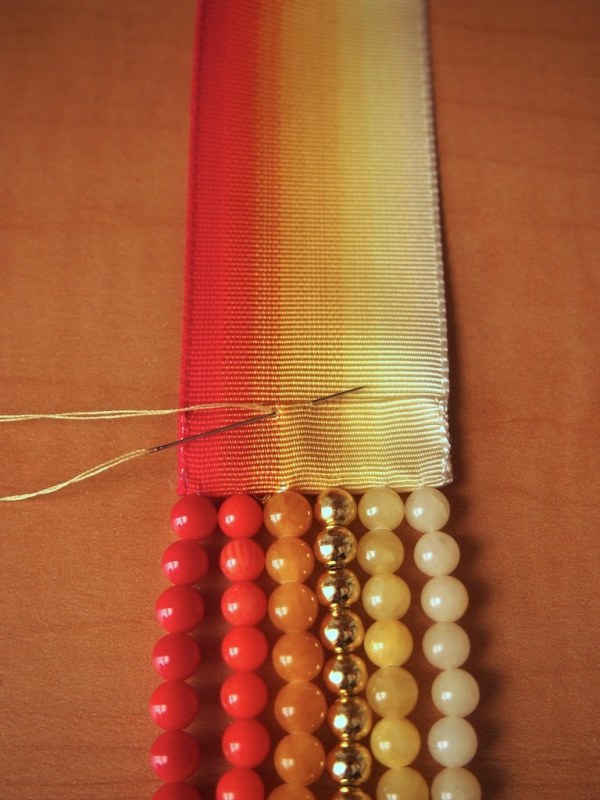
- pin both ends of ribbon to your work board, using straight pins so the ribbon doesn't get unnecessarily large holes. pin to the board at the second fold line. pin ribbon ends with 4" between them.
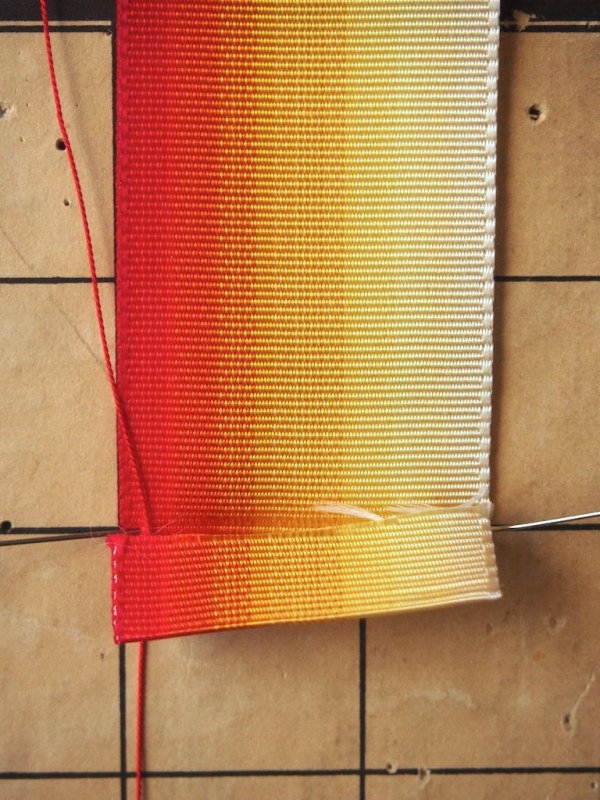
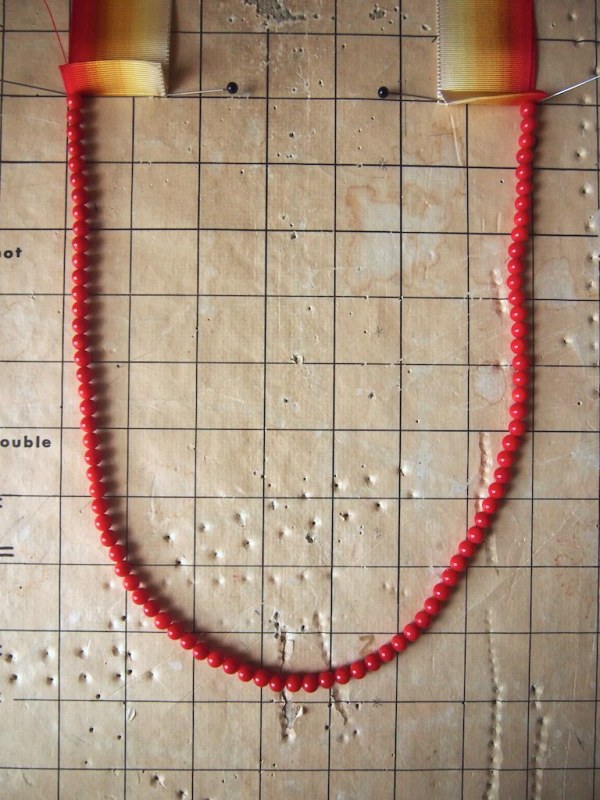
- at the second fold line, start with the longest exterior strand. position the silk cord needle so that the edge of the ribbon will line up to the edge of the beads (approximately 3mm in). it's important to have the beads centered on the corresponding stripe.
- single knot the end of the silk cord, and leave a long tail.
- string first row of beads and bring through the other side's second fold.
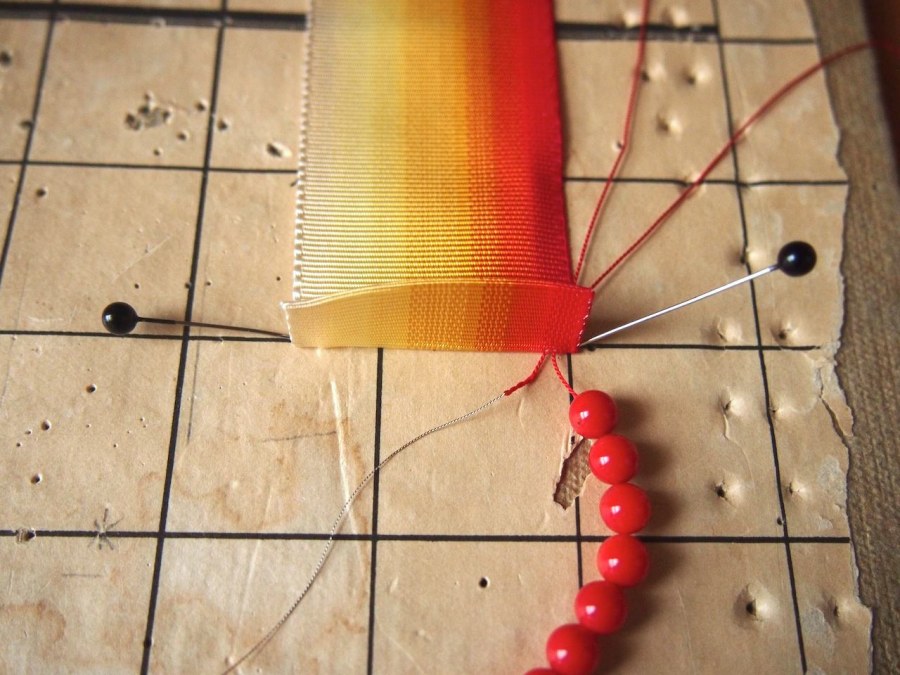
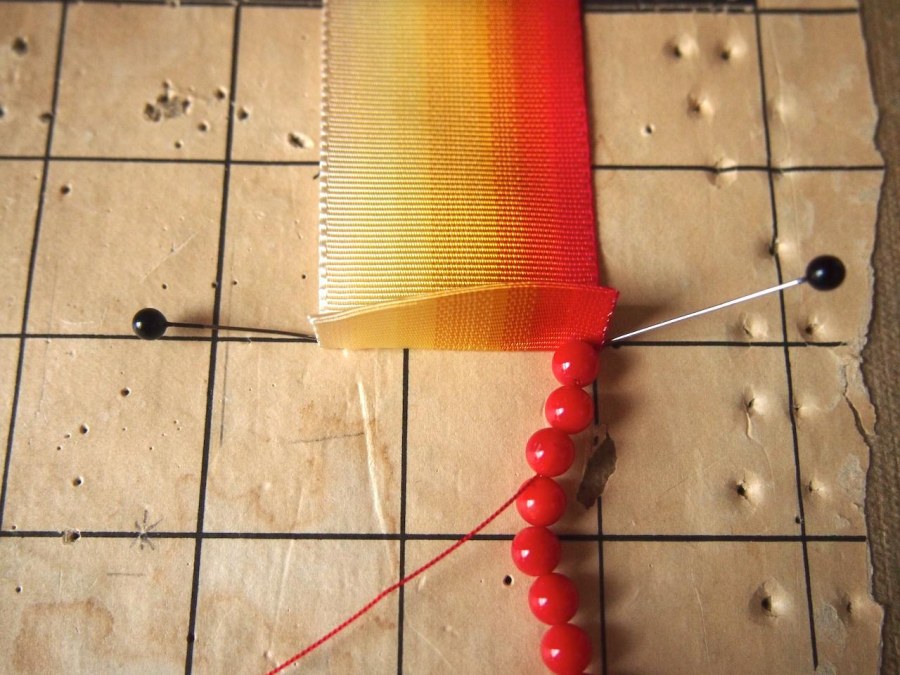
- bring the needle back through the fold, and all the beads to the other side. this doubled thread adds security to the beads. you will have to slacken the cord to get it through the beads the second time.
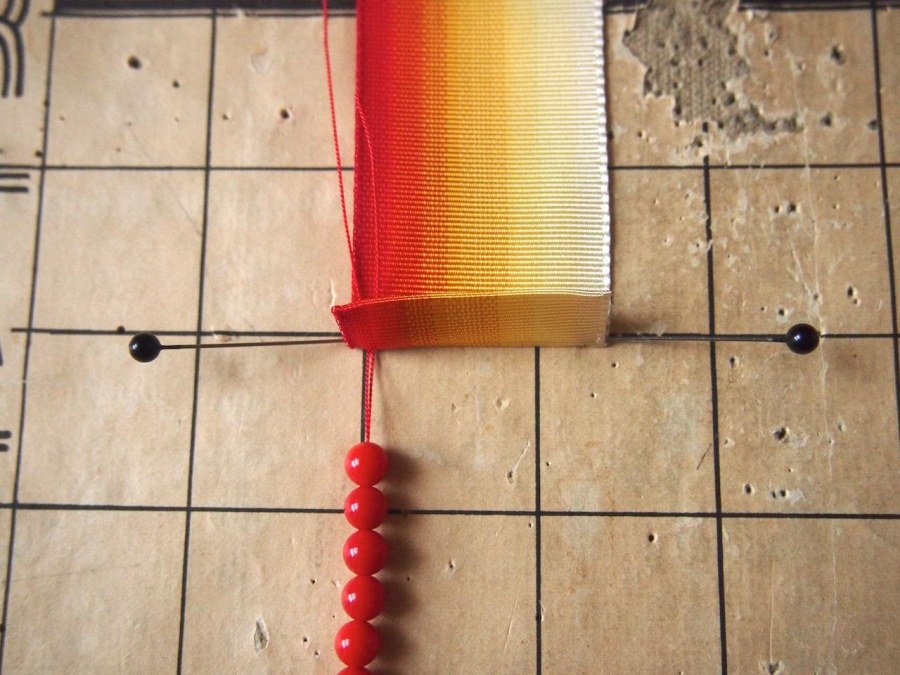
- it's important that the beads be very tight on the strand, or they will slide away from the ribbon when it's worn. to keep the double strand tight, bring the needle back through the fold on the first side of the ribbon. pull the tail and end of cord gently, but firmly until there is no visible cord hanging from the ribbon.
- double knot the tail and the end of the cord when you feel confident that the beads are tight.
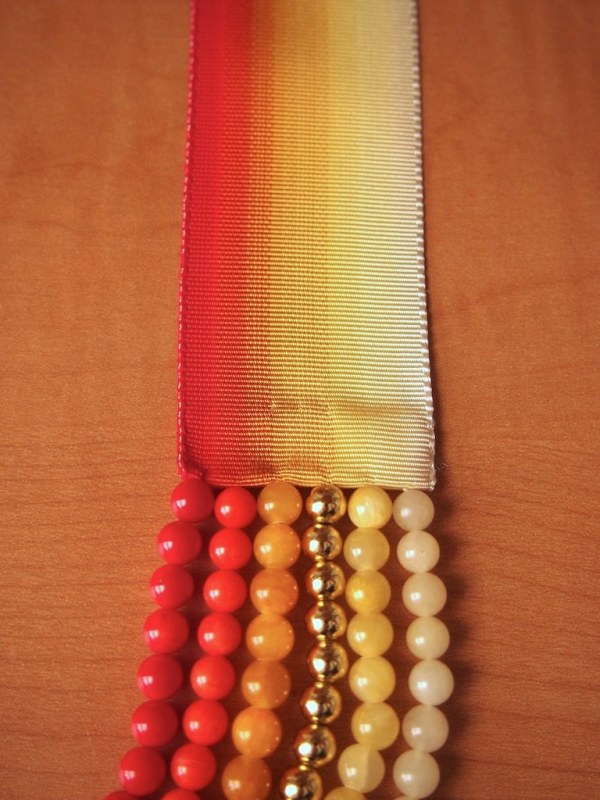
- repeat with the following colors moving from outside to inside, decreasing the length of each strand as you go.
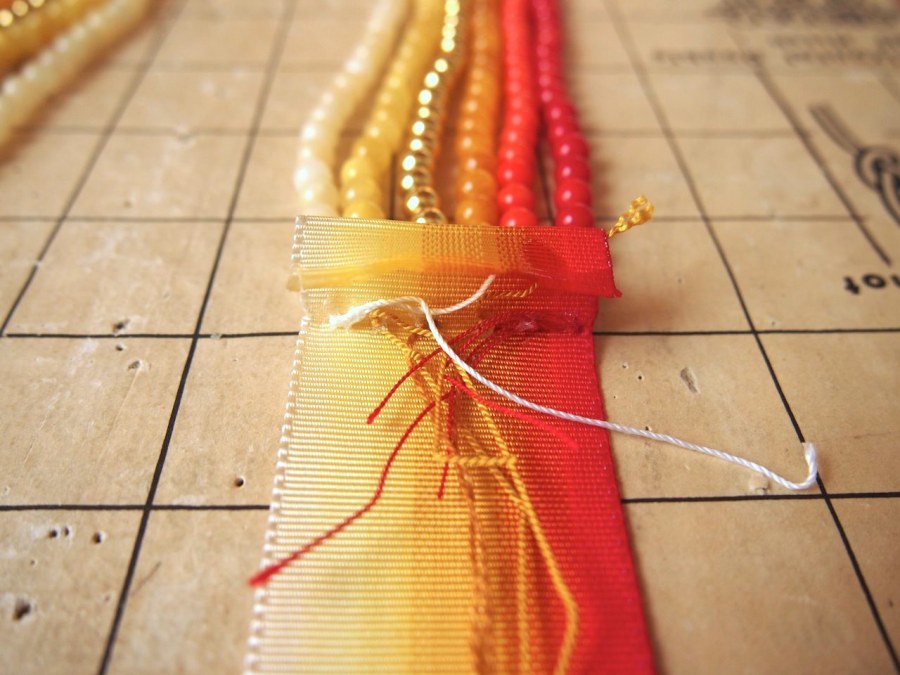
- one side of the ribbon will have all the knots from the doubled cord. add a drop of glue to each knot and push the tails in towards the center of the ribbon. let dry
- fray check the cut edges of the ribbon to prevent it from unravelling. let dry
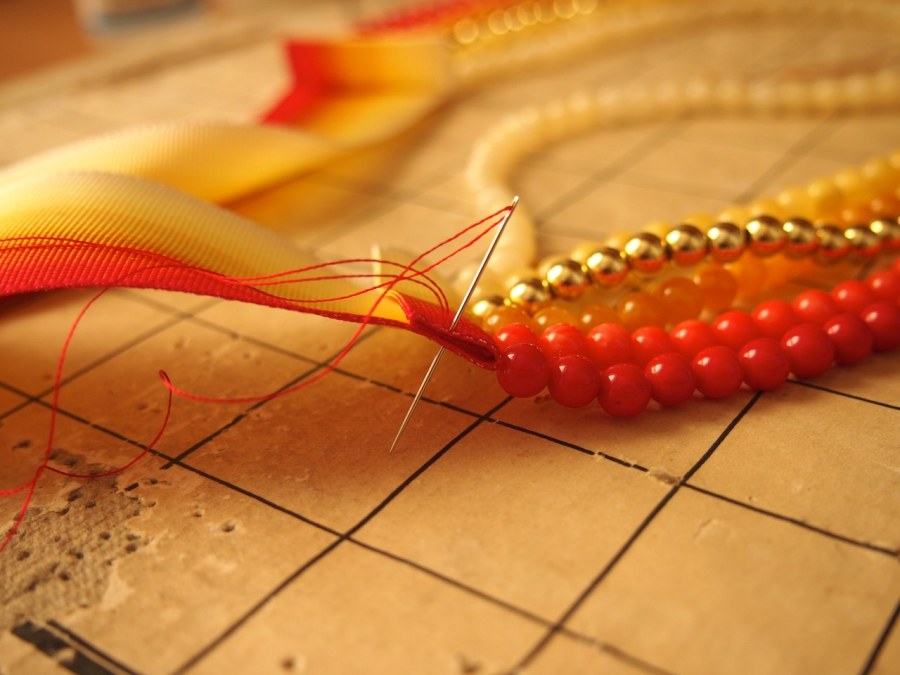
- trim the ends of the cord and fold up the ribbon to create a hem.
- starting from inside the hem, sew the front to the back vertically at the edge of the ribbon. use small, tight stitches, so they are as concealed as possible on the front. repeat on the interior side of the ribbon.
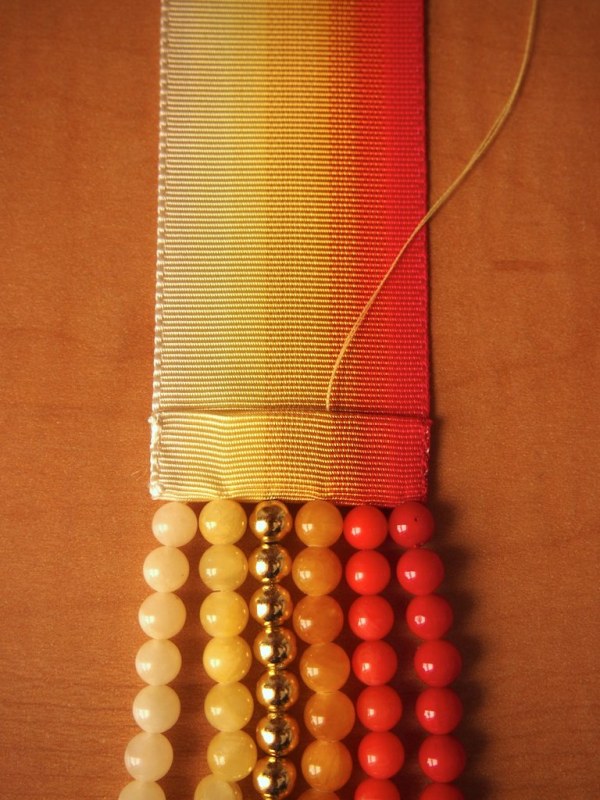
- matching your thread to the stripe colors, start from the inside of the hem and tack stitch it to the front. use the tiniest stitches so it's barely perceptible on the front. it's impossible to make these stitches invisible, but they're so much other stuff going on, that no one will even notice them.
- on the back, slide your needle under the hem's foldline so the threads are concealed.
- after stitching, tie off thread on the back side and pull through the hem to hide the tail.
- repeat on the other side.
