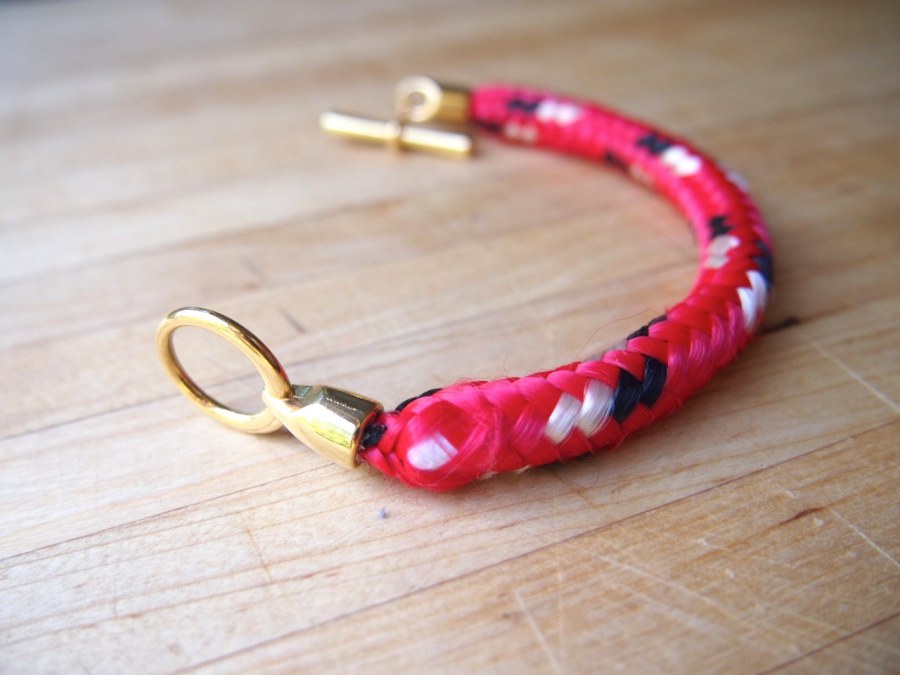
diamond braid poly rope bracelet
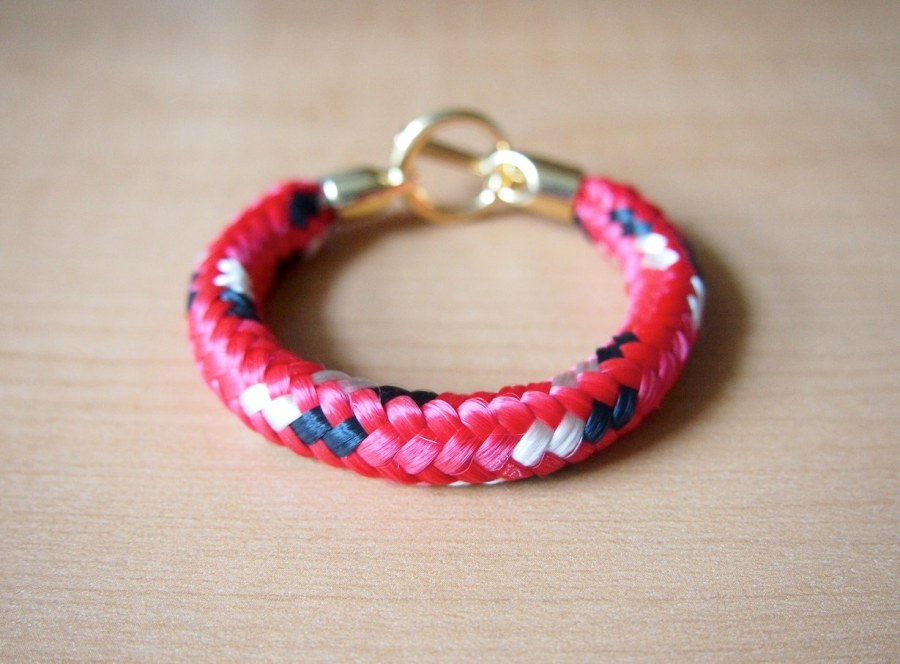
turning hardware materials into classy jewelry is easy. and fast.
during a trip to the hardware store (gathering materials for the squirrel cage), i found this poly braid rope and fell in love. it reminded me of the days when i had time to kumihimo. there were a lot of colors to choose from, but they all came in 100ft bundles, so i had to stick with 1 color. it took about 30minutes to whip it into wearable shape.
materials:
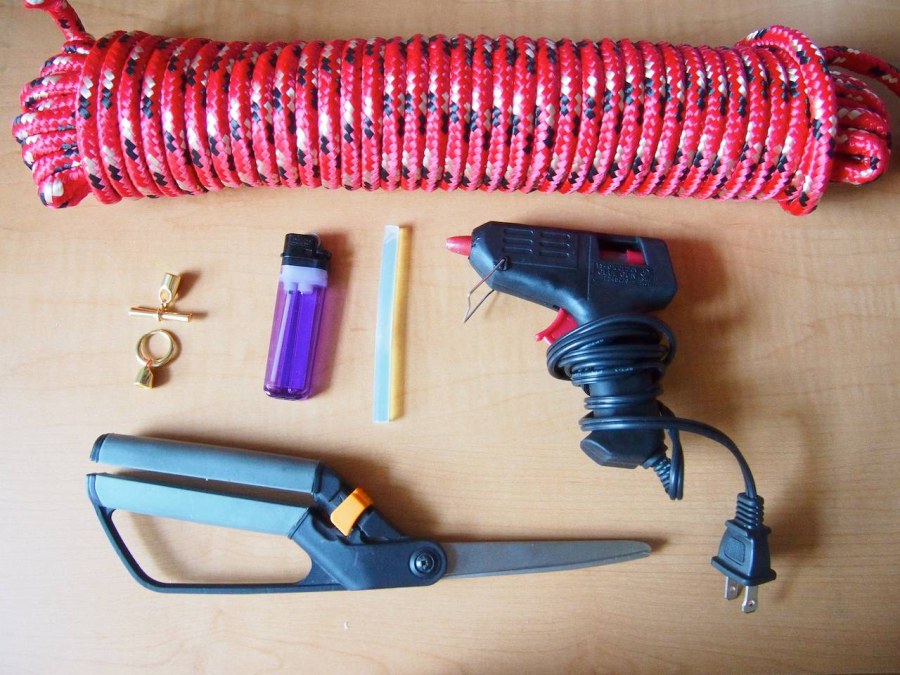
- 3/8" diamond braid polypropylene rope
(this isn't exactly the same as what i used, but you can't pick colors on amazon apparently)
- 6.2mm gold toggle clasp with end caps
- lighter
- scissors
- glue gun and glue sticks
- magna-tac glue


- heat up the glue gun and set aside while you work on the braid.
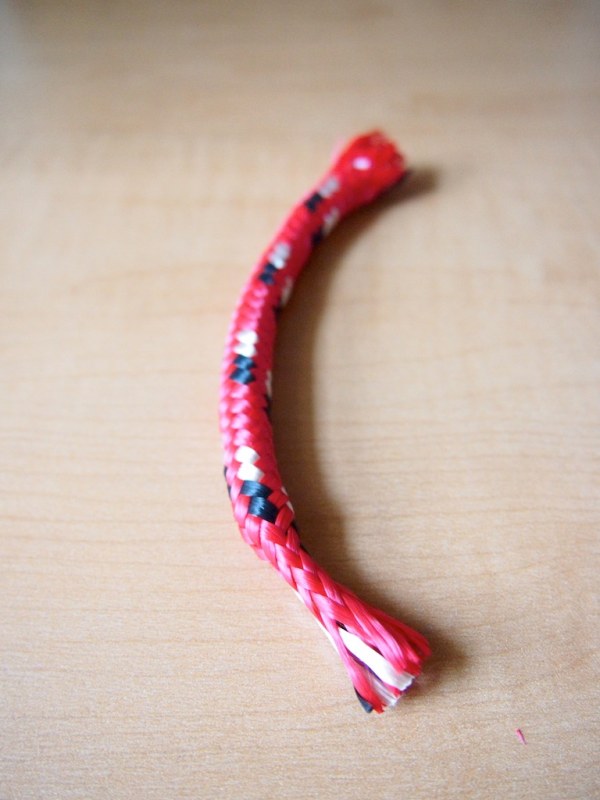
- cut a length of rope, at least 4" longer than your wrist.
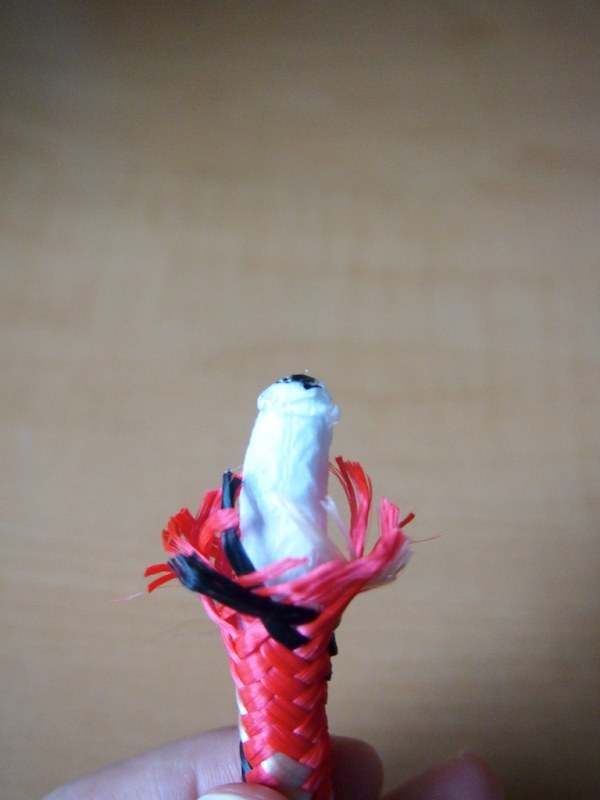
- carefully push back the braid to expose the inner cotton cording. cut 1.5" of cording off the end.
- singe the inner cord a bit with the lighter to keep it from fraying.
- add a small amount of magna-tac to the cord before pulling the braid back over it.

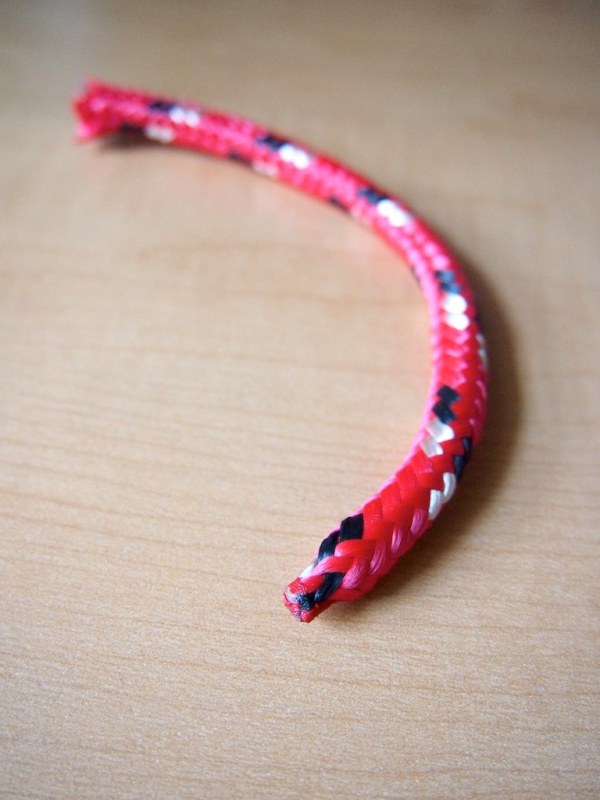
- gently pull the braid back over the cording, squeezing the spot where the cord is gone. it should collapse in on itself. let the glue dry completely.
- keeping the braid squeezed, wave a flame from the lighter just below the pinched part. don't burn it off completely, just melt the strands to prevent them from unravelling when the ends are trimmed.
- trim the ends off, leaving about 1/4". burn the ends and carefully squeeze them together so they melt together. check to see if it fits in the toggle's end caps.
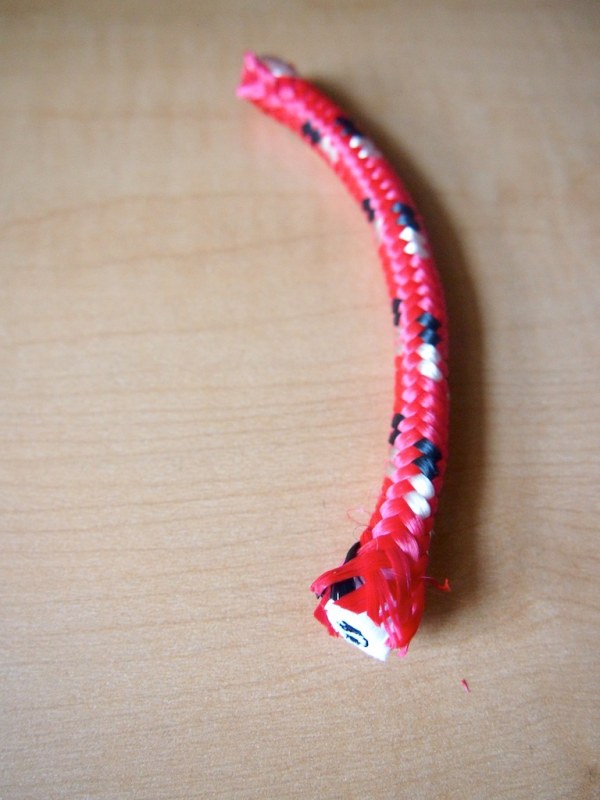
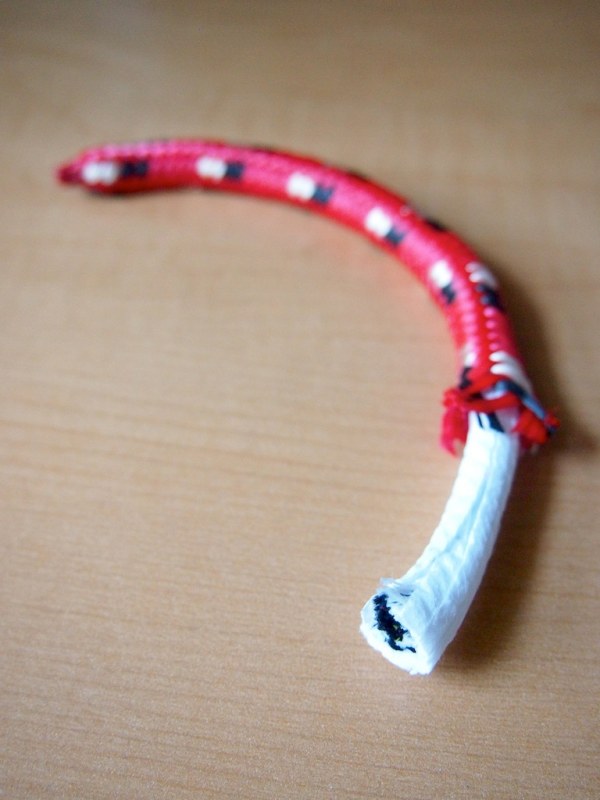
- try on the braid and check the fit. when you've marked where you want the bracelet to end, gently push back the braid and cut the cording at that point. singe and add glue as before. when pulling the braid back over the cord, try to keep the cord as tight as possible within the braid. squeeze the braid and melt as before.
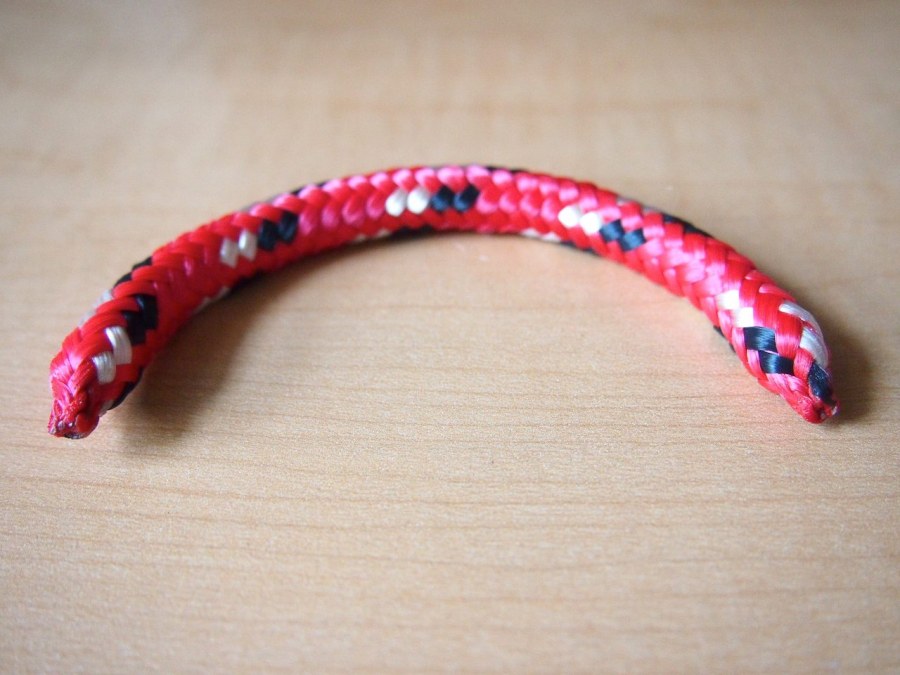
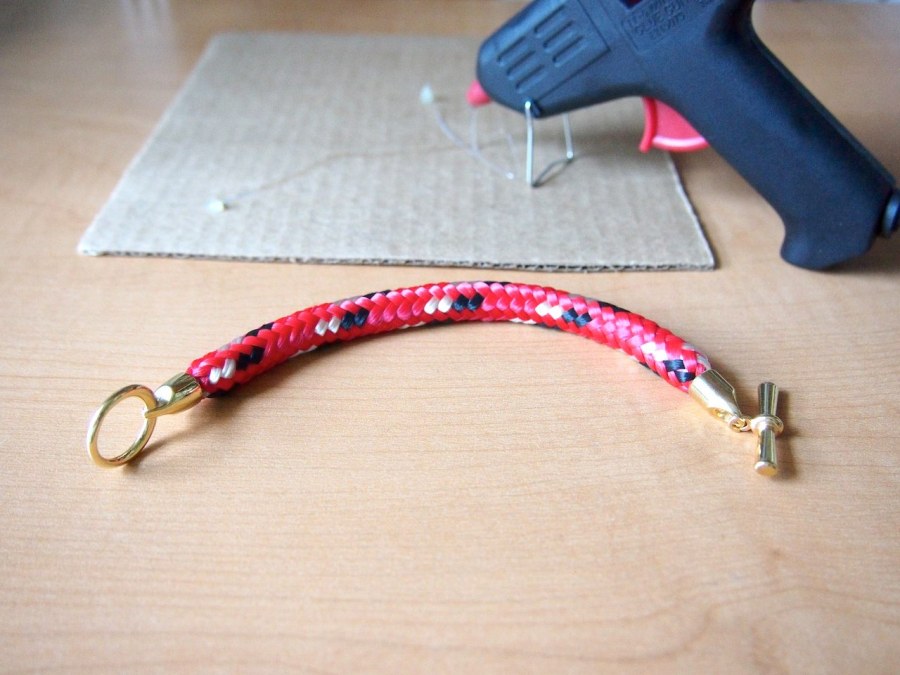
- the final rope piece should look like the one above. melted and tighter on both ends, with cording tightly fitted in the middle. it might take a few tries to get it right- you'll have 100ft on hand to work with, so don't worry.
- when the rope is ready, add a drop of melted glue to the inside of the toggle caps. quickly fit the rope into the caps, making sure that it's stuck securely.
update:
so, after a few hard wears, my bracelet started to look kind of crappy. specifically, the inner cord was showing at both ends, and fraying a bit.
that simply won't do! the solution was simple enough (meltinging and glueing the inner cord before the braid is pulled over it), so i've added it to the instructions above.
ps- if the rope you bought doesn't have a thick central cord like this one, check out the post i did for the second poly braid bracelet and see if that doesn't do the trick.
