mice: needle case and pincushion
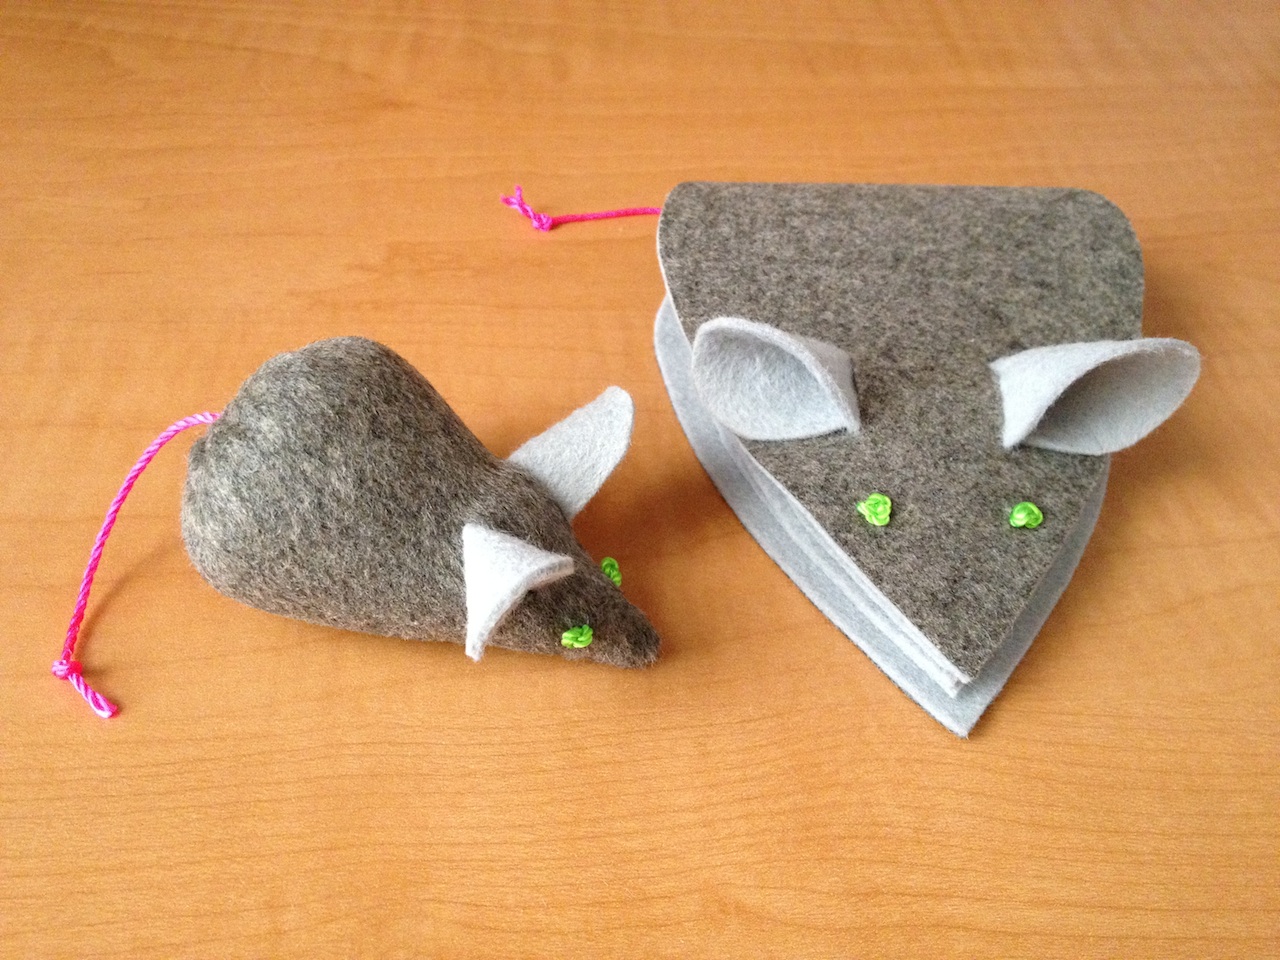
a few years ago, i received a beautifully embroidered handmade needle book and pincushion set for my birthday. it was a perfect present, and i was very touched by the thoughtfulness of this well crafted gift. having run out of time for a sewing enthusiast's birthday present, i whipped up some mice in a jiffy.
mouse needle case
jewelry needles are long and delicate. if you don't store them properly, they look like this.
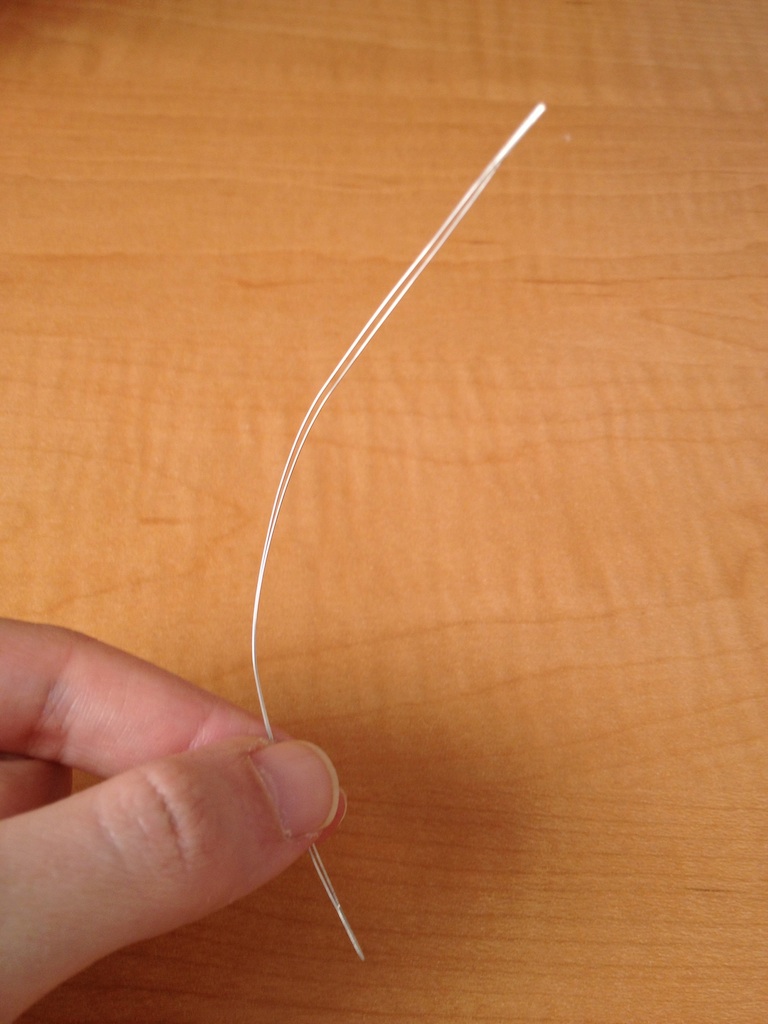
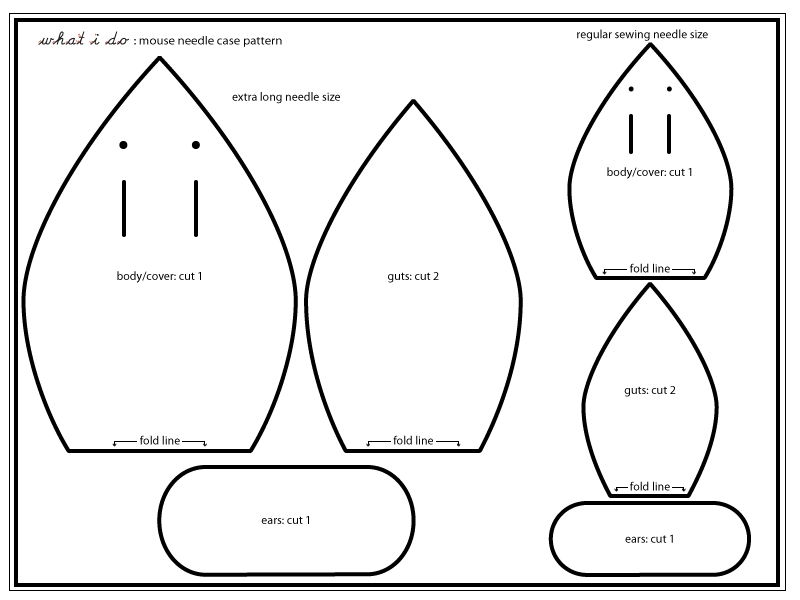
the needle case in the photos is much bigger than one for regular sewing needles, to accomodate jewelry needles and avoid further catastrophe. the pattern below has both the regular sized sewing needle case, and also the larger jewelry needle case in the instructions.

materials:
- thick felt
- thinner weight boiled wool: optional. entire case could be made out of thicker felt. it's important the the fabric won't fray when cut.
- fusible interfacing such as (Thermoweb 17-Inch by 5-Yard Heat'n Bond Ultra Hold Iron-On Adhesive
)
- embroidery floss/ cord/ thread
- scissors/ exacto blade/ needles
- pencils/tailor's chalk
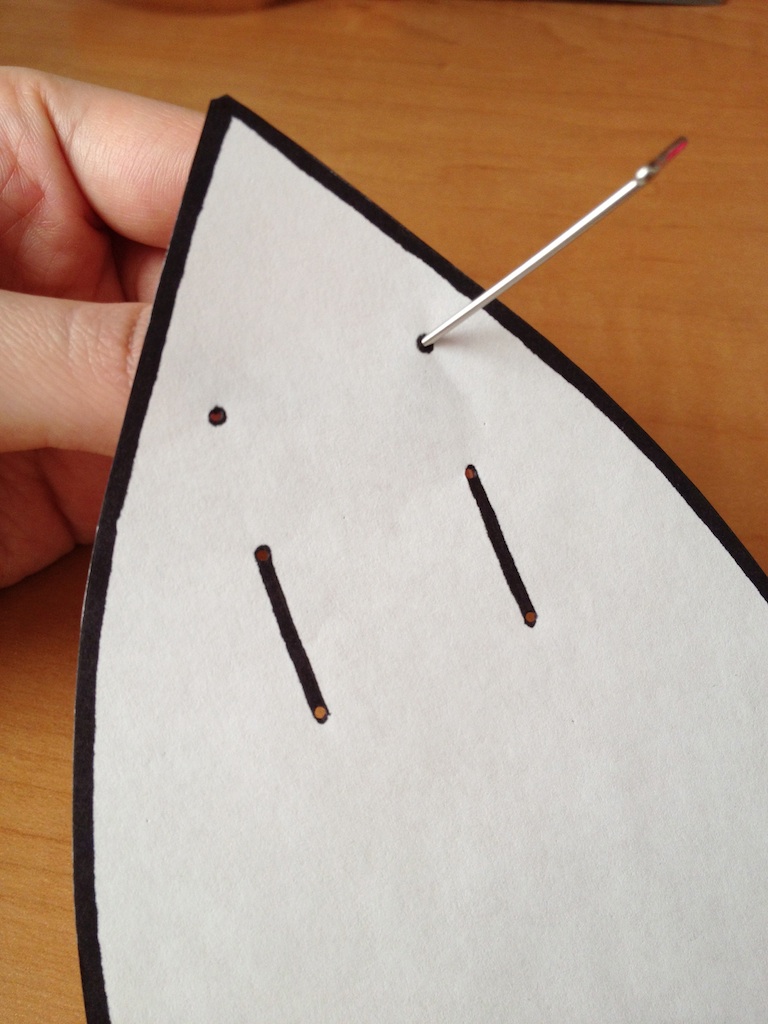
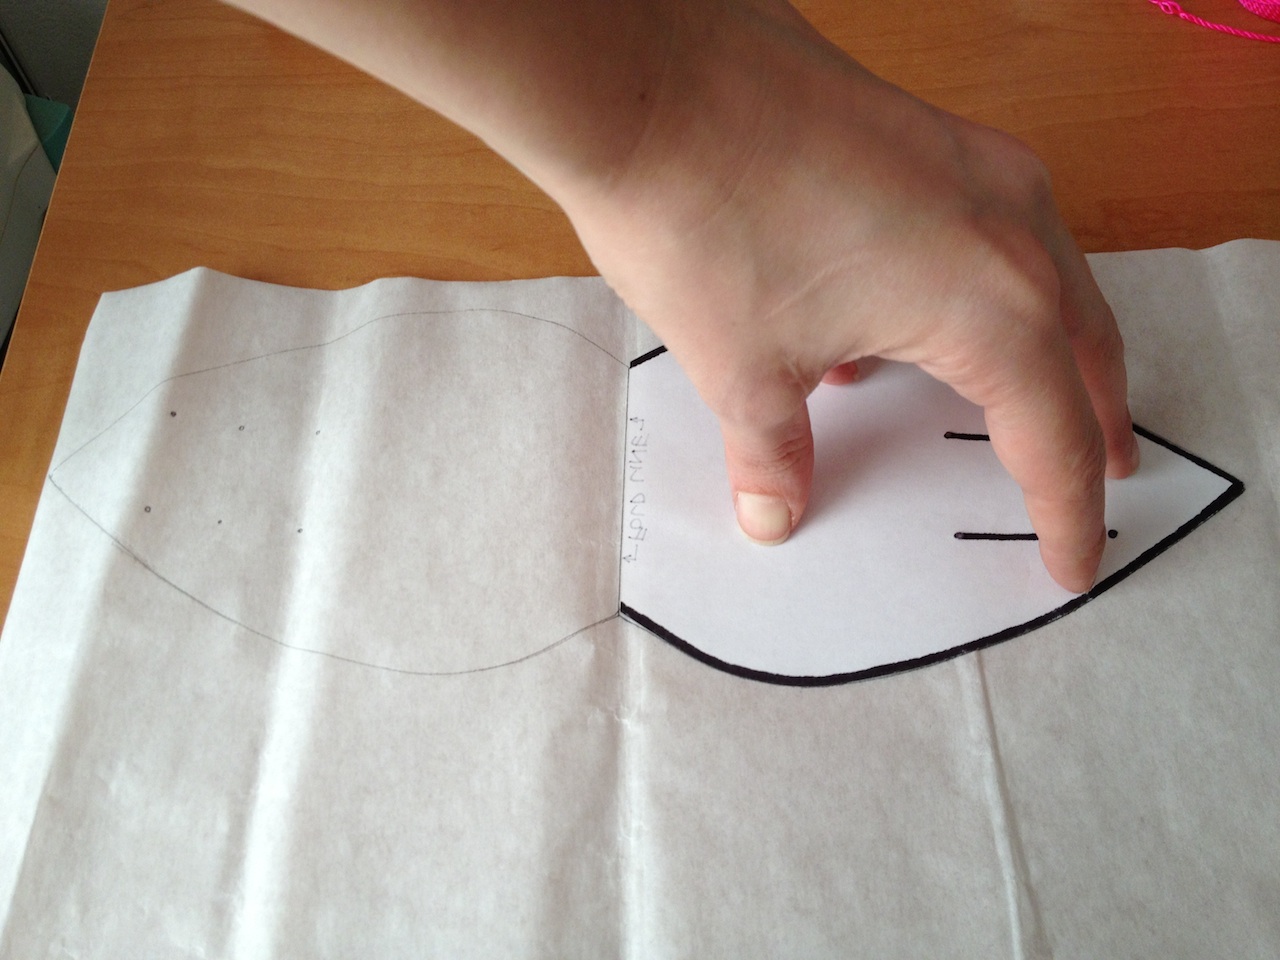
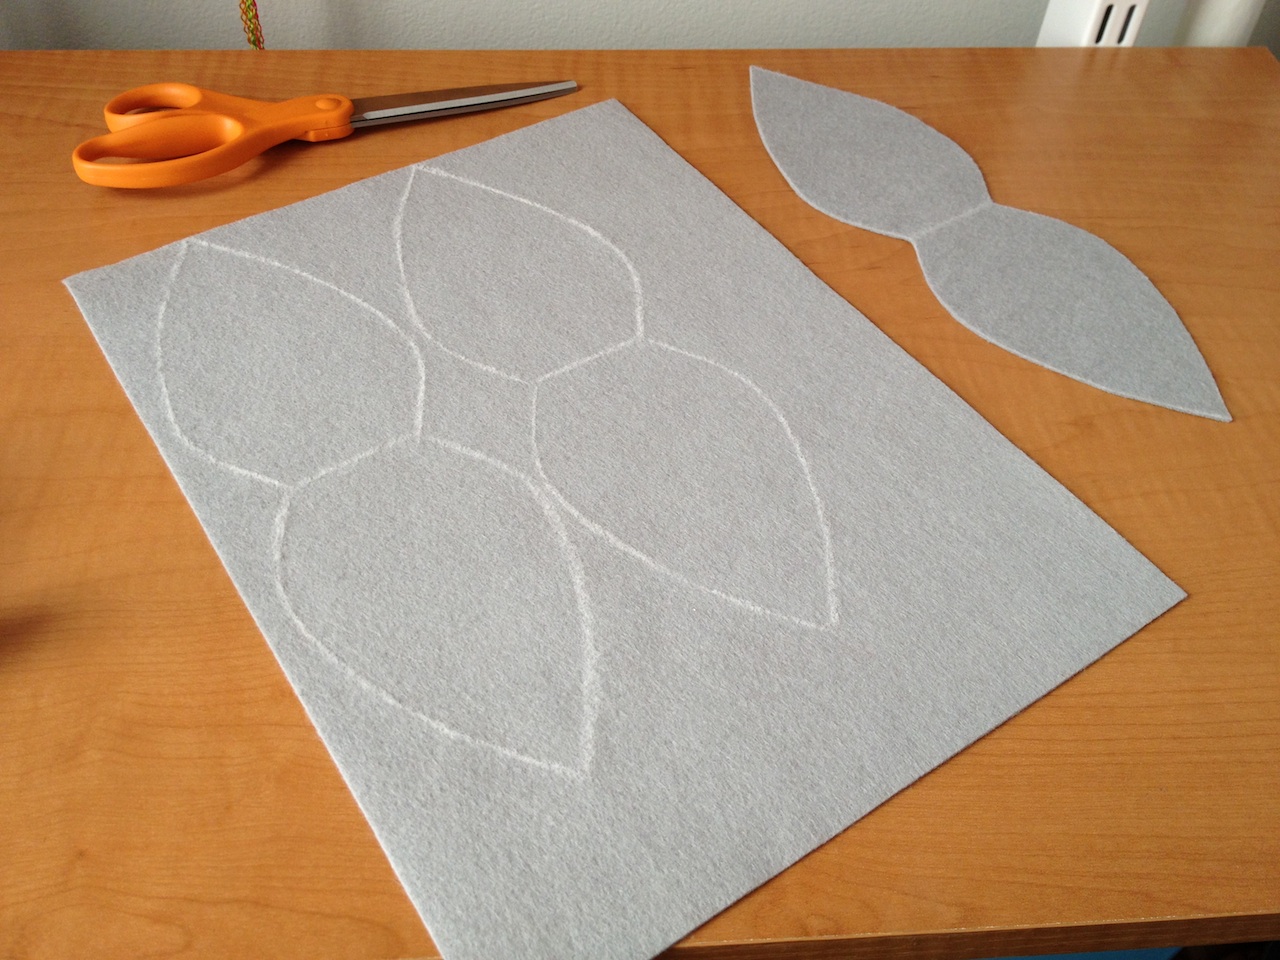
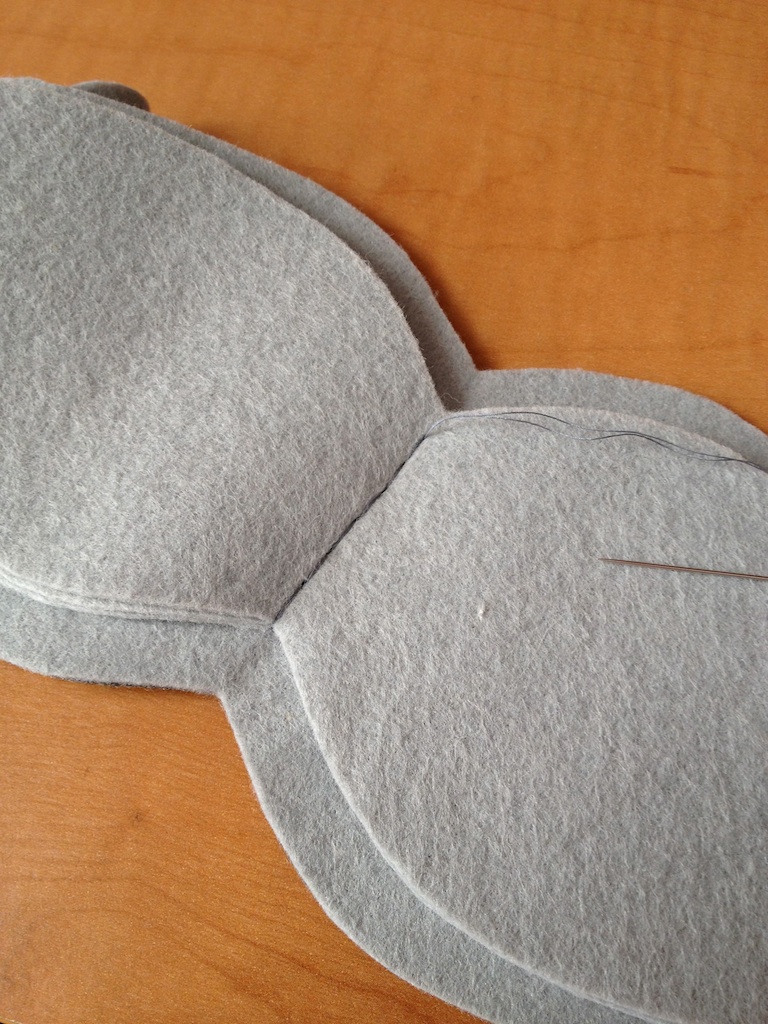
with a sharp pin, poke the markings for the eyes and ear slits. trace pattern onto paper side of fusible interfacing marking eyes and ears. flip pattern and trace other side matching up the fold line.
![]()
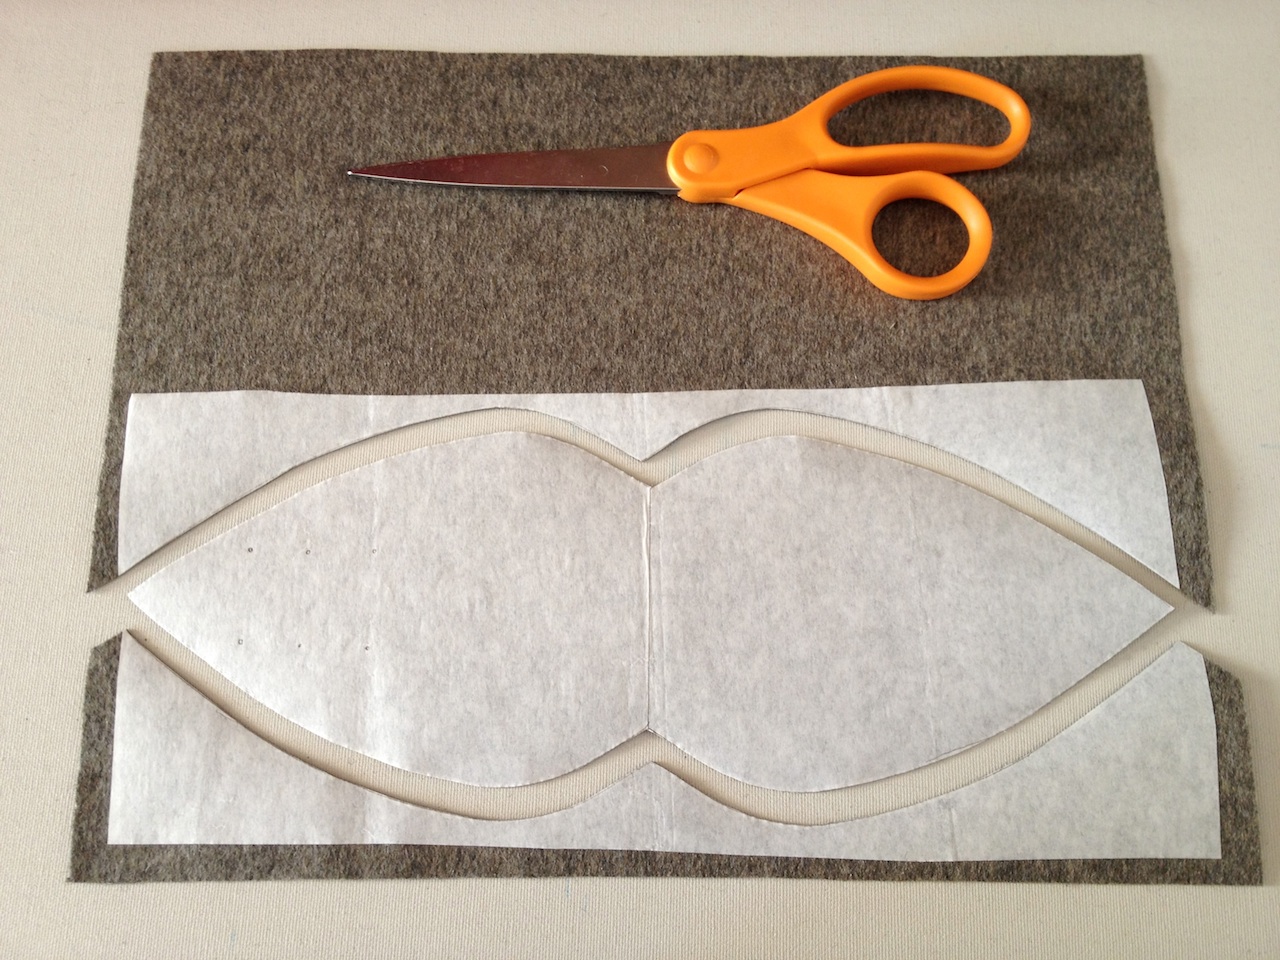
place glue side of interfacing on the wrong side of body fabric. press on low heat. cut out body from backed fabric

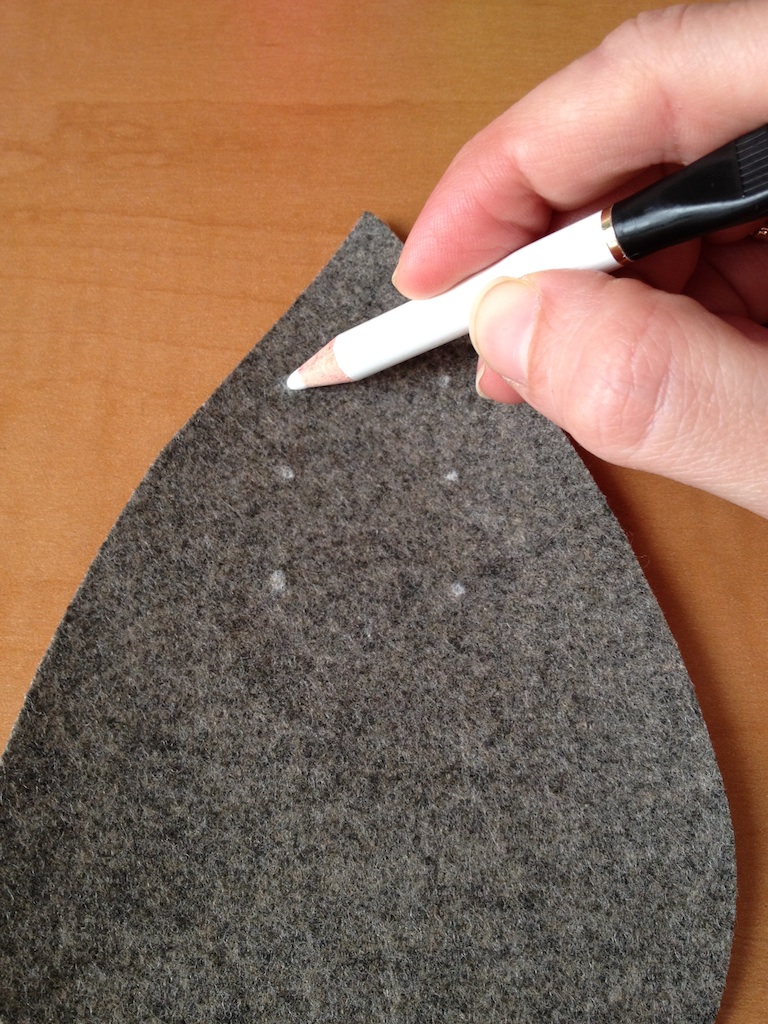
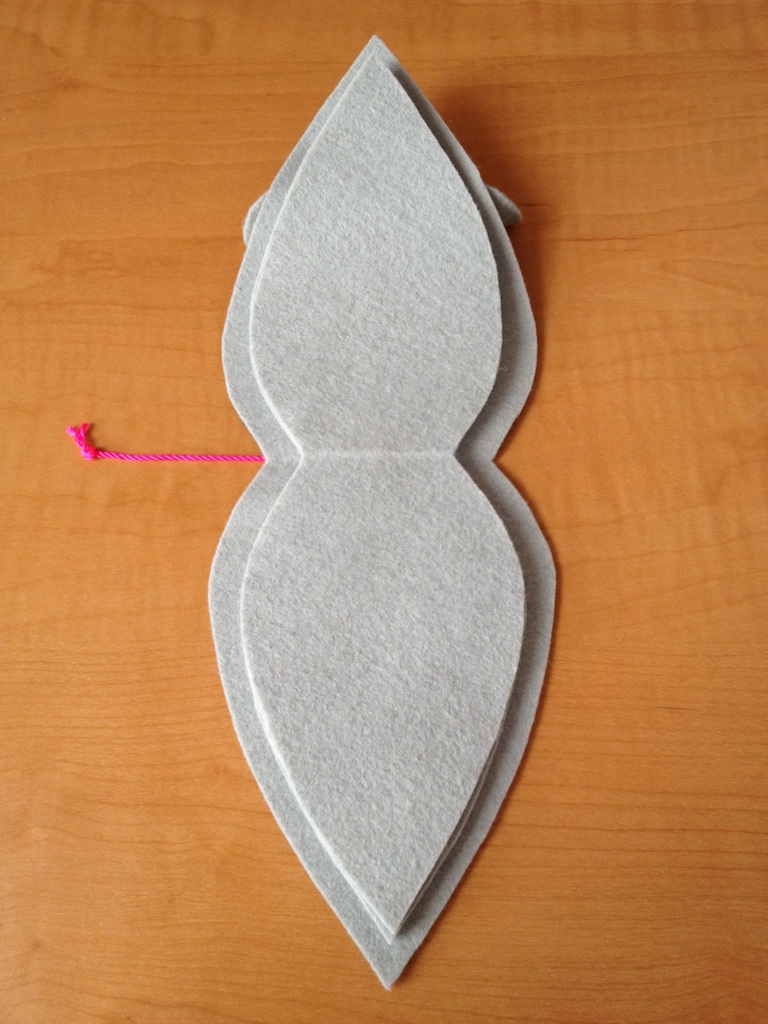
using a sharp needle, poke through to the outside of fabric. mark these locations for the eyes and ears.
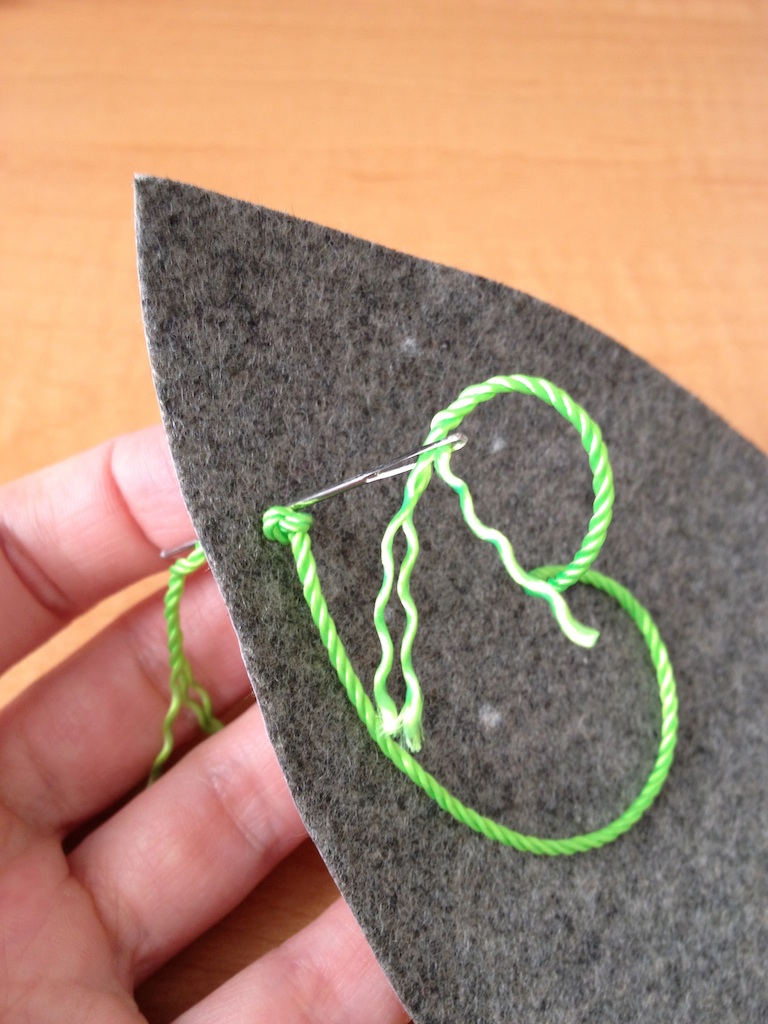
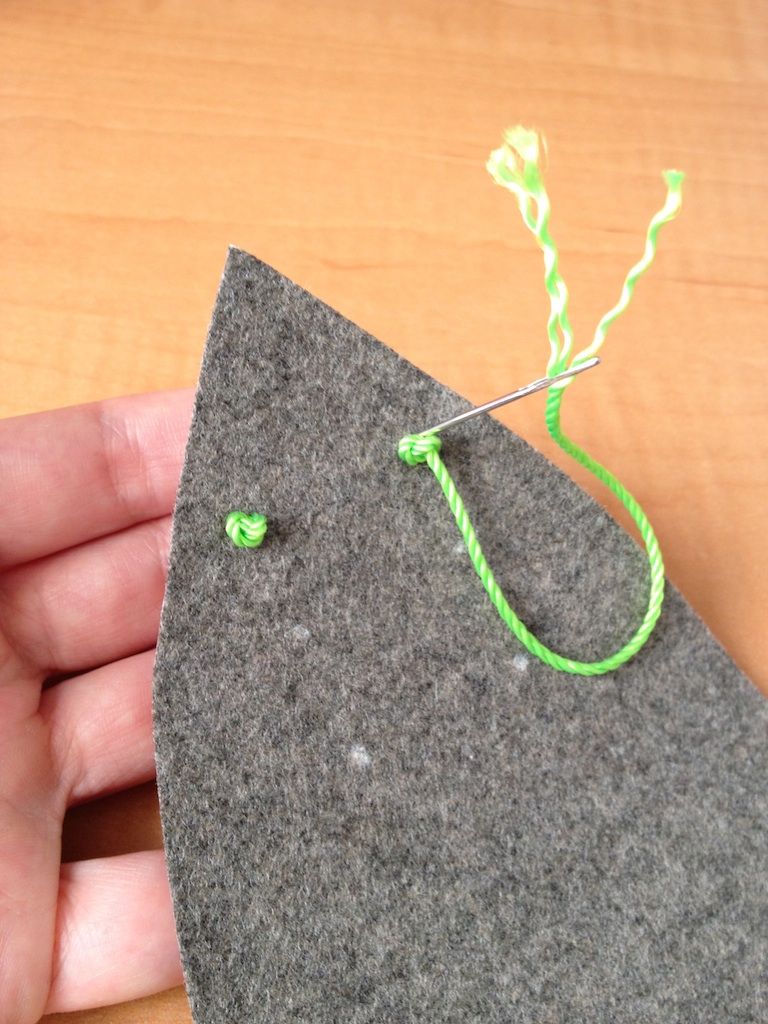
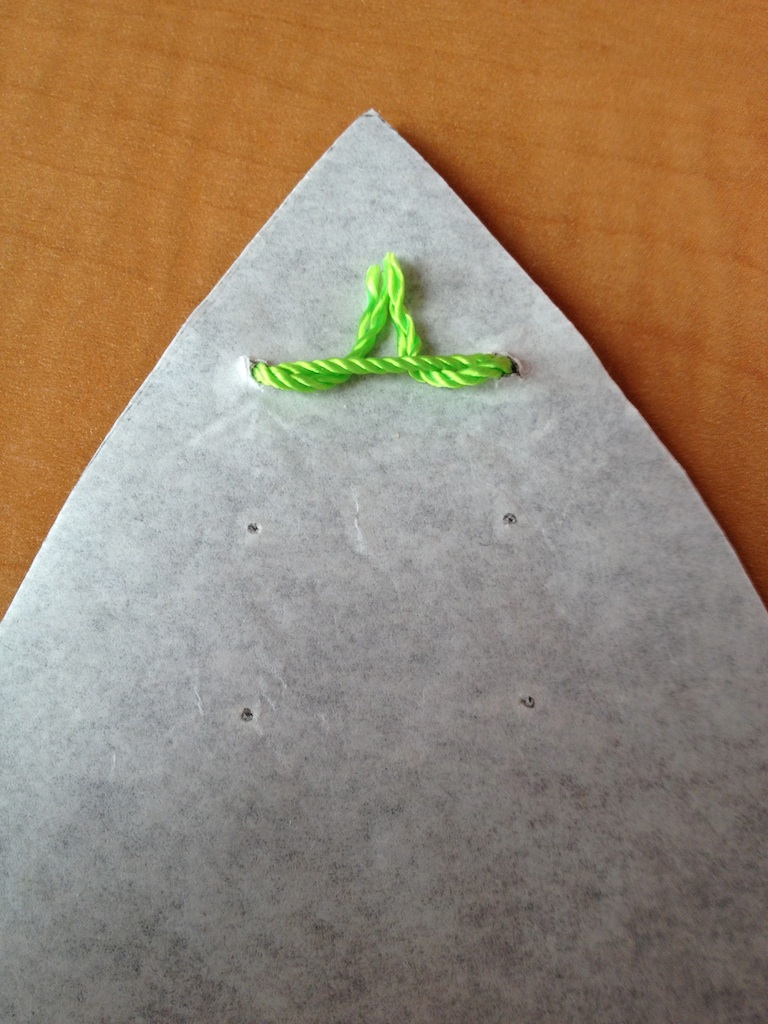
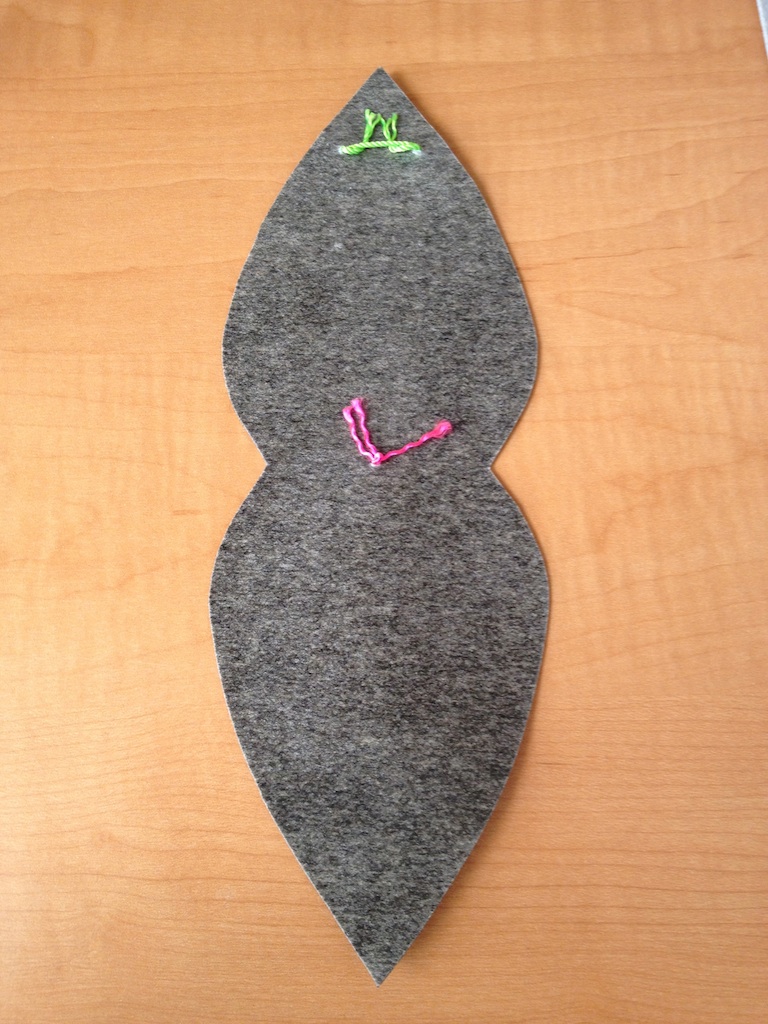
start 1 eye by bringing the needle through the fabric to the outside and tying a knot. bring thread back through the same hole and cross over to the other eye marking. knot the same as before, and bring the thread back through the same hole. tuck tails under the floating thread on the back side and cut.
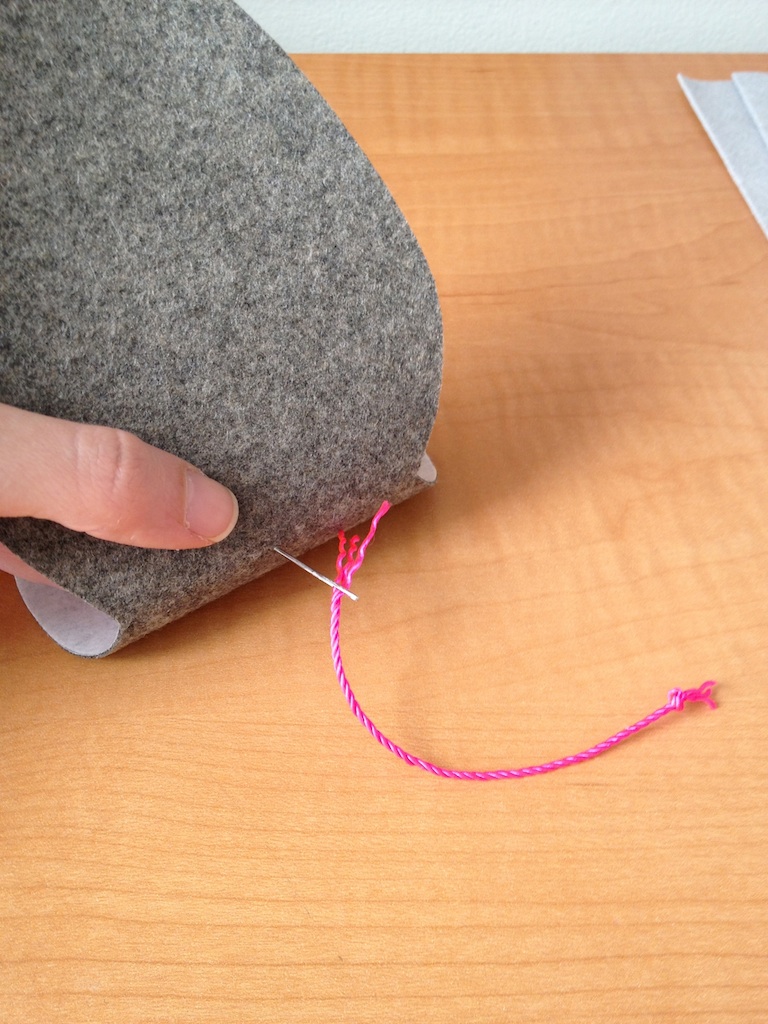
tail is made from knotted embroidery floss or cord (note: cord used in photos was very hard to work with). a drop of glue has been added to the knot to prevent fraying. pull opposite end of tail through the body fabric, and tie off.
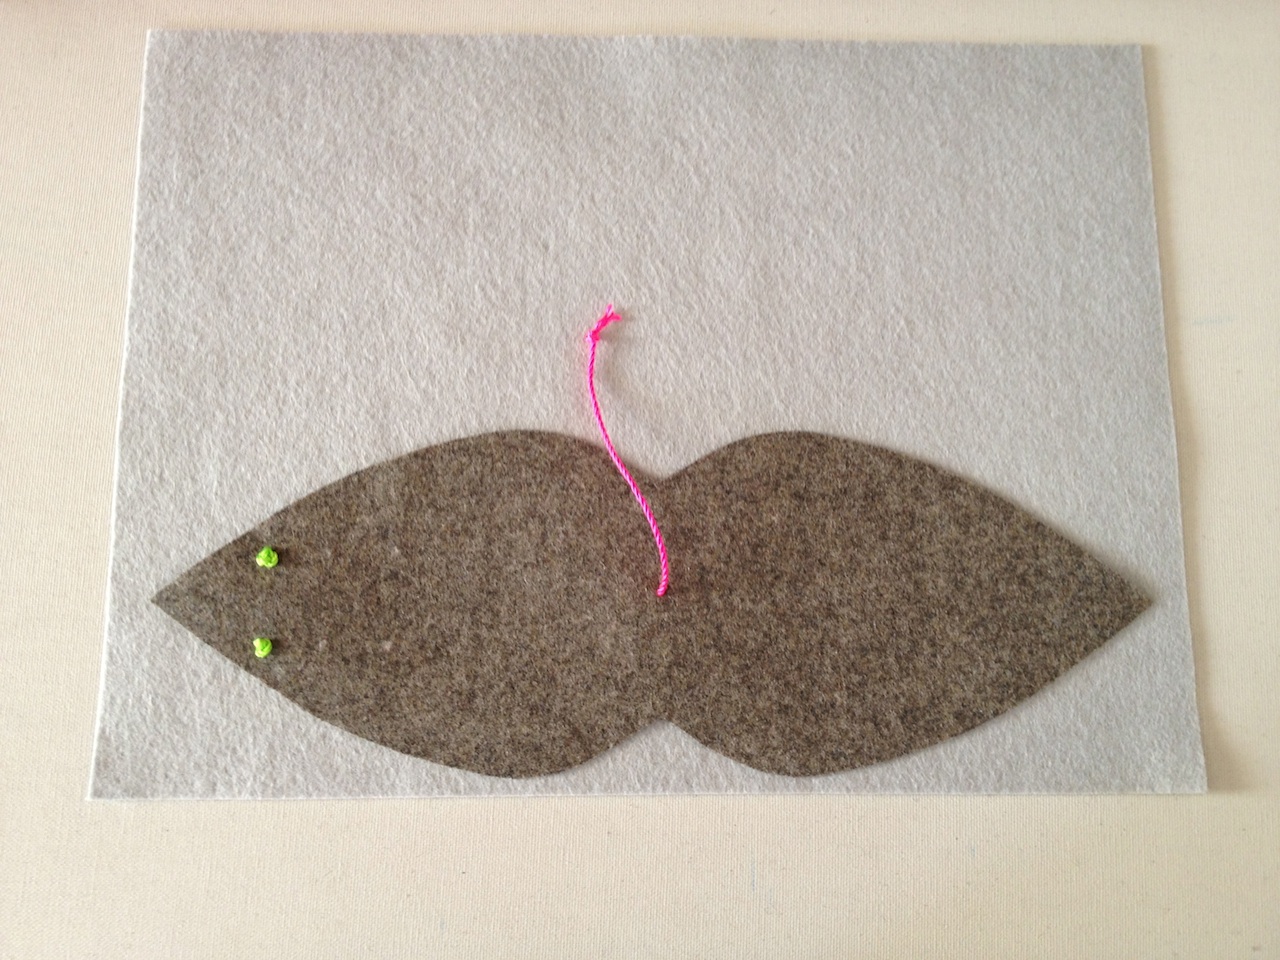
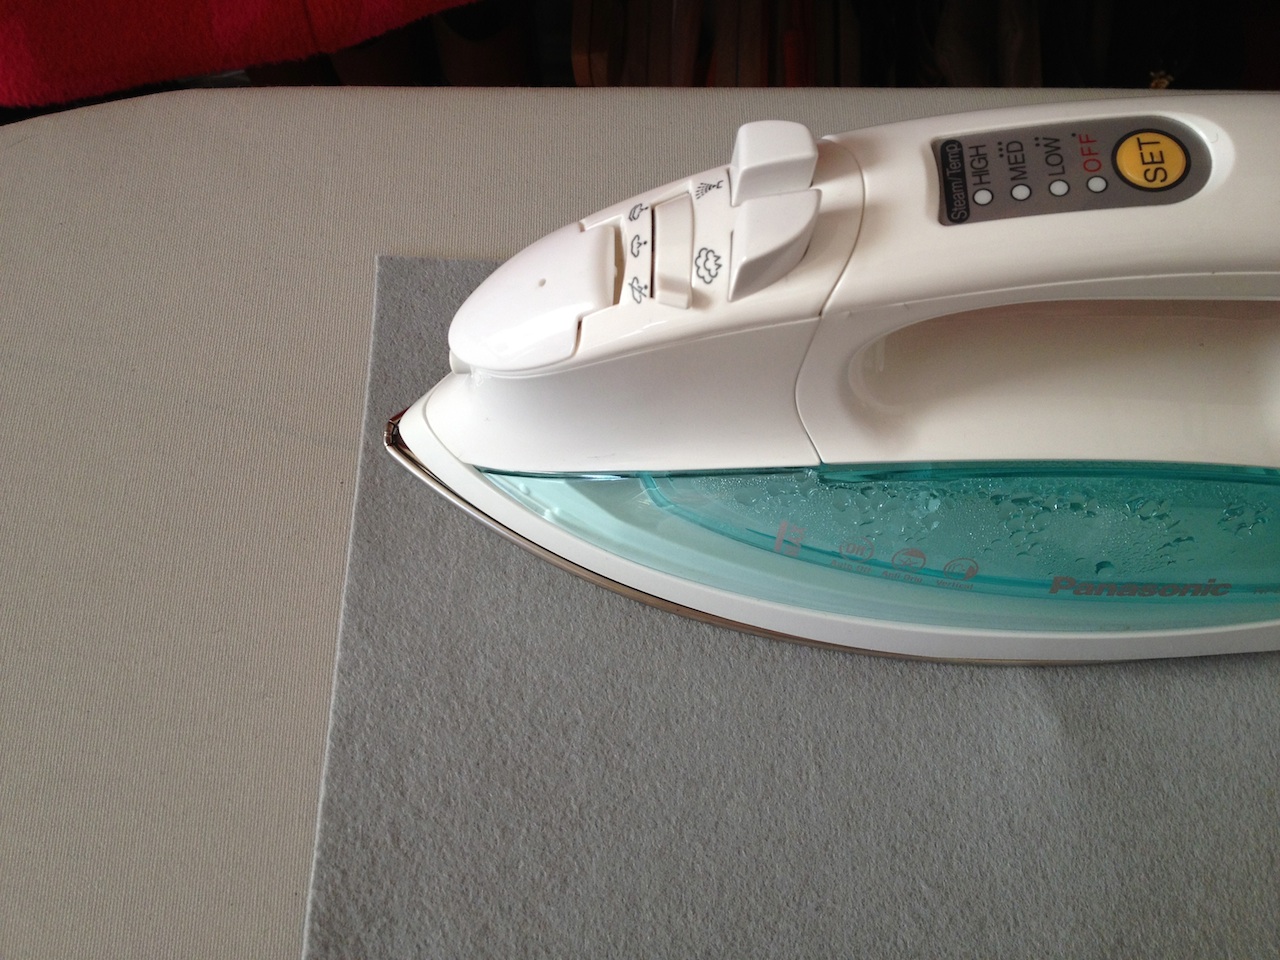
peel away the paper backing from the body fabric. place this face up on a piece of felt. press on low, gently. then flip the piece over, and press thoroughly.
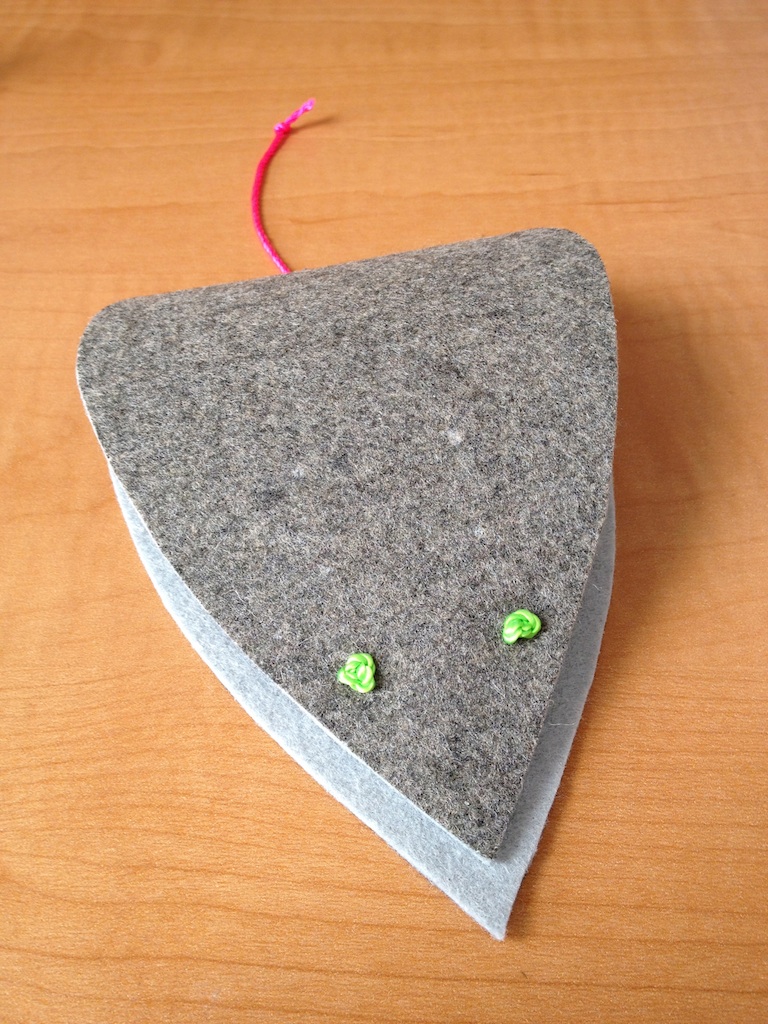

cut out felt and admire your needle case cover. mark ear slits with tailor's chalk or pencil. place cover on cutting surface and cut slits with exacto blade.
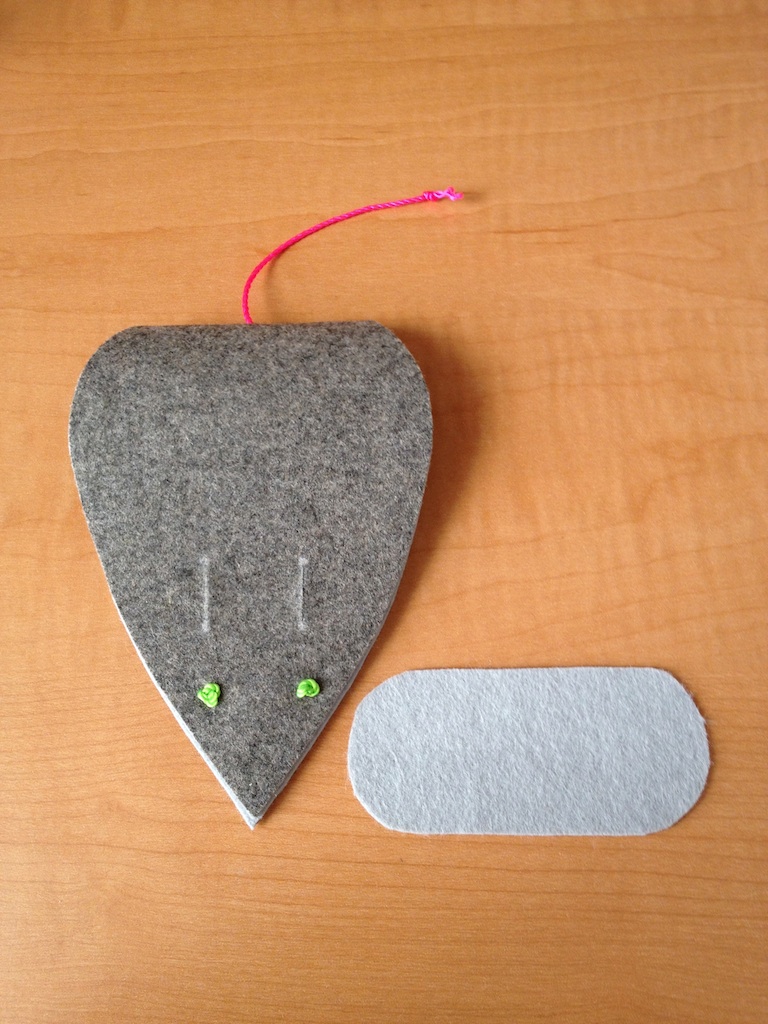
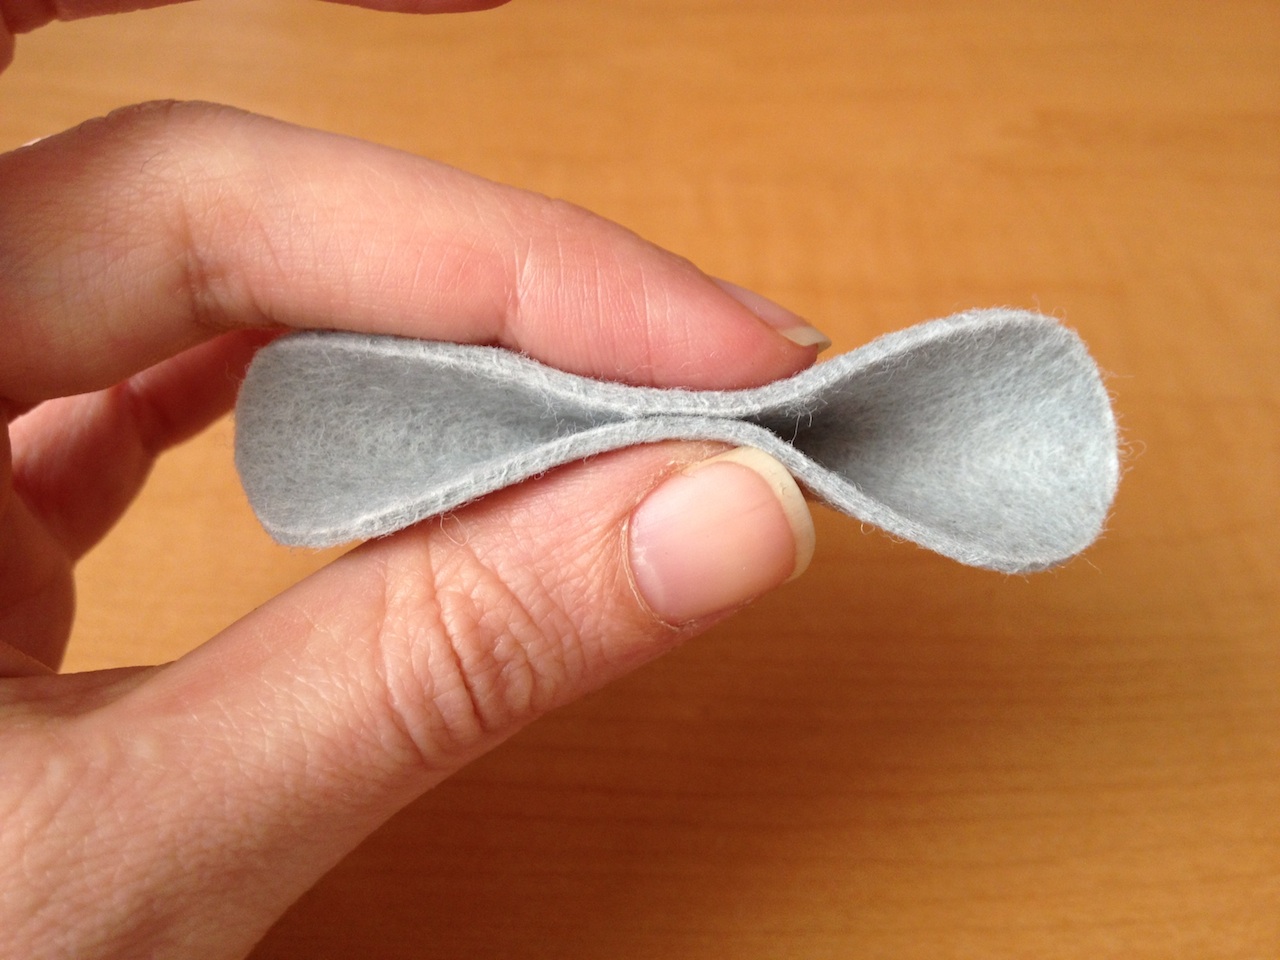
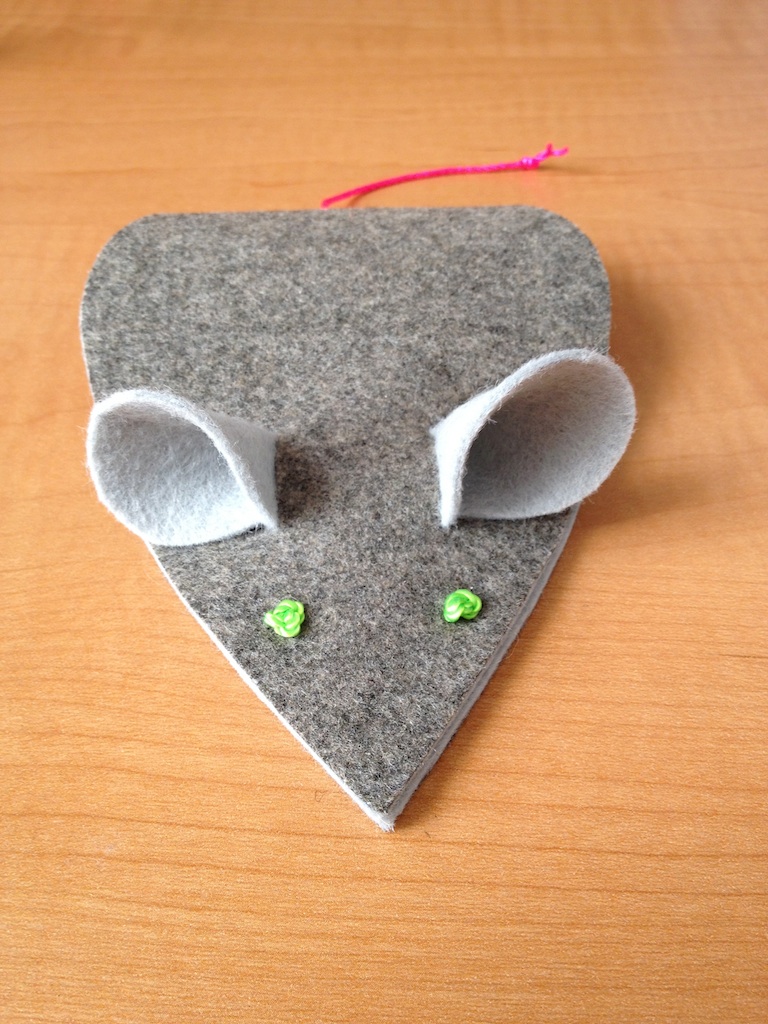
trace pattern for ears on felt and cut out. fold in half lengthwise and slide through slits in body.

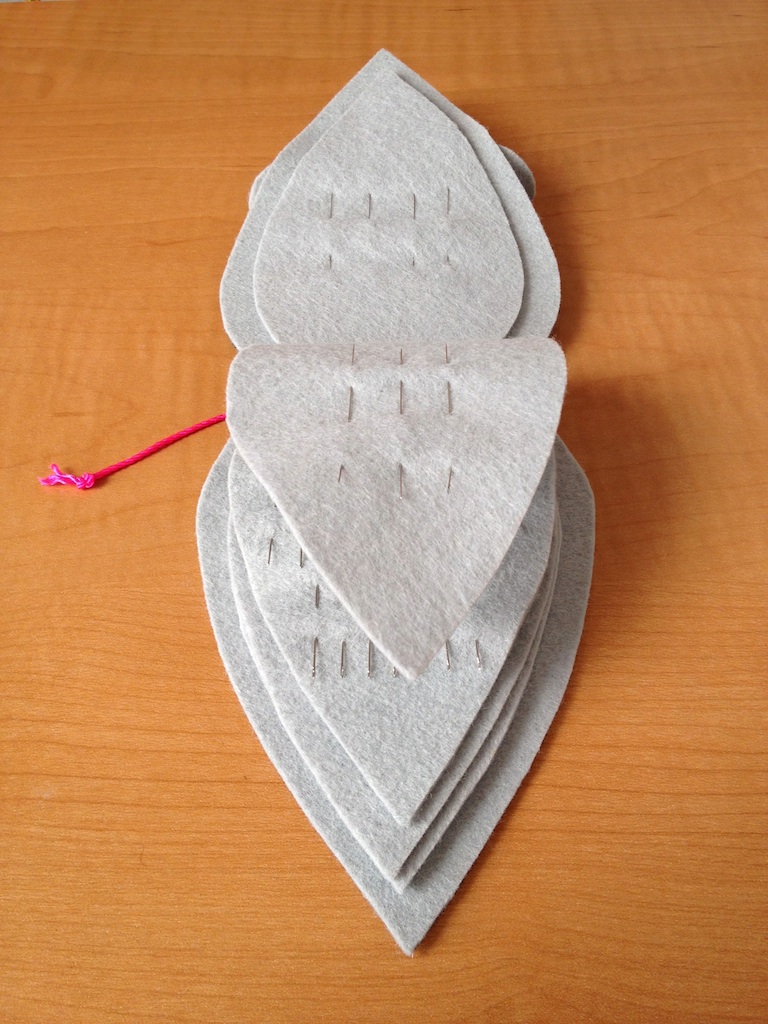
let's give him some guts! trace the guts pattern onto the felt: the same as the body, flipping pattern at fold line. (note: sample made has 3 pieces, but it was very thick. definitely could've gotten away with 2) stack pages inside cover, centering at the fold line. using a basic running stitch, go through all layers in one direction and the other to secure.
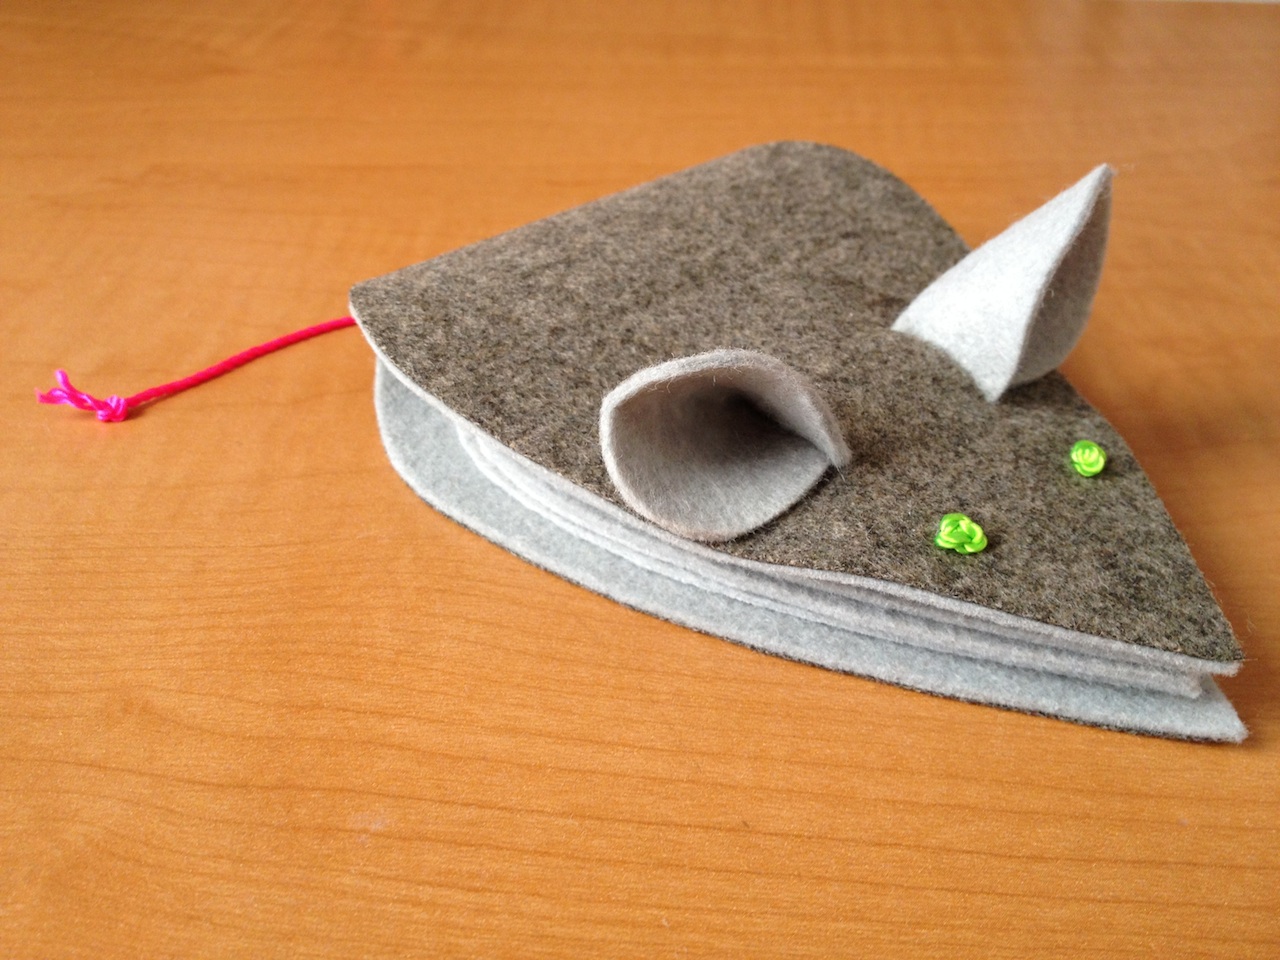
fill him with needles and fall in love! better yet, make him a little friend. come back tomorrow for instructions on how to make his buddy!
