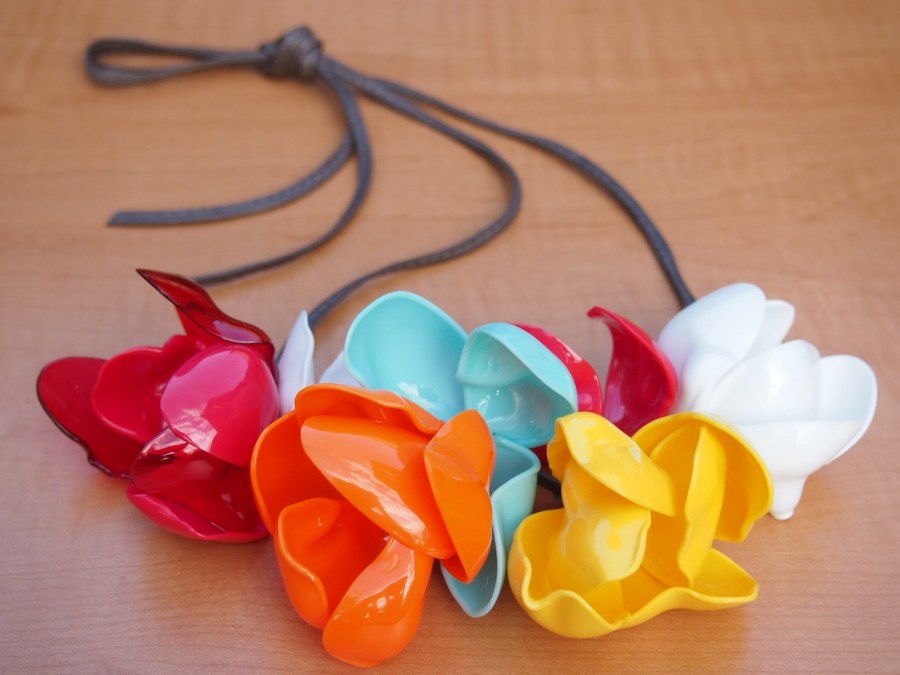
spoon flower necklace
clever cutlery.
this plastic spoon rose tutorial has been tempting me for awhile. but what would i do with it? i wanted it to be a little softer and less rose-y. the answer eluded me until i picked up a hot marni for H&M necklace.
this was the construction i was looking for. oh marni, you clever devils. the answer is so simple. melted spoon petals stitched to leather loops and strung on cord. of course!
spoon petals:
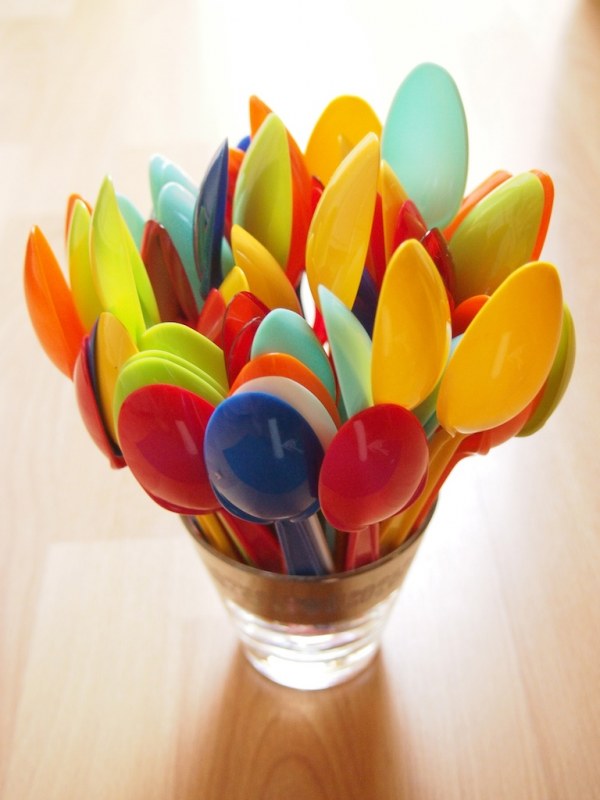
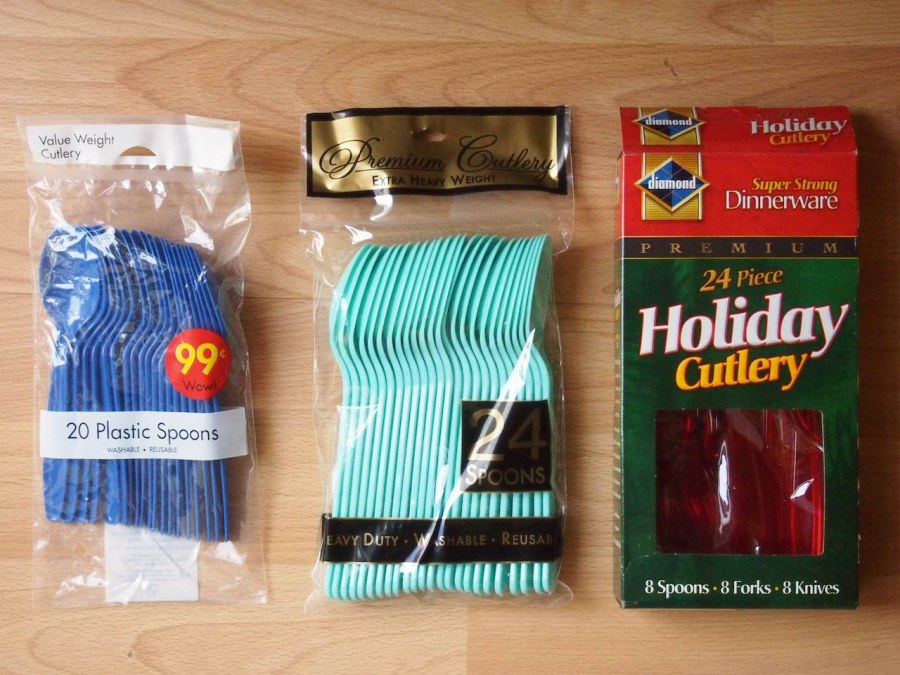
party city provided an overwhelming selection of color options, and although i went in thinking of 2, i ended up with 7. white, red, and royal blue are "value weight". orange, yellow, aqua, and lime are "extra heavy weight". the clear red were left over from a party ages ago and don't specify weight. they all melted differently, and at different speeds.
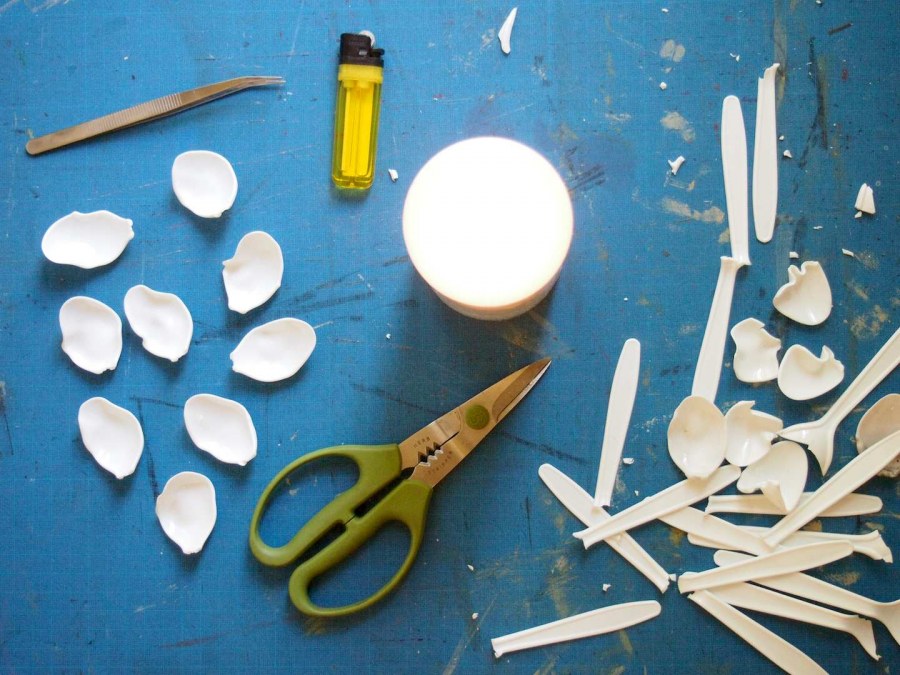
- using very sharp gardening shears, or wire cutters, cut the handles off the spoons.
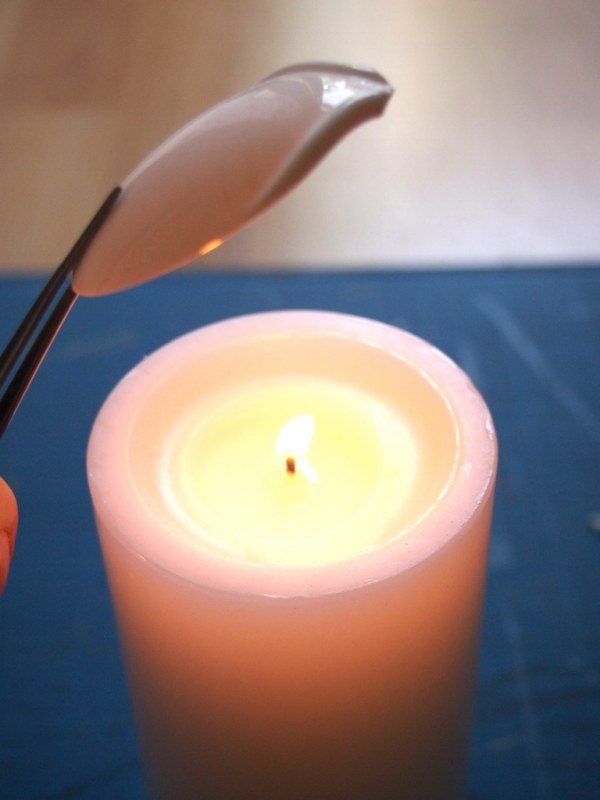
- with long tweezers, hold the tip of each spoon and hover over a lit candle. don't get too close with the spoon, or it will turn black. wait a moment and it will start to melt rapidly. try to shape as best you can (it will dictate it's own shape regardless). let cool, while melting more spoons. this necklace used 33 spoons.
- drill a hole in each petal, at the end where the handle was. i used a hand drill with a 1/16 drill bit.
at this point i feel compelled to say that i have no idea what kind of toxins this releases. there was no smell, and no smoke, and i'm not drooling on myself more than usual, but clearly use your own judgement when melting plastic. and do it in a well ventilated area, please.
stitch the flowers

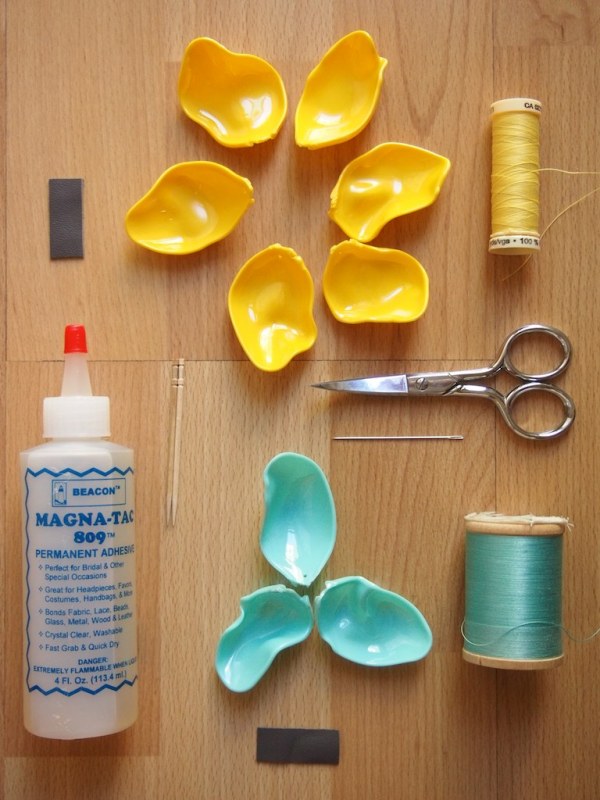
- leather cord and flat leather trim (i bought these at leather impact in nyc)
- nail polish that matches the leather color (or slightly darker)
- thread that matches the flower colors
- sharp needle, sewing scissors
- glue
it took a long time to figure out how to stitch these together. trying to explain it in words is very confusing, so i'm going to let the photos do the talking:
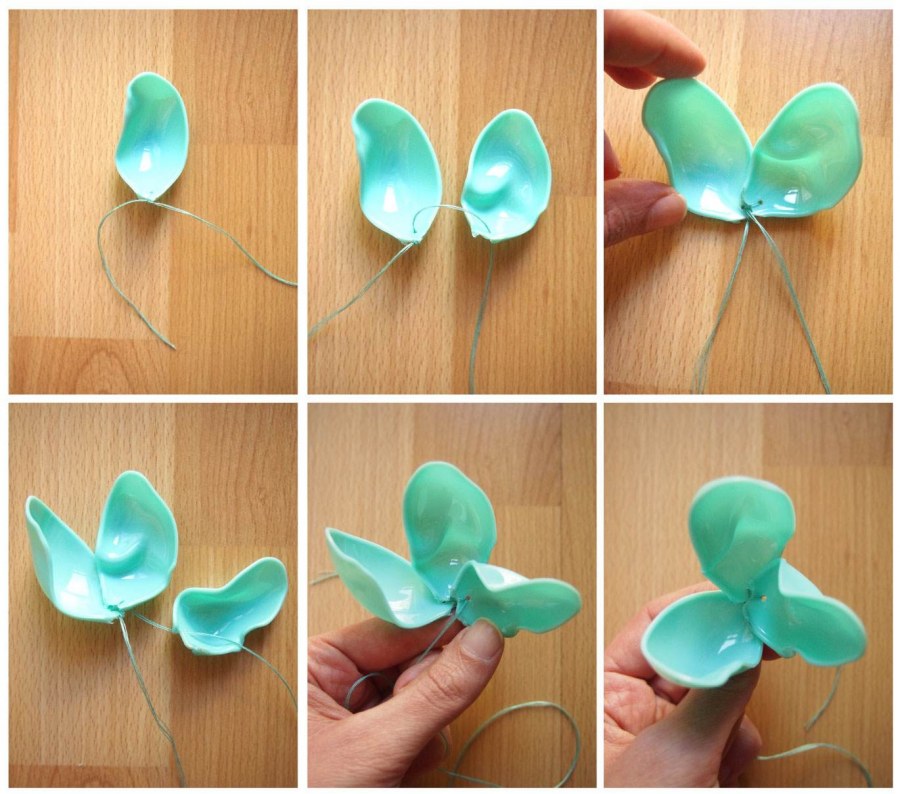
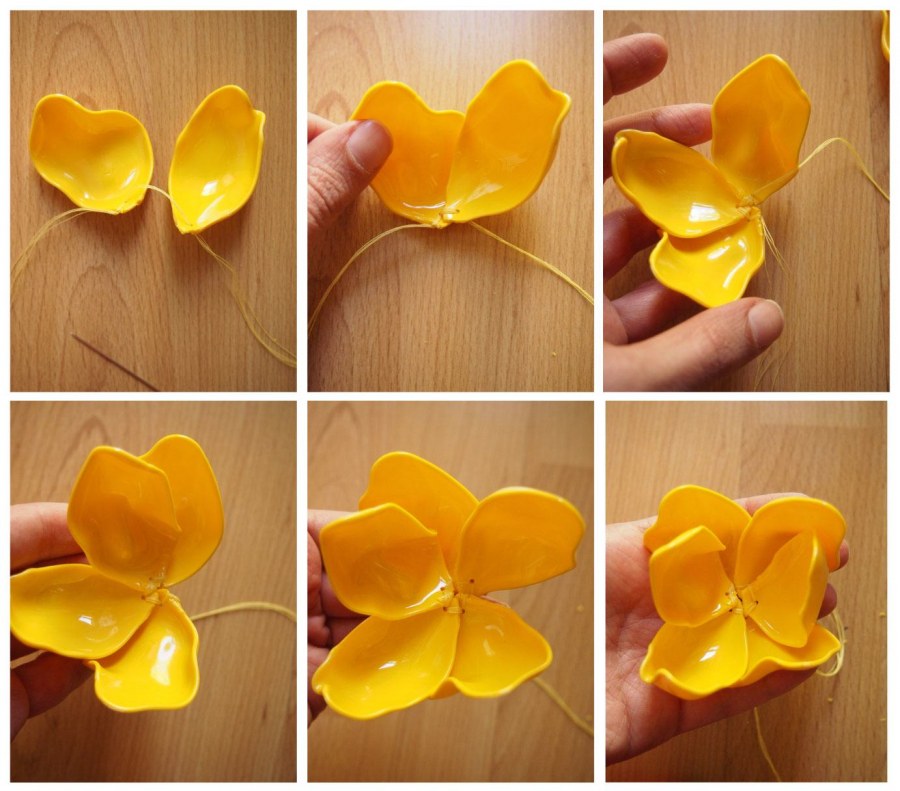
when you've stitched the last petal in the flower, bring the needle and thread back though the first petal. this will pull the petals into a circle. double knot the thread with the tail left at the beginning.
tips:
- keep the thread super tight as you go along. this prevents them from sliding all over the place.
- be thoughtful about how you overlap the petals: larger, less melted petals on the outside, more melted on the inside.
- don't get frustrated. the first flowers were pulled apart multiple times before i got the petals to lay properly. the order that you stitch them together makes a big difference. once i got the hang of it, the rest of them came together quickly.
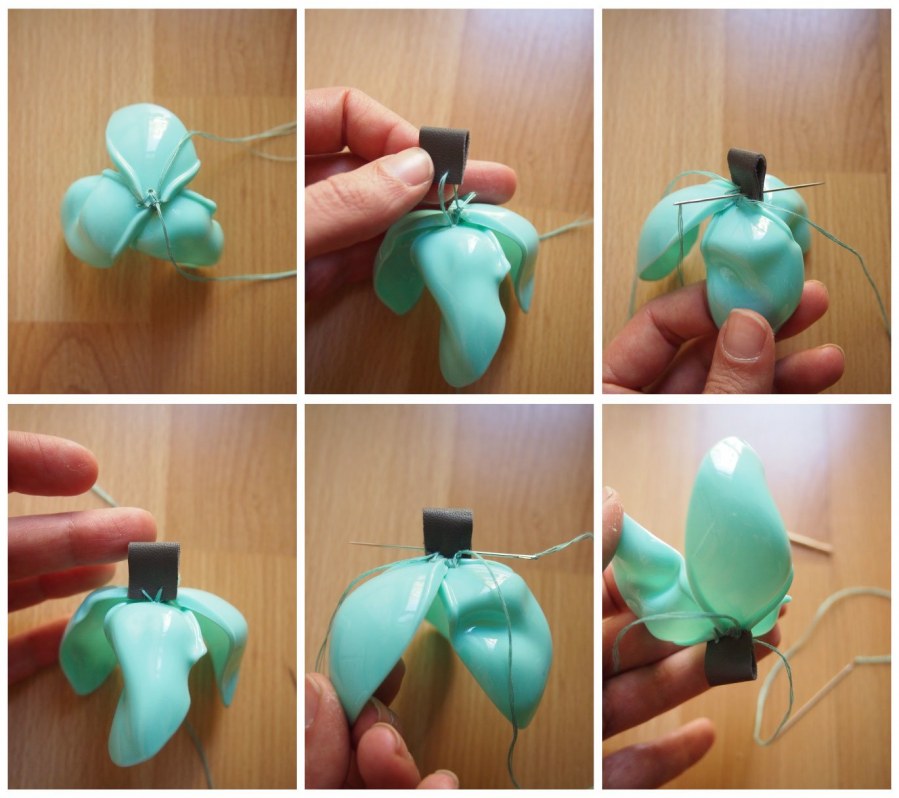
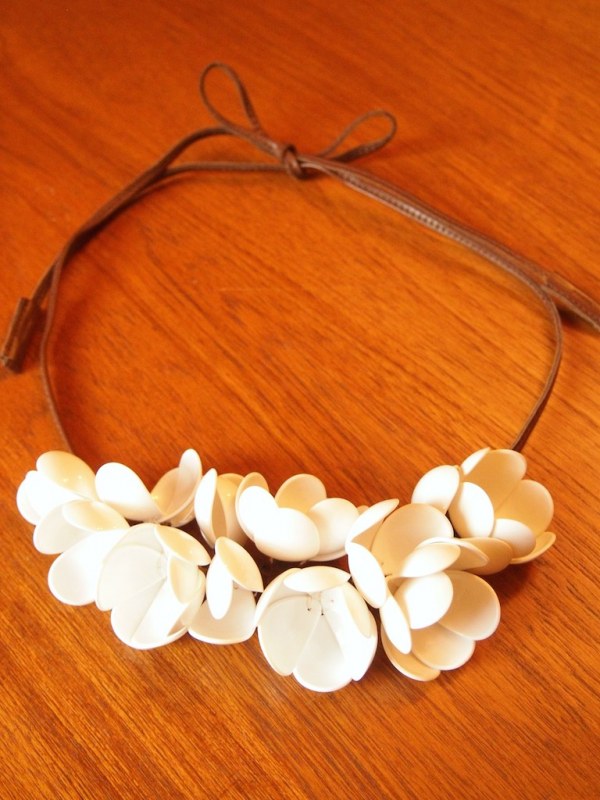
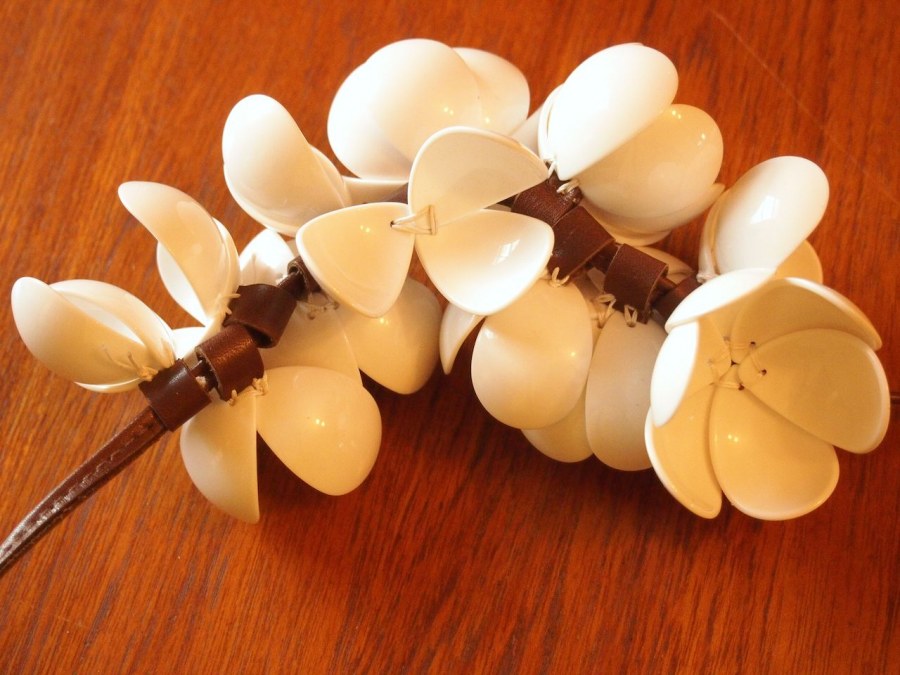
tack stitch the flowers to a small loop of leather trim, following the same stitch lines on the petals. try to keep the stitches as clean as possible (sometimes that's not an option- but it helps to strive for it). add a dot of glue to the top corners of each loop to encase the thread. let dry and trim thread.
for the cord, simply cut each end at an angle. use the nail polish to paint the cut edges and let dry completely before you string the flowers.
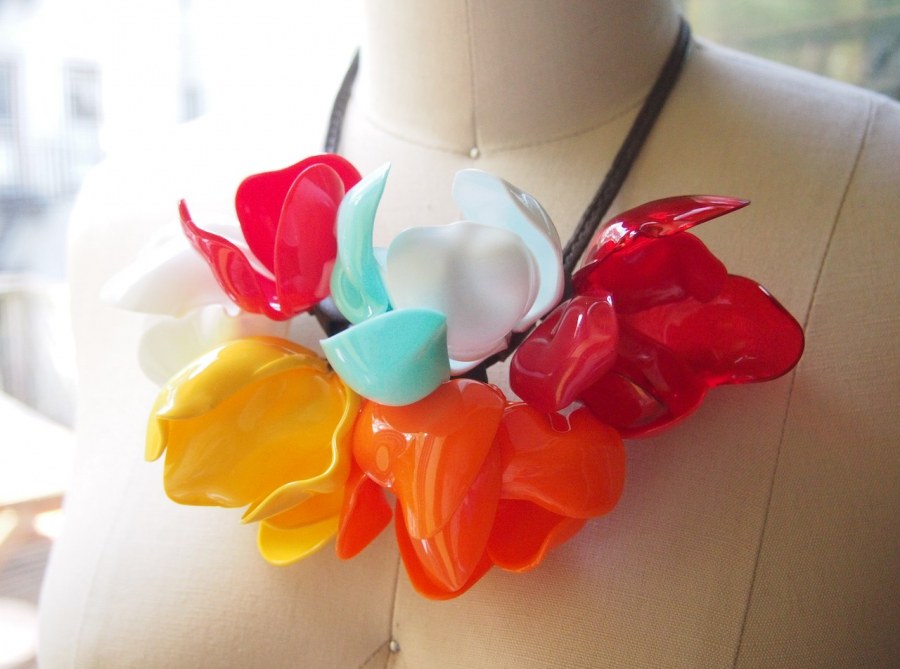
well, it's pretty big. bigger than the original, which means that it needed less flowers. the final has 4 big flowers and 3 little ones. i still prefer a single color of flowers, so i'll be melting the remaining spoons and rotating the assortment.
UPDATE: for another version of the flower necklace (superior in construction, in my opinion), click here
