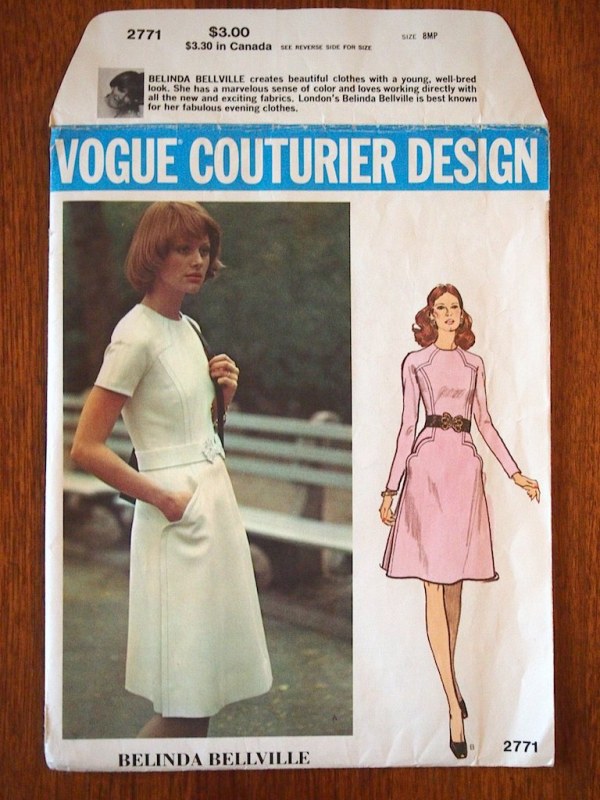
vogue couturier 2771 muslin: phase 2
August 30 2013, 5:07 pm
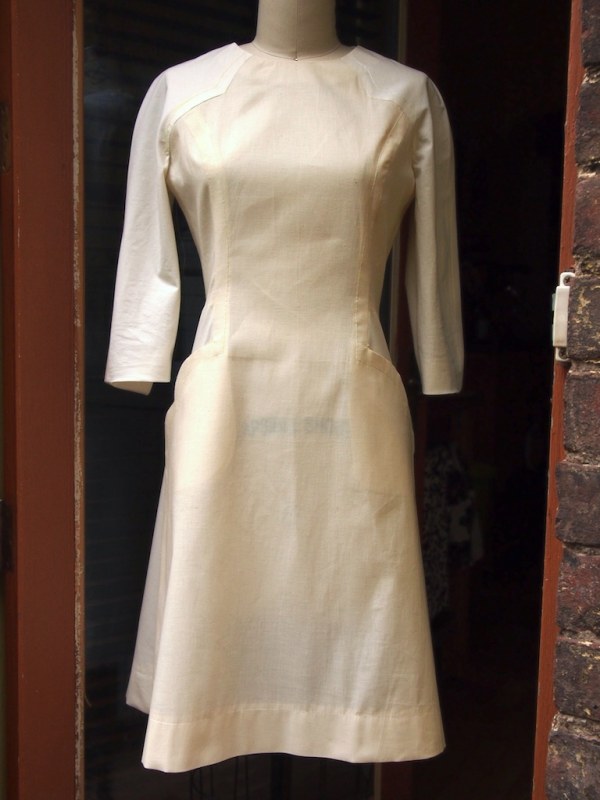
miracles can happen.
after the last installment in this saga, it really seemed like there was no possible way to finish this muslin. but like all good cliff hangers, the pieces eventually fell into place and all was right with the world. well, almost.
attaching the sleeves:

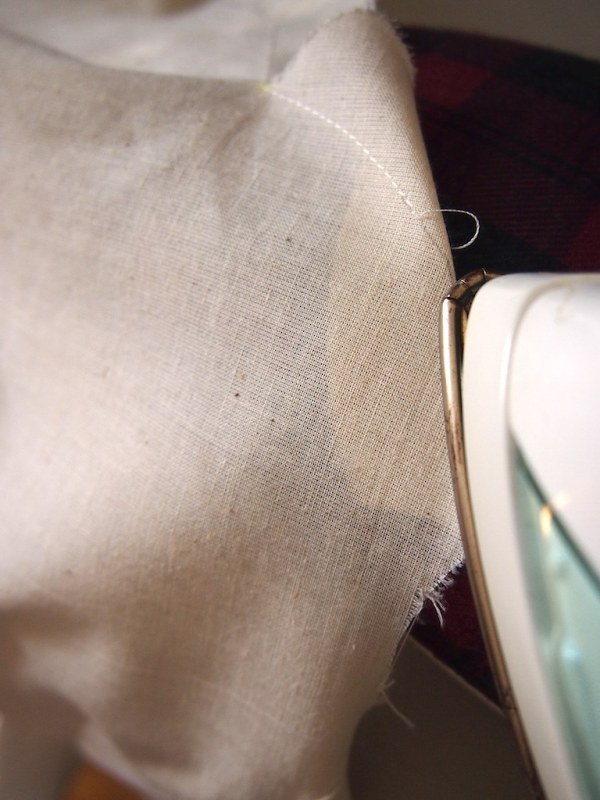
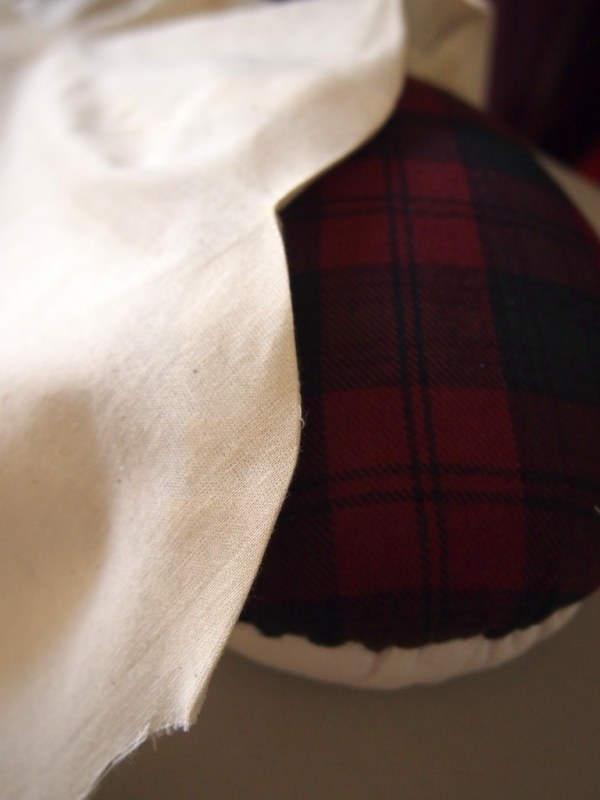

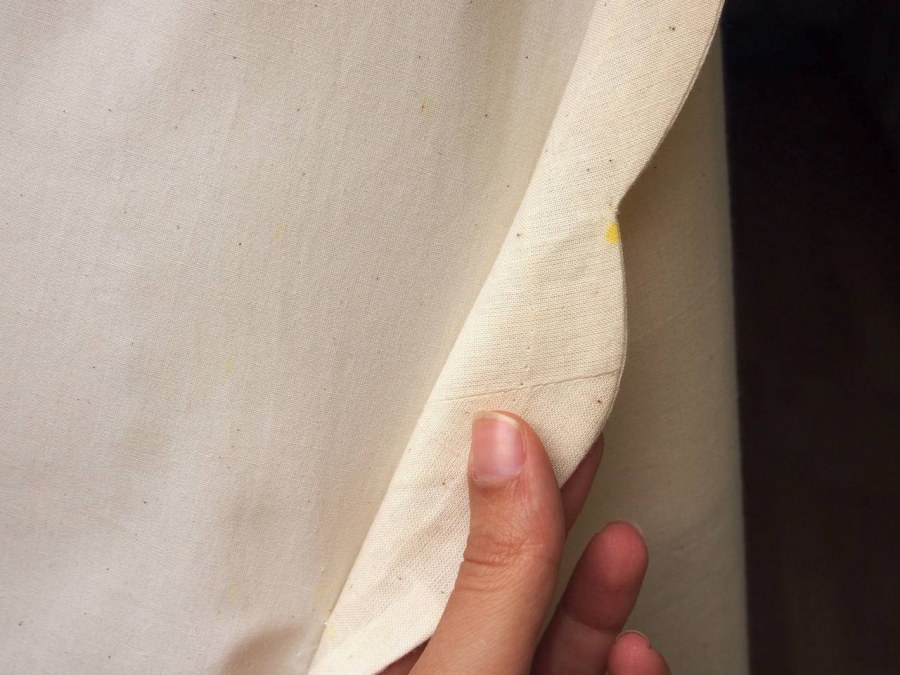
- mark the seam allowance on front and back body curves (use an invisible ink pen on real fabric). press along the curve of the stitch line. it's not necessary to to press the entire seam allowance- just along the stitch line.
- mark the seam allowance on front and back sleeve (no need to press).

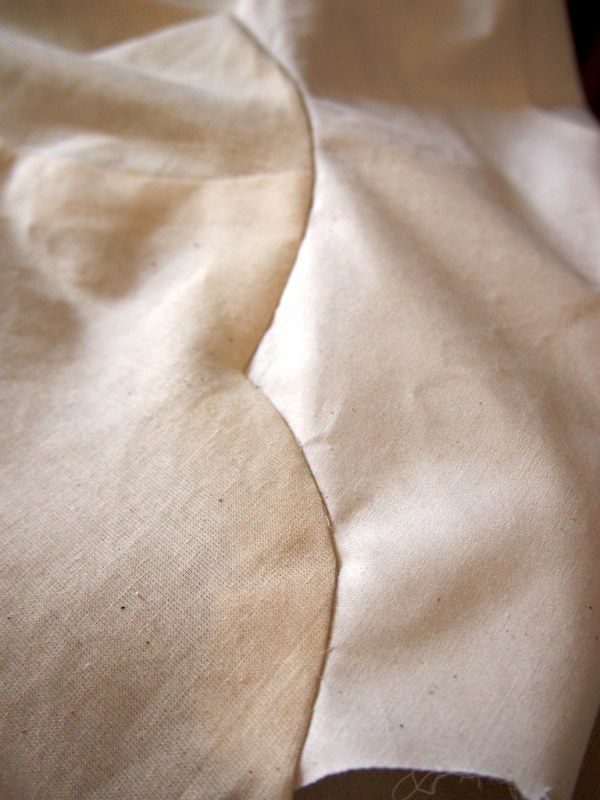
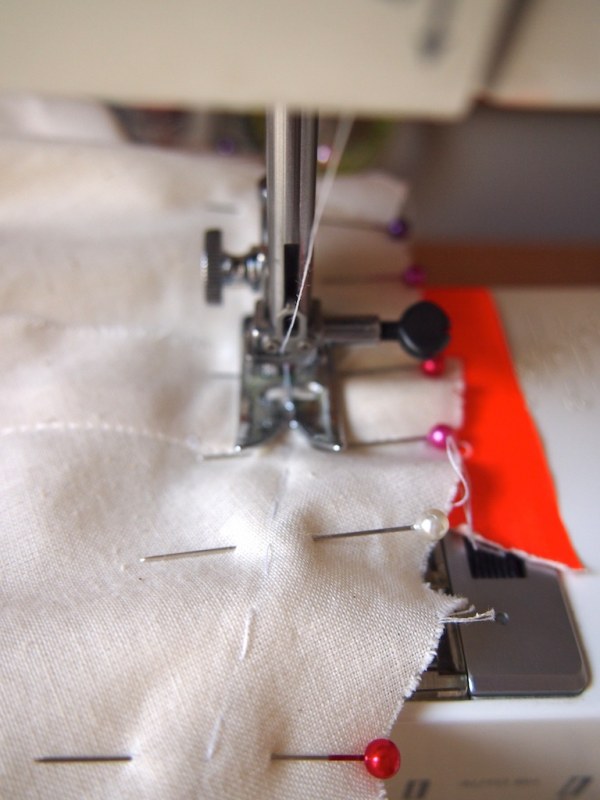

- pin the body front and back to the sleeve, lining up the curves. the body pieces should lay on top of the sleeve. hand baste the body to the sleeve, keeping the basting stitches about the same length as a machine basting stitch.
- turn the garment inside out, and machine stitch along the basting line. at the armpit, stitch a reinforcement row above the seam line. trim the seam allowances according to the instructions, and press towards the sleeve.
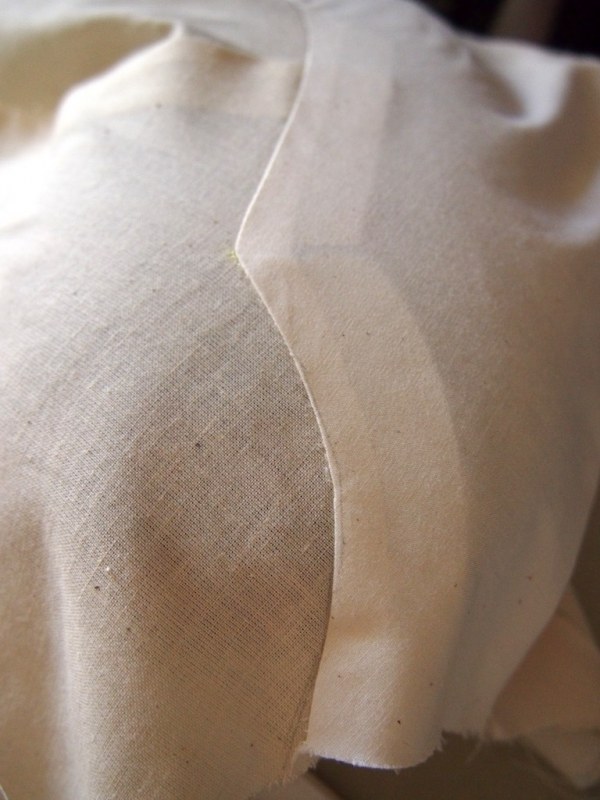
and it worked! this was a major breakthrough. all that was left was the neckline, and it was easy enough to finish. it's the end of the line! or it is?
alterations:
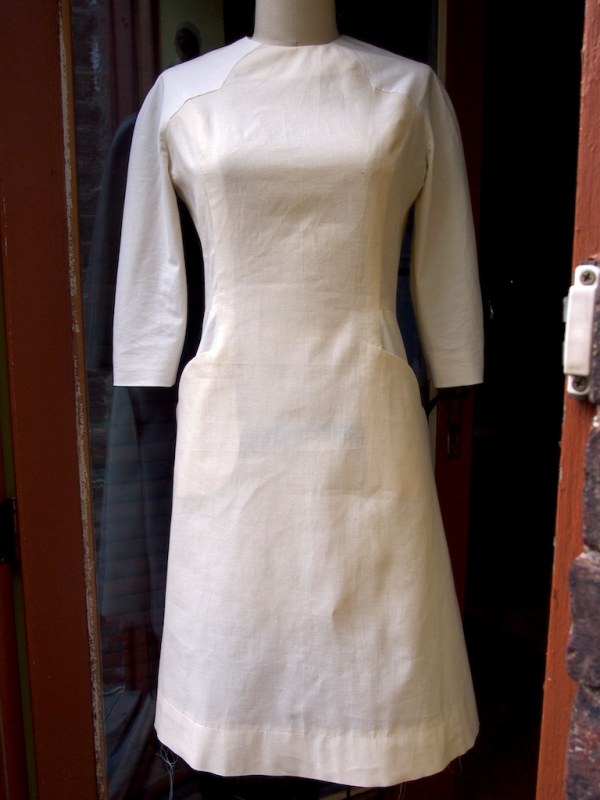
once a muslin is completed, the sucker has to be fit. sometimes it fits perfectly, right off the bat. that wasn't the case with this one. it needed some tweaks.
neckline:
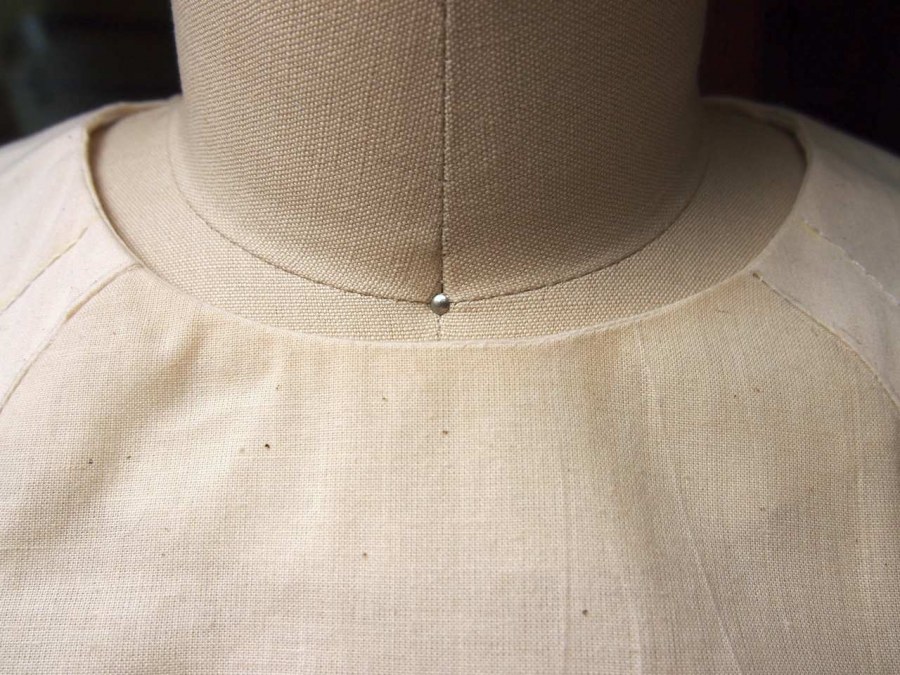
- original neckline was very tight. it had to be opened up 5/8" all the way around.
shoulder seam:

- distance across the shoulders was also tight. this is the exact opposite of almost all garments i've ever made- once again, highlighting the importance of a trial run. shoulder seams at the peak of their curves were let out 1/4", tapering to the seam allowance at the neck and the cuff.
waist seam:
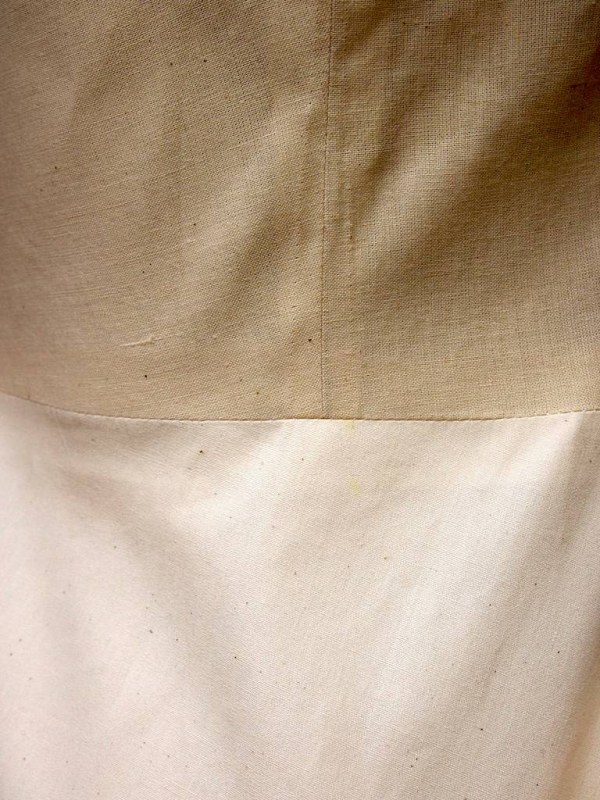
- as noted in the previous post, this seam was super snug. even when let out 1/4" at the lower side seam, it was still snug. for real fabric, cut front and back side panels with 1/2" extra at the waist seam. because the skirt was big at this seam to begin with, it shouldn't need any alteration.
top stitching:
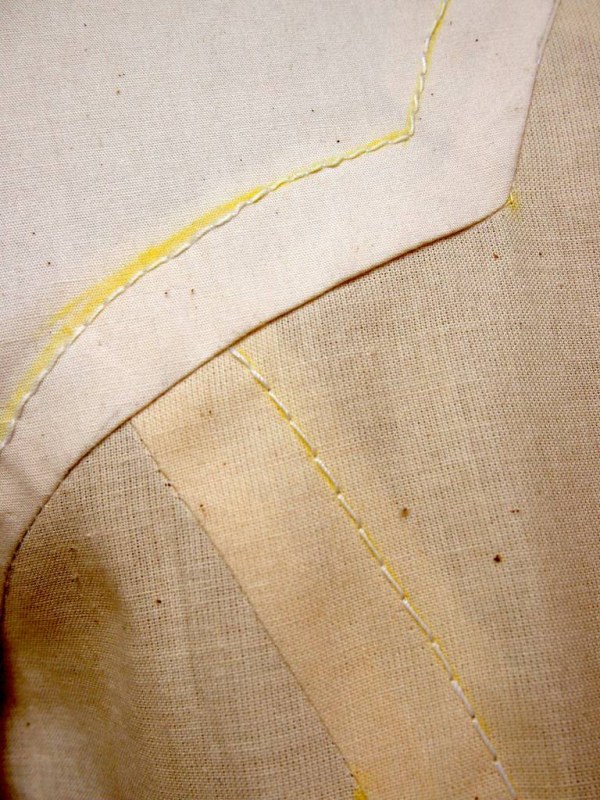
- machine topstitching was very hard to control. the thread is heavy weight, and my machine is not fabulous. tension and stitch length were inconsistent and it was difficult to keep the seam allowances flat around the curves. doing it by hand proved a better method. keeping the stitch length slightly longer than a machine basting stitch, produced a nice effect.
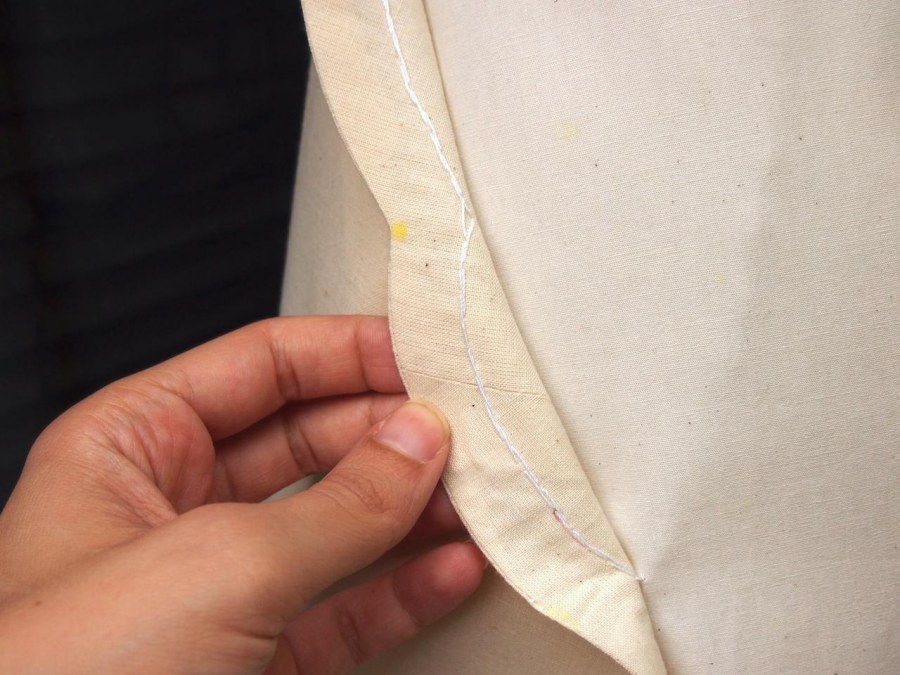
- the pockets and lower skirt pleat also have topstitching. on the first side, it went through all the layers, so the back side was visible. hard to tell if this would ever really be visible when worn. it does hold together all the layers very flat.
- on the second side, i hid the back of the stitching between the layers. this looks much better on the outside, but it doesn't hold the layers together. still need a compromise for this.
and the time has come. the real fabric is purchased and ready. am i?!? we shall see...
